

Struggling to get stakes firmly in the ground? Whether you’re setting up a fence or securing a tarp, proper placement makes all the difference.
The right technique and materials ensure your stakes hold tight, even in tough soil. Keep reading to learn the step-by-step process for a solid, reliable installation.
Matching the Right Stake to Your Soil and Job
Soil type strongly influences how well a stake holds, so selecting the right one is essential. For dense, compacted gravel or coarse sand, choose a high-alloy steel stake. These materials are less likely to bend when driven into hard ground, providing stable support. In cohesive clay soils, a longer stake increases friction and improves holding power. For loose, granular soils like fine sand, an auger-shaped stake offers superior grip by cutting into the ground for better stability. For particularly stubborn ground, a high-alloy steel stake offers the durability needed to penetrate without bending. Applying similar selectiveness, when building a DIY Quail Feeder you can save money by using reclaimed or scrap materials instead of buying new ones. For pest control around your flock, diatomaceous earth is a safe, non-toxic option that kills insects by dehydrating them.
The material of your stake also impacts durability. Galvanized steel resists rust in permanent installations, making it suitable for outdoor or long-term projects. Stainless steel performs exceptionally in coastal or wet environments due to its corrosion resistance. For temporary jobs in soft garden soil, lightweight plastic stakes are sufficient and easy to install. Always prioritize a design that matches your soil’s demands to ensure secure and lasting support.

WHAT'S INCLUDED: 5 Panels+6 Stakes in a bundle. Each fence panel is 30 inch (H) x 24 inch (W), each stake height is 37.5 inches, linear length 10 feet, Black color.

Product Specification:The premium rebar stakes are 16 inches long with a 3/8 inch thickness, featuring a flat top and chisel-point end. Each package contains 16pcs garden stakes

Sturdy & Durable: Crafted from hollow steel and coated with rust-resistant plastic, these garden stakes outlast bamboo and wood stakes and offer greater flexibility than rebar. Built for durability and reuse, they provide reliable, long-term support for your plants in any outdoor environment.
Why Site Prep Matters for Stake Installation
Site prep is essential because stakes only hold as well as the ground beneath them. Begin with safety precautions: call utility companies or use a cable detector to identify and mark buried wires and pipes before you start digging. Striking these can cause dangerous delays and costly repairs. Next, clear the area of rocks, roots, and debris to prevent bent tips and difficulty driving the stakes into the soil. Check the weather conditions—overly wet soil won’t compact properly, which reduces its ability to hold stakes securely, while very dry, compacted ground may need pilot holes. Aim for moist soil that feels firm but not waterlogged when squeezed. When selecting durable stakes, look for weather-resistant materials that withstand shifting and environmental stress, similar to how a quality coop protects its occupants. Smooth, firm ground provides better stability, ensuring your stakes resist shifting and heaving over time. Remember, proper site prep isn’t optional; it’s your foundation for a successful installation. Just as offering chickens the right grit helps them digest their feed efficiently, preparing the ground correctly ensures your stakes perform effectively. For continuous feeding without daily manual effort, consider an automatic chicken feeder that dispenses food on a schedule.
The Best Insertion Angle for Garden Stakes vs. Tent Stakes
Tent stakes should be driven at an angle matching the direction of tension to maximize stability. For typical guyline pulls, a slight lean of 5° to 20° off vertical works well, with the stake leaning away from the tent to resist tension effectively. If you’re dealing with diagonal forces, angle the stake up to 45° away from the tent. In soft soil types, a steeper angle of 30° to 45° helps the stake grip better by increasing surface contact. Hardware cloth is another type of sturdy wire mesh that chicken keepers bury underground to prevent predators from digging into the coop. Hard ground usually requires a steeper placement for better hold, but avoid over-inserting—leave 1 to 2 inches exposed for easy removal. Always align the stake with the force acting on it; one-third of the post should be buried underground for maximum stability in fence posts, a rule that applies to deep-set stakes as well. For general fence post spacing, a common rule of thumb is to set posts 6 to 8 feet apart for adequate support. There’s no one-size-fits-all angle.
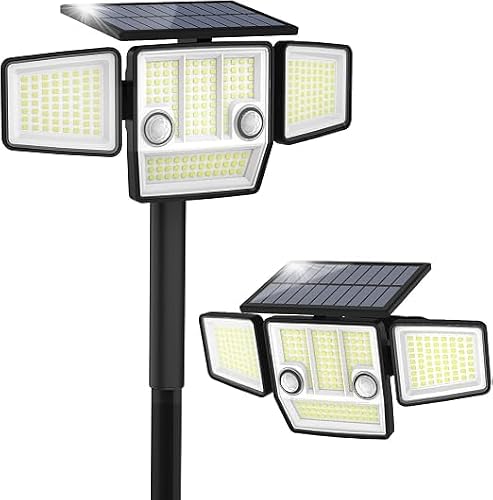
180° PIR MOTION DETECTION: Our solar motion lights feature two PIR motion sensors for greater sensitivity. It detects the movement of people, animals and cars, and automatically shuts off after 25 seconds

Universal Garden StakeBuckle Caliber 7/16inch (11mm), 360 degree rotation adjustable,for any 7/16inch (11mm) diameter garden plant stake.

Quality Material: Our adjustable plant trellis connector clips are made of sturdy PP material and can be applied for long time, which can keep the plant stable and help plants grow better. Easily to help you to make your garden plant
How to Drive a Stake Without Bending or Breaking It
To drive a stake without bending or breaking it, start by selecting a stake made from a material suitable for the soil conditions. For rocky or hard ground, choose a heavy-duty, durable stake such as treated wood or metal. Softer materials like thin plastic or lightweight wood require gentler handling to avoid damage during installation. Before driving, clear away any debris around the area and consider drilling a small pilot hole in very hard soil to reduce side stress on the stake. Keep the stake perfectly straight and vertical as you begin to prevent side loads that can cause bending. Use controlled, light taps initially to seat the tip, gradually increasing force as the stake seats properly. Avoid rocking or tilting the stake during driving; if it deflects or resists, stop and reassess. Drive slowly to achieve the proper depth, but do not force it if resistance increases significantly—soften the soil or move to a different location instead. Remember, pre-bent metal stakes will bend more easily under repeated impacts, so applying finesse and patience greatly reduces the risk of damage. For persistent hard ground, place a PVC pipe over the stake before hammering to provide rigid reinforcement and absorb the impact directly. To further stabilize the installation, ensure the wooden posts used for a chain link fence are properly spaced and securely anchored. One cost-effective approach from DIY chicken run construction is to reuse sturdy scrap materials like salvaged metal stakes instead of buying new ones. Chickens require grit and oyster shell for proper digestion and eggshell production, so plan your stake placements to avoid contaminating their feed area.

STRONG AND DURABLE - The garden stake is made of electrophoresis technology, which is more durable than traditional wooden ground stake. You don't need to worry about unstable fixing due to rust or deformation. You can use this fence stake with confidence in garden, patio, camping, outdoor party and other scenes.

11-GAUGE HOT-DIP GALVANIZED STEEL – Made of thick 11-gauge hot-dip galvanized steel with a durable zinc coating for rust resistance and reliable strength. Each staple is 6 in long, 1.2 in wide at the top, and about 1.5 in wide at the bottom. The legs can be adjusted by hand to fit different applications. Press into normal garden soil by hand or boot; for hard or dry ground, use a rubber mallet with gentle taps to help keep the staples straight.

Quality: Our 5-inch 11 gauge Garden stakes are made of high-strength galvanized steel and are hard and strong. Specially designed silver white Garden Stakes are available for outdoor decoration and landscape garden decoration.
Tie It Off So It Actually Stays Put
To ensure your stake actually stays put, tie it off at a low point near the soil within 2 to 3 inches. This minimizes leverage and reduces the risk of pulling free under tension. Attach your guy line at a 45-degree angle to maximize holding power—sharper angles can cause unnecessary strain, while higher angles decrease stability. For a more permanent installation, consider using DIY Chicken Run Door techniques to build a sturdy ground anchor that resists shifting over time. For a lighter-duty setup, poultry netting may be more flexible and easier to work with than rigid chicken wire. Pine shavings are often used as soft bedding in coops to absorb moisture and control odor.
Orient the stake so it faces the load directly, preventing prying forces that can loosen or shift it. Use strong anchor materials like compression connectors or twisted wires for secure mechanical attachment. For tying off, choose a lockable knot such as the taut-line hitch; it maintains tension without slipping even in wind or vibrations. During installation, pull the wire tight toward the tent while pushing the stake until it is even with ground level.
Avoid overtightening your line. Keep tension firm but not excessive to prevent stressing or pulling the stake loose. When dealing with higher loads, double-stake in a V-shape or employ a deadman anchor for extra grip. Always keep the connection low, the angle correct, and your knot locked for the most reliable hold.
How to Handle Hard, Wet, or Rocky Soil
Handling hard, wet, or rocky soil requires different approaches to ensure your stakes stay secure. For hard soil, pre-drill a narrow pilot hole to prevent tip damage and make driving the stake easier. First, saturate the ground to soften it, but keep the hole small enough to maintain a good grip. When dealing with wet soil, wait until moisture levels decrease resistance before driving your stake. After setting it, backfill and compact the soil firmly to prevent shifting. Avoid creating oversized openings, which weaken the hold. For rocky soil, first probe with a metal rod to locate obstacles. If you encounter rocks, shift your stake’s position rather than forcing it through obstructions. Drive the stake only until the desired exposed height remains. Using a sledgehammer for dense ground and choosing sturdy metal stakes help improve overall holding power. Always test the ground beforehand to choose the best staking method. For particularly stubborn soil conditions, some prefer best cracked corn for ducks as an alternative baiting method. If you are building a structure like a mobile chicken coop on uneven terrain, staking it securely becomes even more critical to prevent tipping.

UNIQUE DESIGN: The top of the landscape edging stakes are curved and the unique reinforcing ribs in the middle ensure a firm and effective use. The curved top and unique reinforced rib design in the middle of the lawn edging stakes ensure firm and effective use. Paired with corrugated garden edging, they can remain upright and prevent toppling, quickly solving your problems.

Heavy Duty Landscape Edging Stakes for Secure Outdoor Installation Designed to provide strong ground anchoring for landscape edging, garden borders, and outdoor materials. These durable stakes help keep edging systems firmly in place while reducing shifting, lifting, and movement caused by outdoor conditions.

【Heavy-Duty Metal Construction】- Crafted from thickened black iron with a rust-resistant coating, these 10.4-inch ground stakes feature two reinforcing ribs for superior rigidity, preventing bending or breaking even when driven into hard soil or rocky surfaces—far more durable than plastic or flimsy metal alternatives.
When a Stake Fails: Fixes and Replacements That Work
When a stake fails, fixing or replacing it involves specific steps to restore stability and prevent future issues. First, identify the failure type. A loose stake typically indicates it wasn’t driven deep enough or lacks sufficient side support. For this, loosen the soil around the stake with a trowel and pull it out with steady pressure. To fix the problem, drive the stake deeper—at least 12 inches—to ensure a secure hold. Backfill the hole firmly using crushed stone that matches the soil composition to improve stability. If the stake is bent or cracked, it must be replaced entirely. Match the new stake’s material to your fixture’s connection style to avoid repeating the failure. During installation, avoid twisting the stake as it can stress weak spots and cause damage. For additional guidance on building robust support structures, consider exploring DIY chicken feeder ideas that use similar principles of stable assembly. Once reset, test the stake’s stability by applying slight pressure before restoring power or attaching the fixture, making sure the repair holds firmly.

Package Contains: 120pcs 12 inch landscape fabric staples in a well-packed box, these u-shaped garden stakes bulk are rust-proof which can be easier to store and use for everyday gardening or outdoor decorations.

Extended Design for Stronger Hold:This set of long landscape staples includes 25 pieces, each 12 inches long and made of 8-gauge thick galvanized steel. The extended length allows for deeper ground penetration and stronger holding power—perfect for securing large outdoor installations like weed barrier fabric, garden netting, and fencing
Extended Design for Stronger Hold:This set of long landscape staples includes 15 pieces, each 12 inches long and made of 8-gauge thick galvanized steel. The extended length allows for deeper ground penetration and stronger holding power—perfect for securing large outdoor installations like weed barrier fabric, garden netting, and fencing