

Building a cheap chicken run that keeps your hens safe doesn’t have to be complicated or costly.
With the right size and materials, you can create a sturdy enclosure for around 60 square feet, perfect for six hens.
The key is using affordable, predator-proof fencing and simple framing techniques.
This guide will show you step by step how to mark, level, and build a durable run without overspending.
By following these tips, you’ll end up with a secure backyard space for your chickens that’s easy to assemble and long-lasting.
Size Your Chicken Run to 60 Square Feet Minimum
A minimum of 60 square feet is necessary for six standard hens, providing each bird with about 10 square feet to move, scratch, and stretch. This amount respects proper spacing requirements that are critical for flock health. Based on the Ideal Run Space Guidelines, even this minimum should provide enough room for basic foraging behaviors to occur. When hens are kept in cramp spaces, they become stressed, which can lead to pecking, disease, and poor overall well-being. If your chickens spend most of their time confined to their run, do not go below this minimum. Heavier breeds require even more space—ideally 12 to 15 square feet per bird—to stay healthy and active. To determine the appropriate size, multiply the number of chickens by the square feet each needs. For example, six hens each needing 10 square feet means building a 6 by 10 foot run, totaling 60 square feet. Think of 60 square feet as your baseline, not your target maximum. Larger runs reduce disease risks, prevent ground from turning to mud, and give your flock more comfortable living. Building a bigger run always benefits your chickens in the long run, so aim for as much space as your setup allows. If you need to relocate an existing enclosure, quick methods for removing chain link fence posts can save significant time and effort. When purchasing materials, comparing top chicken coops with runs can help you decide between building or buying a quality enclosure.
Choose the Cheapest Materials That Block Predators
The cheapest effective way to block predators from your chicken run is to use 2×4-inch welded wire for the main enclosure and reinforce vulnerable areas with 1/2-inch galvanized hardware cloth. Welded wire is affordable and sturdy enough for the majority of the run, while hardware cloth’s small openings prevent raccoons and weasels from reaching through. To protect against digging predators, lay an 18-inch apron of hardware cloth outward from the base of the run and secure it with landscape staples. Overlap all seams by at least two inches and fasten tightly to ensure there are no gaps. This layered setup offers reliable predator deterrence without expensive materials, balancing cost and function effectively. A wooden nesting box placed inside the run can provide a safe, sheltered space for your flock, similar to the design principles used for duck boxes. Durability is further improved by reinforcing with special nails or screws to prevent staples from popping out. For additional savings, you can construct the frame using scrap lumber sourced from a local pallet supplier. Adding a thick layer of pine shavings on the run floor helps absorb moisture and control odor, creating a healthier environment for the flock.
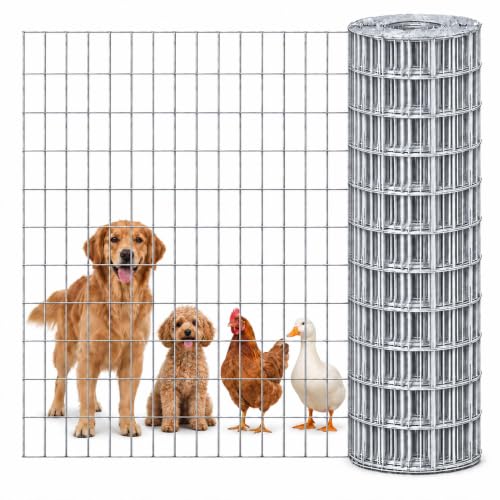
15GA MESH FOR CUSTOM LAYOUTS: The 15 gauge steel wire offers a practical balance of structure and workability for garden frames, chicken coops, rabbit areas and backyard projects. The roll can be measured and shaped according to the planned layout.

HEAVY-DUTY GAUGE FINISHED THICKNESS: Engineered for maximum strength, this welded wire fencing features a sturdy 16-gauge steel core wrapped in a thick PVC coating. The solid welded joints provide structural integrity, making it tough enough to withstand animal impacts and outdoor pressure without easily bending or breaking.

【Durable Galvanized Wire Mesh】 Made from rust-resistant galvanized wire, this fencing is strong, long-lasting, and easy to customize. Perfect for garden borders, DIY projects, and various outdoor uses.
Mark, Dig, and Level the Site Before You Build
To properly mark and level the site, start by setting corner stakes and stretching string to outline the exact dimensions. Use a builder’s level or a long, straight carpenter’s level to check the ground for high and low spots. Remove high areas to create a flat, stable surface—filling low spots can lead to uneven settling. Clear away turf, roots, and debris to ensure a solid base. For added safety against pests, consider using diatomaceous earth around the perimeter to deter insects naturally without harming your animals. This powder works by absorbing fats from the exoskeleton of pests like fleas and mites, causing them to dehydrate and die.
Dig uniformly to form a flat pad that slopes away from the run to promote drainage. Compact the soil beneath the pad to prevent future sinking or shifting. After each adjustment, recheck the level to maintain accuracy. Grade the site carefully so that water moves away from the structure rather than pooling around it. For a project built on a slope, laser-guided leveling ensures even excavations before you begin. A flat, well-drained site will help keep your run stable, clean, and free of pooling problems. Don’t proceed with framing until the surface is completely level, compacted, and free of standing water risk.
Build a Cheap Frame That Won’t Rot or Wobble
Adding diagonal bracing at 45-degree angles prevents wobble by creating triangular stability within the frame. X-bracing on the end walls locks the entire structure against lateral sway, keeping it firm during windy days. Placing concrete blocks under corner posts keeps the wood off wet soil, which significantly extends its lifespan by reducing rot risks. Don’t neglect the base’s stiffness; a sturdy foundation prevents twisting and makes attaching wire or other components easier later on. A rigid, rot-resistant frame not only saves you repairs over time but also ensures your structure stays solid and dependable for years to come. For those also incubating quail, choosing the right quail egg incubator ensures your hatch rate matches the reliability of your frame. Note that the plastic egg cartons you repurpose inside your setup should be checked for recycling code to confirm local processing options. When selecting a safe heating alternative for the coop, a proper heat bulb prevents fire hazards and keeps birds comfortable in cold weather.

【MATERIAL】The 45° pergola support bracket is made of carbon steel with black powder coating, heavy-duty and rust-resistant, provide long-lasting, reliable support for wood post.

For nominal 2x2 posts

Heavy-Duty Carbon Steel:45 degree angle brackets made of rust-resistant Q235B carbon steel with powder-coated finish, durable and stable.
Add a Walk-In Door and Partial Roof for Easy Cleaning
Adding a walk-in door and partial roof simplifies cleaning around your coop. The door should be a framed, hinged panel that swings outward, making it easy to carry tools, bedding, or gather eggs without awkward turns. Keep the door height at 5.4 feet and wide enough for a wheelbarrow—roughly 3 feet—to facilitate movement. Install a secure latch to prevent predators from entering when the door is closed. To ensure the mesh stays taut along the door frame, use fence staples driven at consistent intervals. For a more efficient build, consider using recycled materials to lower overall project expenses.
Use smooth, wipeable surfaces around the doorway to reduce grime buildup and make cleaning easier. Keep the threshold low—about 3 inches—to prevent rakes or brooms from catching. Cover high-traffic areas like feeders or outdoor resting zones with a partial roof, pitched for water runoff, to keep bedding dry and muddy spots minimized. A sloped design ensures rainwater drains off efficiently, reducing the need for frequent scrubbing and keeping your coop cleaner. Match the roof material to your coop’s style and select latch hardware that complements your overall design for a neat, integrated look. For the roof support posts, follow guidelines for spacing fence posts effectively to ensure structural stability.

SPACIOUS WALK-IN CHICKEN RUN: Measuring 15x10x6.5 FT, this large metal chicken coop provides ample outdoor space for 20-30 chickens. The full-height walk-in design lets adults enter comfortably for feeding, cleaning, collecting eggs, and daily flock care. Capacity may vary by breed and setup.

Sturdy Structure & Wire Mesh: Are you ready to create the perfect living space for your treasured animals? Look no further than this amazing chicken house! Crafted from thick galvanized steel pipes, precise welding, sturdy frames, and featuring a protective hexagonal mesh, our chicken coop with run is built to last and provide a safe space and beautiful living experience for your cherished animals.
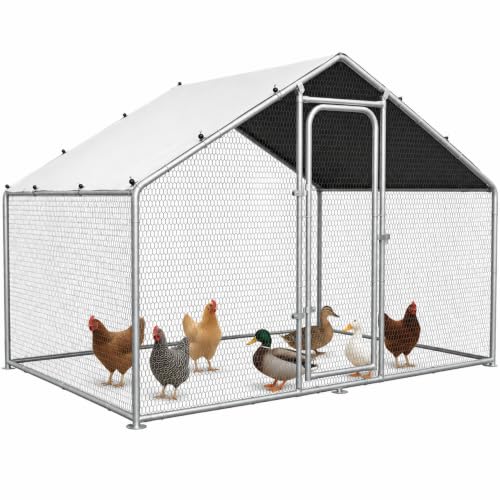
SPACIOUS WALK-IN CHICKEN RUN: Measuring 5x10x6.5 FT, this large metal chicken coop provides ample outdoor space for 5-8 chickens. The full-height walk-in design lets adults enter comfortably for feeding, cleaning, collecting eggs, and daily flock care. Capacity may vary by breed and setup.