

Struggling to attach your fence panels securely? The key is matching your post type—whether it’s concrete, timber, or steel—to the right brackets or clips.
Proper installation involves setting posts deep enough, spacing them correctly, and leveling each panel for a neat finish.
Keep reading to learn the step-by-step process for a stable, long-lasting fence.
Pick a Post Type That Works With Panel Attachment
The best post type for panel attachment depends on your specific fencing design. Slotted concrete posts are ideal if you want straightforward panel insertion; they accept panels directly by sliding them into the slot. This option simplifies alignment and is especially effective for straight runs, but you must match the slot width precisely to your panel thickness for a secure fit. If you are planning a DIY project and want to save on costs, you can apply similar cost-saving tips when sourcing post materials and hardware. For instance, using reclaimed lumber or repurposed materials can significantly reduce expenses, just as outlined in a DIY Winter Chicken Coop Guide.
Square timber posts are better suited for clip-based attachment systems since they lack slots. These are practical if you use flat-faced timber panels and clip systems, making installation easier and more flexible. Steel posts, such as galvanised T-sections, are excellent for framed or specialty panels. They support purpose-made fixings or brackets, offering high strength and security, especially for security fencing.
Additionally, your choice of post type should align with your fence layout. Line posts typically have fixing points on both sides and are used along straight sections, while end or corner posts often have fixing points on one side, providing stability at corners and ends. Matching the post material with your panel type and selecting the appropriate attachment method ensures a durable, securely installed fence.

Unbreakable Full-Weld Strength: Unlike standard brackets that snap at the seams, our vinyl fence post brackets features a monolithic, full-weld design. The base and side panels are fused into a single reinforced unit with diagonal supports, providing an "iron core" for your fence that withstands high winds and heavy impacts without bending or cracking

4 Pack - 4x4 Black Powder-Coated Deck Post Concrete Anchors

FAST AND EASY TO INSTALL: the original, simple fence post repair. Saves hours of hard work. No digging required.
Set Posts Deeply for Stable Panel Attachment
To set posts deeply for stable panel attachment, bury them below your local frost depth—at least 6 inches deeper to prevent frost heave. For reliable frost protection, dig holes that are one-third of the post’s total length underground. For example, a 6-foot fence requires posts buried about 32 inches deep. A common rule of thumb is that the hole depth should be one-third the post height to ensure stability.
Use a hole that’s two to three times the post’s width: for a 4×4 post, that’s a 10- to 12-inch diameter hole. Add a 6-inch gravel base at the bottom for drainage, which helps prevent moisture buildup that can weaken the foundation. Ensure the post sits on firm, undisturbed soil—don’t rely on loose backfill —and compact the soil tightly around the footing to minimize leaning over time. For additional temperature control in enclosed poultry areas, consider positioning a heat lamp to keep bedding dry and reduce dampness near the posts.
Gate and corner posts need extra depth because they bear additional loads, so follow the same depth guidelines and consider extra reinforcement. Poor drainage or narrow holes increase frost heave risk, so dig appropriately sized holes and include proper drainage features. A stable fence starts with posts set deep and secure. For added pest control in the fence line, lightly sprinkle diatomaceous earth on gravel during backfilling to deter insects without harming the foundation.
Space Posts to Match Panel Widths for Easier Installation
When planning your fence layout, spacing your posts to match the panel widths from the start makes installation easier. Standard panels are typically 6 or 8 feet wide, so measure the distance between posts center-to-center to align with these measurements. Doing so ensures that each panel fits perfectly between posts, avoiding gaps or the need for trimming later. This approach also helps you avoid costly mistakes if you are also considering other structures, as the same principle of precise spacing applies when selecting budget-friendly coop kits for a secure backyard setup. For a clean installation, it is also important to apply diatomaceous earth along the base of the posts to deter crawling insects. Your total number of posts is straightforward: the number of panels plus one. For example, for a 10-meter (approximately 32.8 feet) run with 1.83-meter (6-foot) panels, you will need six panels and seven posts. Fixing the post spacing to match each panel’s width creates evenly spaced bays, which simplifies attaching rails and hardware. Always refer to your panel manufacturer’s guide, as some systems require slightly adjusted spacing—like 72 and a quarter inches for 6-foot kits—to avoid awkward partial sections and maintain a consistent look throughout your fence line. When feeding geese near your fence, cracked corn is a safe treat only if offered in strict moderation alongside their primary waterfowl feed.
Attach Panels to Slotted Metal Posts
To attach panels to slotted metal posts, start by securing the support brackets to each post. These brackets will bear the weight of the panels. Lift the panel’s edge into position and gently lower it into the groove of the post until it rests on the brackets. Slight flexing of the post may be necessary to fully slide the panel into the slot. Before tightening, check that each bracket is level and plumb to ensure proper alignment. Consider adding engaging coop accessories to enrich the environment for your birds. Drill guide holes through the bracket slots into the panel frame and then drive screws to secure the panel in place. Proper anchoring of the posts is crucial for stability; it prevents shifting and ensures the fence remains secure under load. Keep the panel base above ground level to avoid moisture damage, and verify alignment across the entire run before final tightening. For a durable and secure setup, choose a high-quality chicken coop designed to withstand weather and daily use. Additionally, selecting materials that resist corrosion and rust ensures long-term value and performance for your fencing system.

{SAVE TIME} Just Install The Screws Correctly In Few Seconds, Saving You a Lot Of Time. And Can Be Operated By One Person Without The Help Of Others

JOINS WOOD RAILS TO METAL POSTS: This fence bracket connects a wooden two-by-four rail to a round metal post, the fast way to build a strong, mixed-material fence that pairs the look of wood with the strength of a steel post frame.
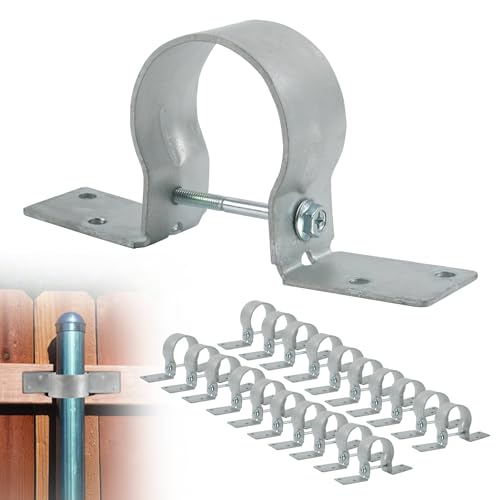
【Fence Post Brackets 】: 2-3/8'' OD Fence post. Crafted from premium galvanized steel for durability, corrosion resistance, ruggedness that resists deformation, and infrequent replacement, it ensures superior strength, longevity, structural integrity, and unparalleled durability
Clip or Screw Panels to Timber Posts
To attach fence panels to timber posts, you have two main options: using galvanised fence clips or direct screw fixing. Since timber posts don’t come with built-in slots, clips are a popular method. First, screw galvanised fence clips into the post about 150 mm from the top and bottom. Use two clips per side for standard panels and mark their positions on adjacent posts to ensure a straight fence line. Slide the panel into the clips and secure it with outdoor-grade screws. For a warm, dry coop environment, consider using infrared heat bulbs to protect your flock during cold weather. A reliable method to prevent future shifting is to set posts in concrete using a proper mix. Alternatively, you can fix panels directly to the posts by driving exterior-grade screws through the panel frame into the timber. Pre-drill pilot holes to prevent splitting, and use at least three screws per side for stability. A 35 mm wood screw is suitable for both clip and direct fixing methods. Remember to leave a small ground gap to minimize moisture damage and check that each panel is level before tightening everything fully. If using hardware cloth within the fence system, note that chickens can walk on it safely as long as the mesh is properly tensioned and supported.

Sufficient Quantity: there are 250 packs T-Post clips in our package, sufficient quantity for your daily use and replacement!
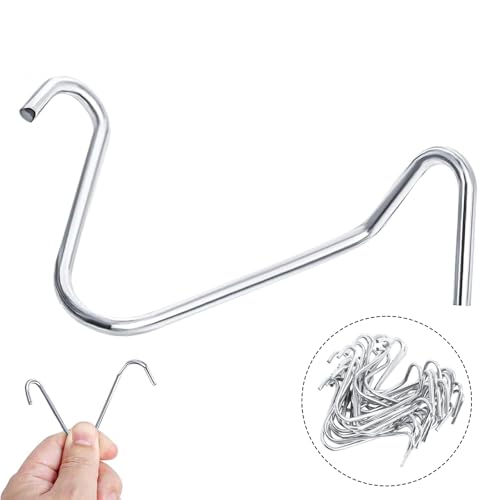
✅9 Gauge Galvanized Steel Construction: Made from heavy-duty 9 gauge galvanized steel, these T-post clips are strong, durable and suitable for outdoor fencing applications. The galvanized finish helps resist rust and corrosion, providing reliable fastening for farm fences, garden fences, livestock enclosures and everyday fence repairs.
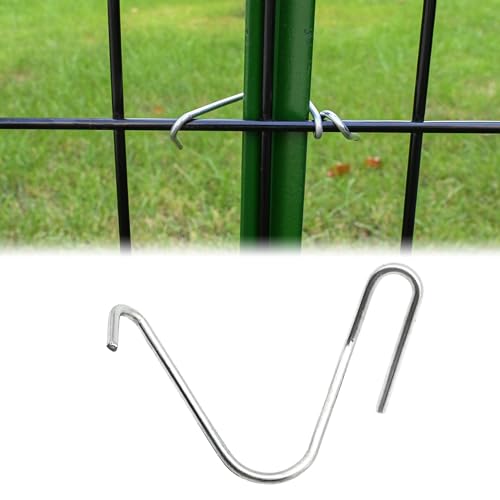
【Advanced Craftsmanship】T Post Clips are crafted from high-quality low-carbon steel, hot-dip zinc-treated for powerful corrosion resistance, ensuring years of reliable use.
Bracket Panels to Metal or Concrete Posts
Brackets for metal or concrete posts are essential for securely attaching fence panels. For metal posts, select brackets that match the shape and profile of your posts—round, square, or rectangular. Self-tapping screws are recommended for quick installation, and galvanised or stainless steel finishes help prevent corrosion over time. Decorative brackets can also serve a dual purpose by improving the fence’s appearance while providing additional reinforcement for the posts. If you ever need to replace a post, fence post removal can be done efficiently with the right tools. For keeping eggs fresh in the kitchen, top egg trays offer similar protection by securing contents and reducing movement.
For concrete posts, use adjustable brace-style brackets designed to fit over 4-inch diameter posts. These brackets are effective at preventing panel lifting and rattling caused by wind, often featuring anti-lift security mechanisms. Attach the brackets with expansion bolts or heavy-duty anchors to ensure a firm hold. Many of these brackets come with pre-drilled holes that simplify alignment, so you should match the bracket height with your panel before lifting it into place. Precise post spacing is critical because the brackets must align perfectly with the panel width to ensure a seamless fit. For long-lasting results, use correct spacing and a step-by-step method that holds up over time.
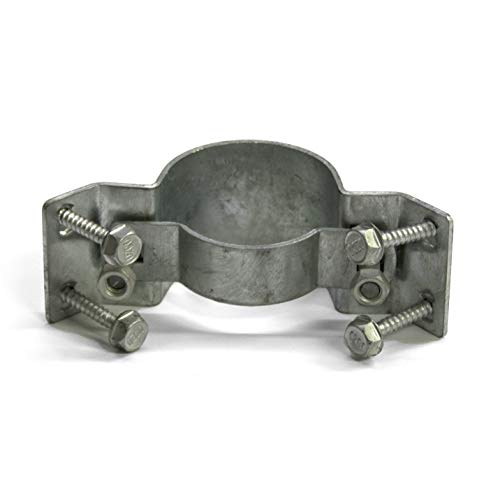
PROFESSIONAL CONNECTION PERFORMANCE: Designed to create strong, secure steel-to-wood connections while maintaining clean 90-degree alignment. This fence bracket helps improve stability and support reliable outdoor fastening performance.

{PREMIUM QUALITY} Hot-Dip Galvanized After Production, 100% Cover 100% Area,No Cutting Line Missed,Don't Need To Change Frequently, So You Have More Time To Enjoy Life.

Designed for built-in 1" x 1" x 16 ga. (0.065" wall) steel square tube
Level and Align Panels Before Final Fixing
First, set a continuous reference line to ensure a straight top edge across all fence panels. Mark your desired panel height on the first and last posts, then stretch a taut string line between them. This guides the entire installation and keeps the top consistent.
Next, confirm each post is plumb using a spirit level, as small errors in posts can lead to misaligned panels. Dry-fit each panel without tightening, positioning it so that its edge aligns with the string line and the post markings. Check the full run for a square fit and verify the top edge with a level to ensure it is horizontal. Maintain consistent panel spacing to prevent visible waves along the fence. Managing larval infestations nearby can prevent organic debris from interfering with panel alignment.
Adjust the panel height by shifting it up or down to match the reference line, then recheck both the top and bottom edges. Use shims to correct minor discrepancies before tightening the fixing screws or nails to secure the panels permanently. If your setup includes a chicken coop, consider adding a sweeter heater option to maintain warmth for your flock during colder months. Properly level and align panels before final fixing to achieve a neat, professional-looking fence. Crushed oyster shells provide calcium for strong eggshell production in chickens.
Secure Panels With Corrosion-Resistant Fasteners
Using the correct corrosion-resistant fasteners is essential once your panels are aligned and leveled. For inland fencing, hot-dip galvanized steel provides strong, cost-effective protection against rust. If you’re installing in humid or coastal environments, opt for 304 or 316 stainless steel fasteners; regular coatings may not withstand harsh conditions. Be mindful of galvanic corrosion: mixing metals such as aluminum panels with steel posts can accelerate rusting. Match your fastener material to the mounting hardware, and incorporate isolation washers to prevent direct contact between incompatible metals. Always choose outdoor-rated fasteners rather than generic indoor hardware to ensure durability. Regular inspections for rust or damaged coatings will help catch potential issues early and prevent panel failure.

𝐑𝐞𝐮𝐬𝐚𝐛𝐥𝐞 𝐅𝐞𝐧𝐜𝐞 𝐍𝐚𝐢𝐥: Fence staples for wire fencing are made of 304 stainless steel material, anti-rust and anti-corrosion, easy to install or remove with a power drill, allow repositioning.
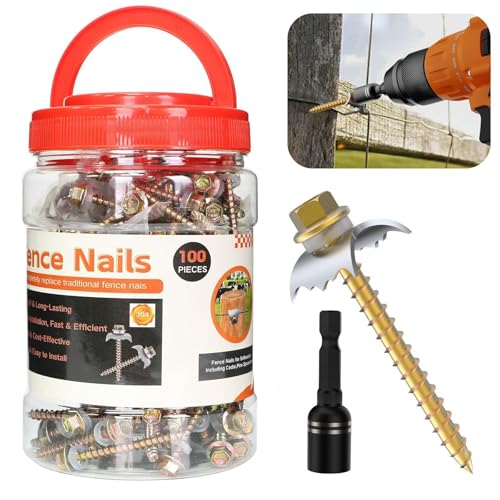
Premium 304 Stainless Steel Fence Nails— Rust-Proof & Durable: These Fence Fasteners are crafted from high-grade 304 stainless steel, resisting corrosion, rust, and weathering—ideal for outdoor use in gardens, farms, or coastal areas. Withstands rain, UV rays, and extreme temperatures, ensuring long-term stability for your fence or DIY Fence Supplies projects

Strength 198 Lbs. Temperature -170℉ To +1000℉, High-temperature Applications Such As Cv Boot Clamps, Tie Rod Boot Clamps, And Heat Wrap For Exhaust Pipes. Uv Resistant For Outdoor Pvc Pipes And Metal Pipes, Pipe Straps.
Avoid 5 Mistakes That Loosen Your Fence Panels
Incorrect post spacing is the most common mistake that causes fence panels to loosen. When posts are spaced too far apart, panels experience excessive stress, leading to bowing or detachment, especially at taller fence sections. Proper spacing should be calculated based on panel size and post thickness to ensure support. If posts are too close, it can cause unnecessary material use and difficulty fitting panels; too far apart, and the panels won’t be stable. Use a spacing measurement tool and follow manufacturer guidelines to prevent this issue. Consistent post spacing distributes weight evenly and maintains the overall fence integrity.
Cap Posts and Check for Wobble
Once your posts are properly spaced, the next step is to cap them and check for wobble. Installing caps protects the exposed end grain from rain and UV rays, which helps prevent rot and cracking over time. Ensure each cap sits flush with the post top and is secured tightly; a loose cap allows moisture to enter and can cause damage as the wood deteriorates.
After capping, give each post a gentle push. A firm post will not shift or wobble. If you notice any movement, it typically indicates a footing issue or internal rot, not just a surface problem. Use a level to verify that each post remains plumb; leaning posts require correction before attaching panels. Examine the ground around the post base for signs of settling or softness, as these conditions can worsen movement. Tighten loose caps immediately, and address wobbling posts early to maintain panel alignment and prevent further instability.