

Worried about keeping your chickens warm and safe during winter? Building a sturdy, well-insulated coop can make all the difference. With the right design, you’ll provide a cozy space that protects your flock from snow and cold while ensuring good ventilation.
Here’s how to create an effective winter chicken coop that lasts through chilly months.
Choose the Best Location and Orientation for Your Winter Coop
Position your coop on high ground with dry soil and a south or southeast exposure. This placement maximizes sunlight during winter when rays are weak and low in the sky. Morning sun from the east or southeast heats the coop quickly and encourages activity. To reduce wind chill, orient the building so prevailing winds cross it at a 30 to 60-degree angle rather than blowing directly into openings. Adding a windbreak like trees or a fence further minimizes drafts and retains warmth. For added protection against the elements, consider models with higher quality materials found in top reviewed coops. Choose a location that remains accessible during snow and avoids low areas prone to meltwater pooling. Prioritize winter sun exposure over shade from deciduous trees, which can provide summer shade and allow sunlight through in winter. This strategic placement helps create a drier, warmer environment that keeps your flock comfortable and simplifies chores throughout the season.
Build a 12-Inch Raised Foundation to Block Snow and Slush
Raising the coop floor 12 inches above ground is your best defense against snow, slush, and meltwater. This height keeps winter moisture from soaking into your bedding and allows better airflow underneath, preventing dampness from lingering. Using pressure-treated foundation materials like runners or solid concrete helps resist rot and ground moisture, ensuring a sturdy base over time. For those who want maximum flexibility, adding wheels to the foundation allows you to reposition the coop to drier ground as conditions change. Using scrap lumber or reclaimed wood for the foundation can significantly reduce material costs while maintaining structural integrity.
Adding gravel around the perimeter improves drainage and prevents water from pooling against the foundation. A 12-inch lift also serves as a strong pest deterrent—rats, snakes, and raccoons find it much harder to tunnel under or squeeze into a raised base. For added pest control inside the coop, you can use diatomaceous earth safely around bedding to help deter mites and fleas. It also blocks snow drifts from piling directly against the floor. For extra security, pair the foundation with buried hardware cloth to prevent digging. Make sure your foundation remains level, and you’ll build a dry, secure structure that withstands harsh winter conditions.

【Enhanced Dual-Door Safety System】This spacious chicken coop includes two separate lockable doors, designed with a dedicated feeding access to minimize the risk of escape. Safe for your animals and convenient for daily care. No more runaway chickens during mealtime! The upgraded model also comes with extra zip ties for reinforced security and additional ground stakes at frame corners for enhanced.

Sturdy Structure & Wire Mesh: Are you ready to create the perfect living space for your treasured animals? Look no further than this amazing chicken house! Crafted from 1" thick galvanized steel pipes, precise welding, sturdy frames, and featuring a protective hexagonal mesh, our chicken coop with run is built to last and provide a safe space and beautiful living experience for your cherished animals.

SPACIOUS WALK-IN CHICKEN RUN: Measuring 15x10x6.5 FT, this large metal chicken coop provides ample outdoor space for 20-30 chickens. The full-height walk-in design lets adults enter comfortably for feeding, cleaning, collecting eggs, and daily flock care. Capacity may vary by breed and setup.
Frame Your Coop for Single-Digit Cold: Walls, Roof, and Insulation
To frame your coop for single-digit cold temperatures, start with a 12-inch raised foundation and then proceed to build the walls, roof, and insulation. Use standard wall framing with rigid foam board cut snugly between studs to achieve an insulation value of R-10 to R-15. Focus extra attention on the north wall, sealing it well with extra insulation and caulking at floor joints and top plates to prevent drafts. For the roof, aim for R-20 to R-30 since heat loss occurs most here. Fit rigid foam tightly against the rafters and seal all joints with tape or spray foam to ensure no gaps remain. Proper sealing of insulation is essential to prevent warm air from escaping and moisture from intruding. Cover all insulation with plywood to avoid pecking by your chickens. Use extruded polystyrene for wall insulation because of its R-5 per inch value, and opt for lightweight foam board for the roof. This creates a snug, well-sealed shell that keeps the cold out and your chickens comfortable. For additional protection, consider adding a covered run to allow your hens safe outdoor access even in harsh weather. Insulating the coop is generally recommended because it reduces moisture and prevents drafts, keeping the interior dry and stable.

High-Quality Material and Construction: The high-density white XPS foam is made of white pure polystyrene particles, free of impurities and pigments, non-toxic, peace lf mind to use,can be safely used for various applications.33kg/m3 density provides lightweight construction with excellent structural integrity, making it resistant to damage and easy to operate. Widely used in handicraft production, building insulation, plant cultivation, package applications and other fields

Dual-Layer Insulation Design: Double-layer foam panels help reduce gaps around window vent openings and support airflow through the vent kit.

Lightweight & Easy to Cut: This DIY foam board is made from high-quality polystyrene, making it super lightweight and easy to handle. Whether you're crafting, building models, or working on a school project, it cuts like a dream with just a utility knife or scissors!
Design Winter Coop Ventilation That Exhausts Moisture Without Drafts
To prevent drafts while ensuring proper moisture control, do not align vents directly with roosts or create a horizontal wind path across the coop. Close or block low openings that aim straight at the birds to avoid cold air blowing directly onto them. Using adjustable covers or burlap curtains on vents can slow air speed, allowing fresh air exchange without creating uncomfortable drafts. In extremely cold weather, reduce the size of low inlets but do not seal them completely; maintaining some airflow is essential to control moisture buildup. Focus on keeping humidity below 70 percent and eliminating ammonia smells to ensure a healthy environment. Just as a brooder requires careful regulation of temperature and airflow to prevent chick mortality, a winter coop needs similar principles to manage moisture without freezing the birds. Continuous, draft-free ventilation that manages moisture effectively will keep your coop both warmer and healthier for your birds. For bedding that aids in moisture absorption, consider using best hemp bedding for hens. Adjusting the size of low inlets in response to temperature changes is a key technique for balancing warmth and air quality.

【Improve Chicken Coop Ventilation】The adjustable chicken coop vent is designed to flexibly adjust airflow and ventilation in the chicken coop. The metal wall vent not only improves the air quality in the chicken coop but also helps to prevent odor build-up in the chicken coop.

Adjustable Airflow Control - You can easily adjust the louvered slats with the side lever on the chicken coop vent to control ventilation, creating a comfortable, odor-free house for your chickens in all weather conditions.

Package includes- You will get 11.3*6.3 FT outdoor chicken coop cover(Chicken Coop Not Included ) and ball bungees cords, this cover protects your chickens or ducks from wind, rain, snow, and sun.
Arrange Roosts and Bedding to Keep Your Flock Warm All Winter
Roosts should be positioned at least 12 inches off the floor to keep your flock warm through cold nights. Use a broad 2-by-4 board with the wide side up, as wood retains heat better than metal, allowing chickens to rest flat-footed with toes covered by feathers. This flat perch maximizes feather insulation and helps keep their feet warm. Allocate 6 to 9 inches of linear space per bird to prevent crowding and reduce stress. For secure perch installation, J Clips offer a cost-effective and durable option compared to other fasteners. When building the frame, pressure-treated lumber is recommended for the base to resist moisture from the ground. For additional design ideas, consider reviewing a comparison of coop toys to see how enrichment options can complement roost arrangements.
Underneath the roosts, build a deep bedding layer of 6 to 12 inches using straw or pine shavings. This bedding traps heat, providing mild natural warmth as manure decomposes. Keep roosts above the bedding line to prevent drafts and dampness from stool and litter. This process also requires you to manage manure regularly to control moisture and maintain a healthy coop environment. Clean droppings regularly under the roosts and refresh the bedding to maintain a dry, comfortable environment.
A 6- to 8-inch kickboard placed by the door can contain the deep bedding and prevent it from spreading, helping your coop stay warm and tidy during winter months.

ULTRA-STABLE & SECURE ROOSTING SOLUTION: Our 4Pcs Heavy Duty Poultry Roost Brackets are designed with an innovative "U" shape to provide exceptional stability, preventing movement and swaying for a safe and comfortable roosting area for chickens, turkeys, and other poultry. Say goodbye to wobbly roosting bars!

EASY INSTALLATION: with the included hardware, screw it to the walls inside your coop and you're done.

Robust & Durable Construction: Crafted from premium, weather-resistant materials, these heavy-duty poultry roost bar mount brackets ensure long-lasting stability for your flock.
Set Up a Heated Water System and Safe Supplemental Heat
For safety precautions, install barn-rated radiant plates or heat pads securely, keeping them at least two feet away from wood, bedding, and cobwebs. Only use supplemental heat when necessary, as dry, draft-controlled coops often do not need any. Check regularly for dust buildup and scorching risks—once a week is a good rule. Keep heated waterers filled and clean to prevent bacterial growth and ensure your flock remains hydrated. Protect all electrical components from snow, dampness, and moisture to prevent fire hazards and electrical shocks. Following these steps creates a safer environment while maintaining a reliable water supply for your birds. If you also plan to raise young waterfowl, note that goslings require specially formulated waterfowl feed rather than chick starter to avoid nutritional imbalances. For additional safety, consider top quail egg incubators for reliable temperature control during brooding. If you use cracked corn in your feed, note that cracked corn floats, which can help you monitor water quality in their drinking system.

DEEP WARMTH & ULTIMATE RELAXATION – Developed by Bob and Brad, this professional-grade heat pad utilizes natural ceramic beads to emit 8-15μm far-infrared waves. Unlike superficial heating wires, this advanced design delivers consistent thermal energy to deeper layers. It instantly elevates your daily unwinding routine, promoting profound, full-body relaxation to perfectly support active users and the elderly.
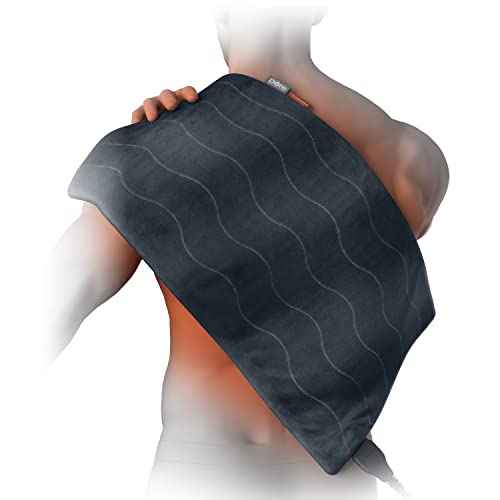
Unlike Other Heating Pads: Our innovative InfraWave Technology offers an advanced level of treatment. The heat-retaining ceramic beads send safe, far infrared wavelengths below the skin’s surface to target sore spots and penetrate muscles more deeply than traditional heating pads.
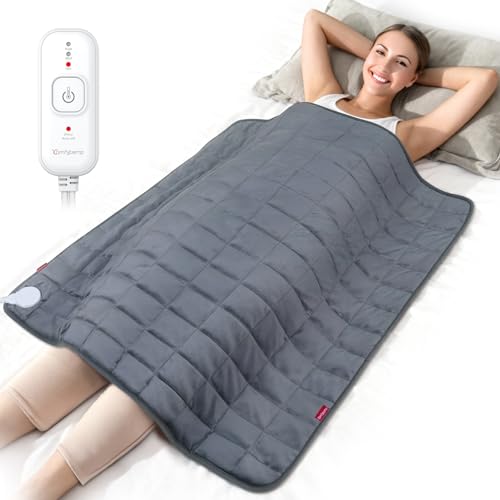
Unique: Our upgraded large far-infrared weighted heating pad is hand-filled with natural micro ceramic beads to ensure even weight and heat distribution, setting it apart from ordinary heating pads. When heated, the ceramic beads emit far-infrared wavelengths within the 8–14 micron range. Combined with gentle heat, this design delivers consistent, enveloping warmth across the pad, creating a deeply comfortable and relaxing warming experience for everyday use.