

Figuring out how to attach wire to T-posts so your fence stays tight and secure can seem tricky at first.
But with a few simple steps, you’ll be able to set your posts and attach the wire properly, making your fence both sturdy and long-lasting.
This guide walks you through the key techniques to get your fencing project done right.
Plan Your T-Post Layout Before Buying Materials
Before purchasing any T-posts or rolls of wire, you need to plan your fence layout thoroughly by mapping it on paper first. Walk the entire route to visualize property lines, gates, and permanent landmarks, which will help you understand the full scope of the project. Mark each corner and gate opening individually, as these require different post types and hardware. Pay attention to terrain changes like slopes, drainage points, or obstacles such as trees or rocks that may influence your material needs. Consider landscaping features, including existing trees, beds, and slopes, to avoid costly adjustments later. Keeping privacy in mind, decide on tight or spaced layouts to block neighbor views if that’s your goal. Use stakes and string to confirm your layout in the field, then measure each straight segment separately. This detailed plan becomes your material list, ensuring you purchase the appropriate posts, wire, and braces for each section instead of just estimating based on total footage. If you plan to keep quail inside the enclosure, review top quail egg incubators to decide on raising them from hatching before finalizing your fence design. For added protection from external pests, you may also want to research top mite sprays to treat the enclosure during installation. If the coop will house chickens, you should also consider the best heat source to maintain safe temperatures during cold weather.
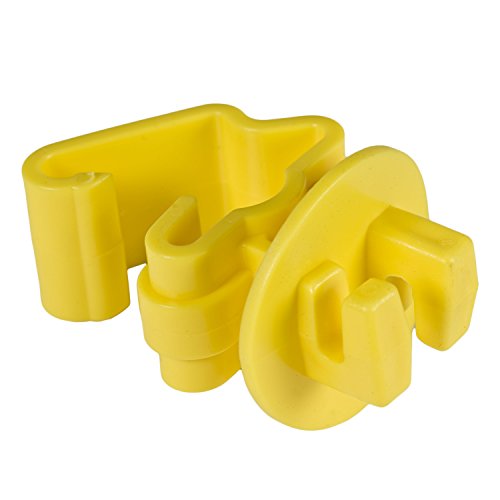
FOR STANDARD T-POSTS: These Zareba wrap-around fence insulators fit securely on standard (1-1/4 or 1.33) studded t-post

Sufficient Quantity: there are 250 packs T-Post clips in our package, sufficient quantity for your daily use and replacement!

For attaching non-electrified wire to T-Posts,easy to assemble, environmentally friendly, waterproof, galvanized surface, long service life
Choose the Right T-Post Spacing for Your Fence
The ideal T-post spacing depends on your fence’s primary purpose and terrain. For heavy livestock such as cattle, spacings of 8 to 10 feet are necessary to withstand the pressure. If you’re installing a lighter wire fence, you can extend the spacing to 15 to 20 feet. On flat, stable ground, wider spacing is acceptable, but on curves or uneven terrain, shortening the distance improves line control and maintains tension. Closer support at corners and turns helps prevent sagging and keeps your fence straight. For welded wire fences on level ground, maintaining a spacing of 8 to 12 feet ensures optimal tension distribution. Consistency in post spacing is key to achieving an even, strong fence that lasts. If you later need to remove posts, using specialized pulling tools can save significant time and effort compared to manual digging. For wooden end posts, consider using staples and screws to secure the hardware cloth directly to the wood for a durable connection. For general fence stability, following simple rules of thumb for spacing helps ensure long-lasting results.

Long-lasting Durability: Upgrade with this T-drilled cable railing post made of 1mm T304 stainless steel and upgraded matte black powder coating. Corrosion-resistant and weather-resistant, it’s a low-maintenance fit for corner areas on decks, terraces, and balconies. Rubber grommets add lasting protection. (For coastal use, search “Zylorix SS316 cable railing corner post.”)

Seamless One-Post Corner Solution for a Modern, Unobstructed View: Achieve a sleek, minimalist look with fewer posts—saving you money and reducing clutter. Our 42" T-drilled corner post replaces two level posts, offering efficient multi-directional cable routing. Perfect for corner applications, it elevates your home's contemporary aesthetic while providing a cleaner, more open-view appearance

T-Drilled Corner Post: Designed for 36-inch residential projects, this sleek black corner post features 10 pre-drilled horizontal three-side holes, minimizing installation labor. A 4ft post spacing is recommended for safety and tension. Check local regulations as they vary. (Tip: For railings upto 20ft, please select the T-drilled corner post)
Set T-Posts Deep and Straight for a Solid Foundation
Use a level to ensure every post is driven straight and deep as you install each one. A leaning post weakens wire tension and undermines the foundation’s strength. To prevent crooked sections, run a string line along the row for proper alignment. After driving each post, tighten the soil around it using a tamper or post driver to ensure a firm, stable base. Always set the anchor plate perpendicular to the fence line for maximum stability. Proper soil compaction around each post increases resistance to shifting and wobbling over time. Even dust from the soil can be safely managed if you consider diatomaceous earth safety for pets in nearby areas. When selecting netting, prioritize heavy-gauge galvanized wire to prevent sagging and predator damage. This solid foundation is essential for a durable, long-lasting fence. A common mistake is driving posts into uneven or rocky ground without preparing the hole first, which can lead to leaning posts and future instability.
Start Your Fence at a Corner or End Post
Start your fence at a corner or end post by firmly securing it first. Mark the beginning point to set the correct fence alignment, as this initial placement will guide the entire run. Since this post bears the highest tension from the wire, use a strong attachment method appropriate for your fence type.
Ensure the post is set deep and straight to provide a stable foundation. Bracing this corner or end post is often necessary to prevent leaning, especially where tension is high. For maximum stability, you should install a horizontal brace between the corner post and an adjacent anchor post. Apply tension gradually when attaching the wire to avoid overloading the post or causing misalignment. Before installation, you might consider crushing oyster shells to use as a compacted base material for improved post stability. This step is especially useful if you are also planning a mobile coop setup that requires frequent relocation and re-staking.
Keep the fence line straight from the start by stretching a guide line between posts. This helps maintain uniform spacing and reduces the need for adjustments later. A straight start not only simplifies installation but also contributes to a more durable and professional-looking fence.
For proper alignment, lean the corner post about 1 inch out for the correct stabilizing angle.


Fits all standard t-posts (1.25-1.33 lb)
How to Use T-Post Clips for a Tight Fence Attachment
To attach fence wire tightly to T-posts, position each clip at the stud area so the wire sits flush against the post flange. Ensure the hooked end engages the wire first, then wrap the remaining end around the post. Use fence pliers or a clip-bending tool to twist the ends until the wire is firmly cinched and the clip no longer shifts. For most T-post types, space clips every 12 inches for woven wire fencing or use 4 to 5 clips per post for welded wire fencing. After tightening, check that the clip does not slide on the post nub and that the wire resists hand pressure between posts. To maintain long-term holding power, regularly inspect clips for rust and re-tighten any that become loose or leave slack in the wire. A clip bender significantly speeds up installation and ensures a more secure hold compared to manual twisting. Using pine shavings as bedding under the fence line can help prevent mud buildup and reduce corrosion on the lower clips. For a more durable setup, consider using metal nesting boxes nearby to store tools and keep hardware dry. For the best overall feed choice, note that all flock feed provides a balanced diet suitable for both chickens and other poultry when kept near the fence.

200pack T Post Clips Kits:Save time and effort with T-Post Wire Clips featuring a drill-compatible design.T post wire clips with drill chuck for lightning-fast installation—tighten over clips in minutes, not hours.No more hand twisting: achieve professional, durable results effortlessly on farms, ranches, or DIY projects.Strong preformed fence ties work seamlessly with any power drill, cutting labor time by up to 90%.Ideal for large projects requiring fast installation

🏡【Premium Quality】T-Post Clips fits T-Posts/U-Posts up to 1.33 lb/ft. Constructed of heavy-duty, 9-gauge galvanized steel with a hot-dipped zinc finish to withstand the harshest outdoor conditions, they are rugged and resistant to corrosion or rust and will not break, warp or bend.
100 pack T Post Clips Kits:Save time and effort with T-Post Wire Clips featuring a drill-compatible design.T post wire clips with drill chuck for lightning-fast installation—tighten over clips in minutes, not hours.No more hand twisting: achieve professional, durable results effortlessly on farms, ranches, or DIY projects.Strong preformed fence ties work seamlessly with any power drill, cutting labor time by up to 90%.Ideal for large projects requiring fast installation
When to Use Zip Ties or Staples Instead of Clips
Zip ties or staples are best used over clips when you need quick, temporary, or lightweight fastening solutions that suit specific materials. Use zip ties for high-speed applications like safety fencing or construction zones because they can be easily applied and removed. They’re flexible and thread through the post’s holes to secure wire or fabric but are less durable outdoors, especially under UV exposure—opting for heavy-duty, UV-stable nylon ties extends their lifespan. For situations involving organic waste, knowing how to eliminate black soldier fly larvae can prevent pest buildup near fencing. Staples work well directly on wood posts or stakes; they bite into timber, providing a solid hold for wire ties, especially when fastener compatibility is critical. Staples are not suitable for bare T-posts and are generally one-time-use, while zip ties may need replacement over time outdoors. Clips are the ideal choice for dependable, long-term metal-post connections. For sturdier predator-proofing, galvanized hardware cloth is a more durable material than standard wire. Choose zip ties or staples only when the material or post type calls for them and avoid using them as long-term substitutes for purpose-built clips. When fastening lightweight chicken wire for a coop, zip ties offer a quick temporary hold but lack the long-term strength of purpose-designed clips.

✅ 𝟒𝟎𝟎-𝐏𝐚𝐜𝐤 𝐙𝐢𝐩 𝐓𝐢𝐞𝐬 𝐀𝐬𝐬𝐨𝐫𝐭𝐞𝐝 𝐒𝐢𝐳𝐞𝐬 (𝟒+𝟔+𝟖+𝟏𝟐 𝐈𝐧𝐜𝐡): From bundling thin wires to securing thick cables, these zipties handle home improvement, garage tools. With 100 pieces per size, tackle any project – big or small!

Heavy Duty Strength for Tough Jobs: Our 100-pack of 8-inch black zip ties is built to last with a 120-pound tensile strength, making them perfect for both indoor and outdoor projects. Whether you're securing cables, organizing tools, or handling industrial tasks, these durable ties won't break under pressure, ensuring reliable performance every time. Ideal for electricians, landscapers, and DIY enthusiasts.

【Specification and Feature】 - white zip ties 8 inches / 20cm , width 0.14 inches / 3.6mm, 40 lbs / 18 kgs industrial strength, Working temperature: -15°C ~ 80°C, Flammability rating: UL 94 class V2. UV-resistant, Heat & Cold resistant. 100 Pack.
Tension Your Fence Before Final Fastening
Pull the fence fabric or wire tight along the entire run before final fastening. Use tools like a come-along, fence puller, or stretcher bar to remove slack in a controlled manner. Anchor the starting end securely to a sturdy post before applying tension so it can handle the pull without slipping. Ensure the tensioning wire is threaded through the center holes of posts consistent spacing along the fence line. Unlike chick starter feed, ducklings require additional niacin for healthy growth, so avoid relying on poultry-only starter mixes. A common mistake is failing to use a stretcher bar to distribute tension evenly across the mesh.
Make small tension adjustments step by step to prevent overstressing your fence material. You should aim for a line that is taut but not guitar-string tight. Over-tensioning can distort the mesh or put stress on hardware, leading to damage.
Once the desired tension is achieved, fasten the fence to intermediate T-posts from one end to the other. This practice secures the tension evenly and prevents slack from developing at individual points. After all fasteners are in place, recheck the tension. Small settling may occur, and a quick follow-up ensures your fence stays tight across all post types.
Handle Corners and Overlaps Without Creating Weak Spots
Corner and overlap zones are common failure points if you don’t strengthen them properly. To handle corners effectively, install dedicated corner bracing at every angle change. Use a two-post or diagonal brace layout to resist side-pull stress; do not rely on a single post. Ensure the brace orientation aligns with your fence line so that load transfer occurs through the brace, not the mesh. Fasten the fence on both sides of the corner post consistently, and bend welded wire around it to prevent sharp stress points that could cause damage.
For overlaps, secure overlapping sections with multiple fasteners spaced every 15 to 30 centimeters. On shared posts, fix only one panel directly to the post to prevent crowding. Make sure overlaps face away from livestock pressure so animals cannot push the joint apart. Regularly check hardware for loose clips or gaps, and reinforce any movement before applying final load. Proper handling of corners and overlaps helps prevent failures and prolongs fence life.
Splice and Overlap Fence Sections on T-Posts
To splice and overlap fence sections on T-posts effectively, you need a minimum of a 6-inch overlap to ensure a strong, continuous joint. For mesh fencing, weave a wood slat through the overlapped strands to lock them together, providing added reinforcement for the joint. Secure the splice directly to the nearest T-post using clips or ties; this prevents movement and maintains alignment under load.
When working with welded-wire fences, use T-post clips instead of slats to connect the sections. Maintain a 6-inch overlap regardless of the fence type—diamond link or barrier fencing—and tighten the joint by hand to avoid distorting the mesh. Do not cut or tie ends loosely; instead, rely on the overlap as your primary connection point. This approach keeps the fence line flat and continuous, securing stability without creating weak spots.
Final Safety and Tightness Checks for a Sag-Free Fence
To ensure your fence remains sag-free and secure, carry out final safety and tightness checks. First, walk along the entire fence line and verify that the wire remains taut without excessive strain, ensuring consistent tension from end to end. Look for any sections where the wire appears slack or overly tight, as these can indicate loose posts or fixtures. Test each T-post for leaning or movement under load, which may suggest the post is no longer stable. Confirm that corner anchors are firmly attached and not shifting.
Inspect every clip and fastener to ensure they are securely holding the wire; tighten any that are loose to prevent shifting or sagging over time. Trim any sharp wire ends flush with the clips to avoid injury to livestock or anyone nearby. Wildlife pushing against the fence can cause sudden slack if weak spots develop, so reinforce any bowed or compromised sections now. Weather conditions, like freeze-thaw cycles or heavy rain, can loosen posts or disturb tension, so plan a follow-up inspection after the first significant storm. Adjust and re-tension the wire as needed to correct dips caused by seasonal changes, and address minor issues immediately to prevent them from worsening into larger sags.