

Looking to build a budget-friendly chicken run that keeps your flock safe and makes cleanup easy? You can do it for around 30 to 45 square feet per three chickens by using simple lumber and predator-proof materials.
With just a few affordable supplies, you’ll create a secure space that protects your birds at a fraction of store-bought costs.
Keep reading for the full step-by-step guide to building your own inexpensive chicken run.
How Much Space Does a Chicken Run Need?
Aim for at least 10 square feet per standard chicken in the run to ensure they have enough space to move comfortably and reduce stress. If possible, provide around 15 square feet per bird; this helps minimize crowding and keeps the ground from getting muddy. Bantam breeds need less space, about 5 to 8 square feet per bird, while larger breeds benefit from more than 10 square feet. For a flock of three, plan on 30 to 45 square feet, and for six, 60 to 90 square feet. To determine the right size, multiply your flock count by your preferred space per bird. Keep in mind that runs with limited confinement require more space than those with free-range options. A rectangular layout is most efficient to prevent wasted area. Many top-rated commercial models emphasize quality and value when balancing run space with durability. Bigger runs promote healthier ground conditions and allow natural scratching behaviors, making more space always a better choice. Skimping on space is a false economy because adequate space is the most affordable upgrade for maintaining a healthy flock. This aligns with Ideal Run Space Guidelines for happy chickens, ensuring a stress-free environment. Choosing a balanced layer feed can also support overall health and egg production in a well-spaced run.
What Cheap Lumber Works Best for the Frame?
2×4 lumber is your best all-around choice for framing a budget-friendly chicken run because it’s widely available, easy to work with, and sturdy enough for corners, top rails, and door openings. To keep costs down, consider mixing full-length 2x4x8s with shorter 2x4x6s to reduce waste. For areas in contact with the ground, such as bottom rails, pressure-treated lumber offers added durability by resisting rot and insects. Use treated lumber below the line of the soil and untreated above to save money while maintaining structural integrity.
Lightweight 2×2 pieces work well for bracing, but you can save by cutting larger 2x6s into strips for less common sizes instead of buying specialty lumber. Softwoods like SPF, pine, or fir are budget-friendly choices for the upper framing but require sealing or painting to protect against moisture damage. Simple box framing assembled with screws provides a sturdy, cost-effective structure that’s easy to build and adjust as needed.
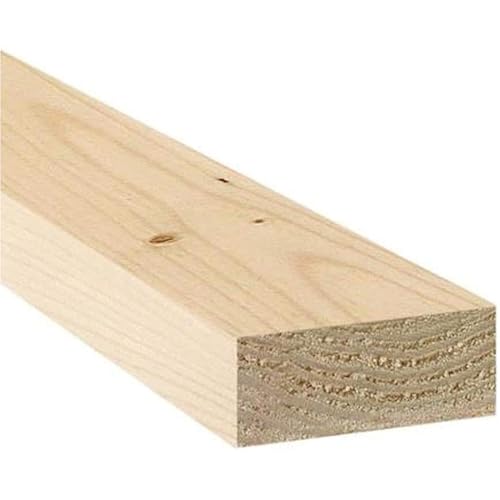
By Crafters, For Crafters: Crafting and building with wood is our number one priority. Bringing you more of the wood craft supplies you love is our job


By Crafters, For Crafters: Crafting and building with wood is our number one priority. Bringing you more of the wood craft supplies you love is our job. Please dont hesitate to get in touch
Why Hardware Cloth Beats Chicken Wire for Predators
Hardware cloth offers a far superior barrier compared to chicken wire. Its half-inch, 19-gauge welded mesh is sturdy enough to resist prying and chewing, effectively blocking raccoons’ paws and smaller predators like snakes and rodents. For example, premium galvanized options provide added protection against rust and corrosion. Chicken wire, in contrast, is thin and weak—raccoons tear through it, dogs can rip it apart, and foxes are capable of biting their way in. Its large hexagonal openings also allow weasels, snakes, and small rodents to squeeze right through. Using hardware cloth means you’re actively preventing predator attacks before they happen, providing a more secure enclosure. While chicken wire may seem like a cheaper option, it often results in losing entire flocks due to its inability to contain or withstand determined predators. For a build that’s genuinely secure, investing in hardware cloth is essential. However, note that hardware cloth will eventually rust over time, so choose galvanized or coated options for long-lasting durability. For maintaining warmth in the coop during cold snaps, consider heat bulbs designed specifically for chicken coops.

Material and size: The size of the hardware cloth is 16 inch×50 ft and 1/2 inch×1/2 inch thickness, adopt 19 guage hot-dipped galvanized material

Galvanized After Welding: Hot-dip galvanized after welding coats every welded joint, so the heavy duty mesh resists rust and breakage far longer than pre-galvanized wire in rain, soil, and sun.Thicker wire builds a sturdier fence that resists bending and animal push-through

[True 19 Gauge Wire Diameter – No Under-Sized Cheap Mesh] Our welded wire mesh uses actual 19 gauge wire with standard thickness, not thinner under-rated wire commonly found on the market. Real gauge means real strength and longer service life. Many 19 gauge listings use thinner wire to lower cost. Each roll weighs 10.8 lbs, much heavier than thin 7.7 lbs, so it’s stronger, more durable, and won’t bend or break easily. You’re paying for real quality, not fake labels.
How Deep Should Post Holes Be?
The typical depth for post holes is about one-third of the total post length buried below ground. For a standard 6-foot post, this translates to digging holes approximately 24 to 32 inches deep. However, the frost line in your area should take precedence over the rule of thumb. In colder climates, you need to ensure the bottom of the hole sits at least 6 inches below the frost line, which can be as deep as 48 inches in some regions. Deeper holes offer better resistance to leaning and wind loads, providing added stability for your fence or structure. For mild climates, a depth of around 24 inches is sufficient for most posts. When installing exposed or corner posts, aim for 30 to 36 inches to enhance durability. If the ground is sloped, you may need to vary the depth of each hole to keep the top of the post level with the ground surface. Always dig deeper than the post itself to allow for a gravel base, which improves drainage and prevents issues caused by trapped moisture. Since your gravel base remains dry and undisturbed, its long-term performance is unaffected by any storage life concerns associated with other materials you might keep nearby. Additionally, using the right sand for your chickens’ dust bath is separate from these construction steps, but choosing a fine, dry sand ensures your flock can properly clean themselves. Ultimately, soil type and local frost lines are the key factors guiding how deep your post holes should be. Building a DIY feed bin can further reduce project costs by repurposing materials and avoiding retail markups.
Assemble the Frame With Deck Screws and 2×2 Lumber
Start assembling the frame using 2×2 lumber and deck screws once your post holes are dug to the proper depth. First, cut all 2×2 pieces to their final lengths, then dry-fit the frame to ensure everything lines up correctly. Use 3-inch #10 or #12 coated deck screws for strong, weather-resistant connections. Pre-drill pilot holes near the ends of each piece to prevent splitting, especially at corners. Apply wood glue at each joint to strengthen the connections further. Drive two screws into each corner face, making sure the frame stays square and flush as you work. Space intermediate supports every 12 to 16 inches along the frame to add rigidity. To prevent racking, add corner blocks or crosspieces across the frame. Keep screw heads flush with the surface to avoid snagging later. This method ensures the frame stays in place and is sturdy before attaching the mesh. Automatic door openers can also be mounted to this frame for hassle-free daily access, ensuring your flock stays safe without manual effort. Consider integrating a solar heater into the coop’s roof to maintain warmth during colder months. To further protect against pests, lightly dust diatomaceous earth around the frame’s base and corners, but avoid applying it directly where chickens can breathe it in.

Anti-corrosion coating: four layers of high-performance coating makes the screws less prone to rust in outdoor construction, and the flat head wood screws are made of high-quality heat-treated steel.

Self-Drilling Point: Together, coarse screw threads and a self-drilling point design eliminate the need for a pilot hole

- Complete 100-Piece #8 x 2 Inch Deck Screws Set - Includes 100pcs carbon steel deck screws and a matching T25 Torx Drive Bit, ready for immediate installation without extra tools. Perfect for medium-duty outdoor projects like decking, fencing, and outdoor furniture assembly, saving you time and effort.
Staple Hardware Cloth Tight Without Sagging
To staple hardware cloth tightly without sagging, start by securing the top edge as an anchor line. Place staples every 4 to 5 inches, beginning from the middle of a long side and working toward the corners. This method helps establish a straight base and minimizes waves. Before adding each new row of staples, pull the mesh taut with your hands and hold the tension using pliers or spring clamps. Working in short sections allows you to remove slack early and maintain a tight fit. For added predator protection, space staples every 2 to 4 inches along the perimeter and supporting members. Closer spacing prevents the cloth from peeling under load. Use a staggered pattern when fastening to distribute stress evenly and keep the mesh flat. Be cautious not to over-tighten, as excessive tension can distort the grid. Regularly check for puckers and make adjustments as needed. This approach ensures a secure, sag-free installation that maintains good ventilation for a chicken run, providing a durable barrier over time. Because mice can squeeze through openings larger than 1/4 inch, using 1/2 inch hardware cloth is essential for blocking them effectively. Later, add staples to any loose areas but avoid forcing a big pull that could damage the mesh. Start stapling from the middle outward on both sides to prevent bubbles and ensure a tight fit. For long-term outdoor durability, note that chicken wire is galvanized to resist rust and corrosion.

280-Piece Value Pack: Includes 280 galvanized fence staples in a sturdy storage box, providing an ample supply for wire fencing installation, garden fence repairs, farm maintenance, and multiple home projects without frequent reordering.

Package includes 200 pcs steel Fencing Staples to meet your daily needs. Wire: approx. Ø 2.3 mm / length: 25 mm / width: 14 mm

Sized For Precision: #11 x 1/2 in double pointed tacks provide secure anchoring for wood and fabric attachment; package contains 1.5 oz for versatile use
Bury the Wire Skirt 12 Inches to Stop Diggers
Bury the wire skirt at least 12 inches deep around the entire run perimeter. This prevents diggers like foxes or raccoons from tunneling underneath. First, dig a trench along the perimeter of your enclosure. Then, place hardware cloth vertically into the trench and secure it to your run structure above using hog rings or zip-ties. Shape the buried wire into an outward-facing L-bend so that tunneling predators hit the mesh first, which is more effective than shallow barriers. Overlap wire seams with additional hardware cloth, securing them tightly to avoid gaps. Backfill the trench with soil or gravel to hold the barrier in place. This low-visibility method provides a permanent, strong deterrent that stops many burrowers from digging under. For complete protection, combine this buried wire skirt with secure sides and top coverage. You can also use a DIY chicken dust bath container placed inside the run to keep your hens clean and parasite-free. Since your chickens will be consuming their feed in this secure run, remember that they also need oyster shell to provide necessary calcium for strong eggshells. Though scratch grains are a popular treat, they are not a dietary necessity for your flock, as a nutritionally complete feed meets all their core requirements.
Build a Gate From Leftover Framing Lumber
To build a gate from leftover framing lumber, start by cutting leftover 2x4s to match the size of your opening. Assemble these pieces into a rectangular frame, ensuring it fits snugly within the perimeter. Add diagonal bracing from the bottom hinge side to the top latch side to prevent sagging and maintain stability over time. Use exterior-grade screws for durability, pre-drilling holes to prevent splitting. Reinforce the corners with L-brackets for extra rigidity. For a fun addition, consider building your own chicken swing to provide enrichment for your flock. For removing any metal stakes that might be in the way of your build, try leveraging the frame itself as a pulling fulcrum to save time and effort. You can also supplement the flock’s diet with best cracked corn for an affordable treat.
Choose heavy-duty hinges and a sturdy latch to ensure the gate withstands repeated use and provides security. Before installing the hardware, fit the gate into place, making adjustments as needed to ensure it swings freely without rubbing or binding. Apply weatherproofing or decorative finishes to protect the wood from moisture and extend its lifespan. Properly built and fitted, this gate will keep your flock secure while making entry and exit effortless.

Premium Materials: Made from solid steel with a black finish, u brackets are built to last. Their sturdy construction easily withstands stress and is a reliable way to reinforce your entrance over the long term.

Farm Gate Hinge Kit: the package includes 2 chain link fence frame gate post male hinges and 2 lag screw hinges, (with nuts, bolts) designed to ensure you have the necessary parts for a complete gate hinge setup

Farm Gate Hinge Kit: the package includes 2 chain link fence frame gate post male hinges and 2 lag screw hinges, (with nuts, bolts) designed to ensure you have the necessary parts for a complete gate hinge setup
Keep the Run Easy to Clean and Collect Eggs
Designing the run for easy cleanup starts with choosing a hard, smooth base like concrete or pavers. These materials make daily scraping and hosing much simpler by preventing mud and uneven spots that trap dirt. Placing a compost bin nearby allows you to toss droppings directly from the rake, keeping the run tidy and reducing the number of trips needed for clean-up. Store feed outside the run to avoid attracting pests and minimize clutter. Installing external nest boxes enables you to collect eggs without entering the space, keeping eggs cleaner and lowering your daily labor. Use at least four inches of bedding in the nesting boxes to absorb droppings and provide comfort. Elevate the nest entrances to contain litter and make egg collection easier.
Add hinged access panels for quick nest inspections and removable trays for effortless cleaning. Throughout the run, prioritize smooth, washable surfaces that can be easily hosed down. This approach helps maintain hygiene, reduces odors, and keeps the environment comfortable for your flock.
Save Money by Combining Frame and Gate Materials
Combining 2×2 furring strips for both your frame and gate simplifies your project and saves money. Using a single dimension reduces the variety of cuts needed, making the process faster and easier. Leftover pieces, like a 2-foot segment from a side rib, can be reused as a door brace, turning waste into functional parts. Scrap plywood gussets placed on the inside support the ridge beam and add stability without interfering with the chickens.
Opt for standard sizes that match roll widths of chicken wire—this minimizes trimming and scrap. Seal all gaps with the same wire to prevent predators from sneaking in. For weatherproofing, choose inexpensive paint or stain, but don’t overspend—scrap or reclaimed wood can serve just as well. Using pallets or recycled materials not only cuts costs but also keeps your run secure without stretching your budget.