

Figuring out the right time to switch your chicks from starter feed to layer feed can be confusing. The key moment to make the switch is when your hens are about 18 weeks old or when you see their first eggs.
Doing it too early can harm their health, so timing matters.
Keep reading to learn exactly when and how to make the change safely.
When to Switch to Layer Feed: The 18-Week Rule
The 18-week mark is the recommended age to switch your pullets to layer feed. This timing strikes a balance between ensuring reproductive readiness and avoiding nutritional risks. Introducing high calcium too early can strain your birds’ kidneys, so waiting until they reach around 18 weeks helps prevent this. For pet owners considering other safe practices, diatomaceous earth(is often considered safe for pets when used correctly. When installing your chicken run, selecting a durable chicken wire ensures your flock stays protected from predators. Additionally, providing the perfect roost supports healthy sleep and reduces stress for your hens.
Since genetic variation means some pullets will mature at different rates, you should observe their development but avoid making the switch before they are close to this age. Delaying the transition too long, however, can result in hens lacking enough calcium for strong eggshell formation, which could impact productivity.
When changing from grower to layer feed, do so gradually over four to seven days. This slow transition minimizes digestive upset and helps your birds adjust comfortably. Ultimately, you should switch to layer feed at 18 weeks or at the first egg, whichever comes first, to ensure optimal health and egg production.

Feeds 10 Grower (8-20 Weeks) Chickens for 12 Weeks | Complete Kit Includes: Seven 23 lb. bags of Grower Organic Chicken Feed (161 lb) | Two 4 lb. bags of Oyster Shell (8 lb)...
Signs Your Pullets Are Ready for Layer Feed
Your pullets are ready for layer feed when they display clear physical and behavioral signs. Look for bright red, waxy combs and wattles, which indicate hormonal changes and readiness. Check if their pelvic bones are two to three fingers apart near the vent; this spacing shows they have developed enough to handle higher calcium levels. You’ll notice them squatting when approached, exploring nest boxes, and becoming more restless or vocal, all signs of readiness. Their feathers should look sleek and full-grown, showing they have reached mature growth. Ensuring your birds have access to a quality quail incubator can help maintain consistent hatching conditions for future flocks. A well-ventilated coop with a quiet fan can also improve airflow and comfort during this transition period. Note that straight run chickens are often sold as unsexed day-old birds, so you may need to confirm your pullets are indeed female before moving to layer feed.
When preparing for the transition, focus on maintaining proper health by ensuring they are maintaining an appropriate weight and have bright, alert eyes. The first small “pullet egg” is a direct indicator they are ready to lay larger, stronger eggs. Consistently strong-shelled eggs confirm they are handling the increased calcium needs. If their combs appear pale or their pelvic bones are tight, it’s best to wait until these signs improve.

PREMIUM CHICKEN FOOD FOR LAYING HENS WITH OMEGA-3: High-quality chicken layer feed made for strong egg production; fortified with chicken feed omega 3 & extra chicken feed calcium to support healthy shells & provide complete daily nutrition for your hens

Premium Quality from Family-Owned Farm: Proudly crafted at Ernst Grain & Livestock, a 7th-generation family farm, this quail feed embodies the dedication and expertise of sustainable farming practices to deliver quality you can trust

Supports egg production - All the nutrients needed for proper production and eggshell strength
How to Transition Gradually Over Two Weeks
To transition your pullets to layer feed gradually over two weeks, you should start by mixing their current feed with the layer feed, increasing the proportion each day. For the first four days, combine 75% starter or grower feed with 25% layer feed. Then, from days 5 to 8, adjust the mix to 50% starter and 50% layer. Days 9 to 12, shift to 25% starter or grower and 75% layer feed. Finish the transition on days 13 and 14 by offering 100% layer feed. This staggered approach helps prevent digestive upset and encourages acceptance of the new diet. Monitor your flock closely every day; if you notice reduced appetite or feed uneaten, hold at the current ratio a bit longer before progressing. Be sure to blend each batch thoroughly and avoid mixing large amounts at once to prevent feed from staling. This gradual change ensures a smooth and stress-free switch to layer feed.
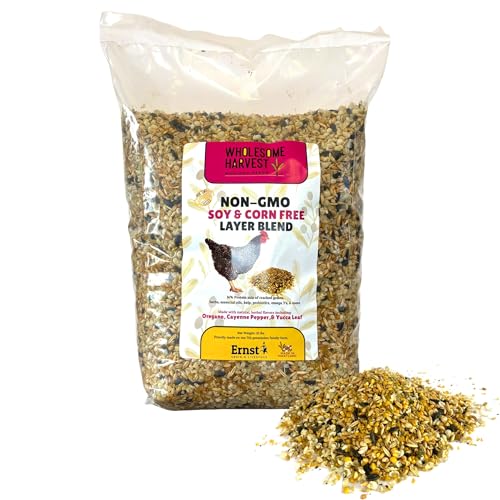
LAYER BLEND: Our Non-GMO layer mash is a complete feed fortified with minerals and additional calcium, ensuring quality eggshells. This blend of grains includes probiotic for digestive health and higher omega 3 levels from linseed (flax) oil. Ideal for supporting your flock's overall health and egg-laying productivity.

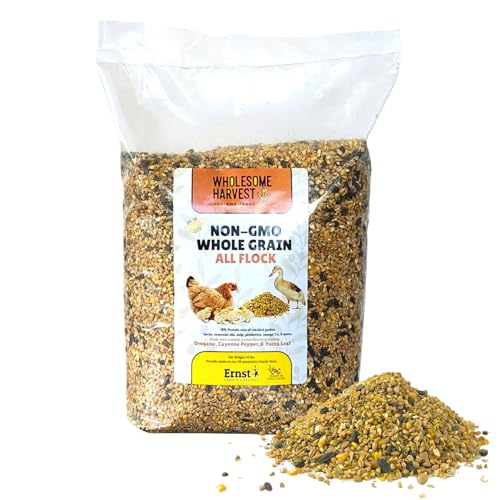
Premium Quality: Proudly made at Ernst Grain & Livestock, our 7th generation family farm, ensuring trust and quality in every bag of chicken feed.
Why Timing Matters: The Dangers of Switching Too Early
Switching to layer feed too early can cause serious health issues in your pullets. It is crucial to wait until around 18 weeks or until the first egg appears before making the switch. Layer feed contains 3 to 4% calcium, which is appropriate for eggshell formation but too high for growing birds. Feeding it prematurely can lead to calcium overload, impairing their kidneys and bones. Excess calcium accumulates in the urinary tract, potentially triggering visceral gout, a painful and often unnoticed condition caused by uric acid crystal buildup. This damage can shorten your bird’s lifespan and hinder skeletal development. Additionally, high calcium levels interfere with phosphorus absorption, delaying skeletal growth and postponing future egg-laying capability. Sticking with starter or grower feeds until the appropriate time is essential to ensure your pullets grow strong and healthy. A keeper should follow chick starter guidelines to determine the correct feed type for each growth stage. Building a DIY chick brooder can help keep your pullets warm and safe during the early weeks when they need starter feed. For those raising multiple birds, constructing a DIY feed bin can help store large quantities of starter or grower feed affordably while protecting it from moisture and pests.

MEDICATED CHICK STARTER FEED: This complete chicken feed is made with added Amprolium to aid in the prevention of coccidiosis, and contains 18% protein for weight gain, our chicken food is essential for your young birds.

MEDICATED FEED: Complete feed for chicks with added Amprolium; helping support the prevention of coccidiosis while providing balanced nutrition, essential vitamins, and minerals to promote healthy growth, strong development, and overall vitality.
How to Handle Mixed-Age Flocks Without Harming Chicks
To handle mixed-age flocks without harming chicks, start by separating different age groups whenever possible. Keeping the younger birds apart makes it easier to manage behavior and prevents stronger, more dominant birds from hogging feed and water. If mixing is necessary, introduce newcomers gradually using physical barriers, allowing sight and sound without direct contact for 14 to 30 days after quarantine. This helps reduce stress and aggression. For example, selecting a coop with ample space and multiple feeding stations**** can significantly ease the integration process.
Provide ample space and multiple feeding stations to minimize bullying and give chicks places to escape from more aggressive birds. Observe your flock closely, especially early on; separate any birds that chase or pin others. Introducing new birds in the evening is preferable since they tend to be calmer then. Always protect chicks with a warm, secure area separate from adult hazards. Before mixing, consider using diatomaceous earth dusters to apply a fine layer of food-grade DE to the birds’ bedding, which helps control external parasites that can transfer between age groups. If you need to cut wire for a temporary barrier, use tools like a sharp utility knife by scoring the wire repeatedly against a hard surface until it snaps. Prioritize gradual integration to ensure safety for all ages.
Match Feed to Each Stage: Starter, Grower, and Layer
You should switch from starter feed to grower feed at around 6 to 8 weeks of age. Grower feed typically contains 15%–18% protein, providing a steady supply of nutrients necessary for the developing skeleton and muscles without signaling premature maturity. Its calcium content remains low to prevent issues related to early laying, such as kidney problems or deformities. For optimal flock management, it is essential to consider the overall quality and value of your feeding setup alongside the coop’s durability. A DIY brooder box can be an affordable building idea to house your chicks during this transition.
The feed should be in the form of crumbles or pelleted form, which makes it easier for slightly larger chicks to peck and digest efficiently. This transition supports continued growth while avoiding nutritional imbalances that could affect future egg production or overall health. Make sure to monitor your chicks during this switch to ensure they adapt well and are receiving the right nutrients at each stage. Consider building a metal shed chicken coop to securely store your feed and protect your growing flock from the elements.

COMPLETE STARTER FEED FOR CHICKS: Specifically formulated for chicks from hatching to 16 weeks, this non-medicated chick starter feed delivers balanced nutrition and essential nutrients to support strong, healthy early growth and development.

Watch Your Birds Flourish: Our nutritionally complete whole grain grower crumbles with 17% protein promotes strong development and growth in chickens and ducks. Corn-free. Soy-free

Prebiotics and Probiotics - Supports immune and digestive health
Common Mistakes to Avoid When Changing Feed
Even a well-planned feeding schedule can backfire if you make common shift mistakes. Avoid abrupt feed changes by gradually mixing new feed with your current feed, starting with a 25/75 ratio and gradually switching over 7 to 21 days. This slow transition helps prevent digestive upset and loss of appetite. Starting layer feed too early, before 18 weeks or before the first egg appears, can damage kidneys because of excess calcium. It is essential to wait until your flock is developmentally ready. For a small flock of six birds, choosing a well-ventilated coop from the start supports good health and feed management. Additionally, a solar heater can help maintain a stable temperature in the coop, which is beneficial during cold weather.
Ignoring gradual nutrient changes can hinder growth. Starter and layer feeds are not interchangeable, even if they appear to have similar protein levels. Using the wrong feed at the wrong stage can lead to severe health issues. Keep an eye on flock behavior; roosters or non-layers on layer feed long-term may develop calcium overload, which can cause other health problems.
Proper feed storage is also crucial. Damp or stale feed reduces palatability and may introduce mold or pests. Store feed in cool, dry containers to keep it fresh and prevent spoilage. Make sure your feeders have enough space—using inconsistent or cramped feeder setups can limit intake and cause competition or stress. Finally, monitor droppings and feed intake carefully during the transition to catch any problems early, ensuring your flock stays healthy.