

Building a safe and cozy brooder box is essential for raising healthy chicks. You’ll need a sturdy container, ventilation to keep fresh air circulating, and a heat source to keep them warm during their early days.
Done right, your setup will protect your chicks from predators and help them thrive. Below, I’ll walk you through the key steps to create a reliable brooder that sets your little flock up for success.
Choose the Best Container for Your Chick Brooder
A 50-plus gallon container, such as a large plastic tote or stock tank, is ideal for brooding fewer than 15 chicks. It provides ample space for movement without being overly cumbersome to manage. Larger containers offer enough room for chicks to stay comfortable and reduce stress, which promotes healthier growth. When choosing a container of this size, ensure it has smooth sides to prevent chicks from climbing out and to make cleaning easier. Always verify that the container’s walls are enclosed and that it’s simple to disinfect, helping maintain a sanitary environment for your chicks. For a pre-assembled alternative, a kit constructed from tung wood offers a safe, comfortable environment without the need for additional purchases. For long-term use, consider a design that includes a secure run to give chicks safe outdoor access as they grow. To keep costs low, you can build the container yourself using common plywood and a straightforward assembly process. When securing fencing or attachments to the container, using t post clips ensures a firm and reliable connection.

Snaps tight keeping contents fresh

Clear Plastic COVERS only for G.Q.F. brooder troughs

Brooder Covers: Replacement plastic covers are specifically designed for the EcoGlow Safety 1200 Chick Brooder to make cleaning easier
Build a Sturdy Brooder Frame and Secure the Walls
To build a sturdy brooder frame, start with a rigid perimeter made from straight lumber or plywood strips. This keeps the box square and prevents twisting. Dry-fit each piece to ensure 90-degree corners, which are essential for proper load transfer and overall stability. Don’t skip frame reinforcement; install vertical corner posts and interior braces to strengthen the structure. These elements provide solid attachment points for the walls and help prevent racking during cleaning or when handling the brooder. Consider the chickens’ water cups as an additional attachment point for wall-mounted hydration systems. To further enhance the brooder environment, using hemp bedding provides excellent absorbency and odor control for the hens. Choosing a roost height that prevents crowding also improves airflow and reduces moisture buildup.
When securing the walls, use exterior screws with pre-drilled pilot holes to avoid splitting the wood or plywood. Place multiple fasteners at each corner and along long seams to distribute stress evenly and increase durability. For heavier builds, consider bolting through the side frames for extra strength. Before fastening all the walls, align them carefully and clamp them in place to prevent gaps. Anchor each wall at both the top and bottom to minimize flexing and movement. Once assembled, recheck the frame for squareness and tighten all fasteners; small shifts can weaken the structure over time.
Install Brooder Ventilation That Keeps Predators Out
Ventilation openings for a brooder should be placed high on walls or the lid to keep predators out while allowing steady airflow. Installing vents at the top reduces crawling access since predators can’t easily reach these openings. Use opposite-side vents to create a gentle cross-breeze, which helps circulate fresh air without causing direct drafts on the chicks. Cover all openings with ½-inch galvanized hardware cloth; avoid chicken wire or window screening as raccoons can tear through these materials. Secure the mesh tightly with washers to ensure a snug fit, since staples are likely to come loose over time. For adjustable airflow, especially in warmer weather, fit the vents with flaps that can be opened or closed as needed. Drill small upper holes instead of large gaps to prevent paws or snouts from reaching inside. Mice cannot squeeze through ½-inch hardware cloth, but they can pass through 1/2 inch mesh only if the openings are stretched or damaged. Using a brooder plate instead of a heat lamp reduces fire risk and provides more natural heat distribution for chicks. Regularly inspect all covers and fasteners for tears or looseness to maintain predator protection while keeping the air fresh. For optimal nutrition, also ensure that chicks receive a quality layer feed once they begin laying.
Set Up Heat Sources Safely and Adjust Temperatures Weekly
To set up your heat source safely, hang the lamp at a height that creates a 95°F warm zone at chick level for the first week. Ensure the lamp is securely fastened so it cannot fall into the bedding, as this poses a serious fire risk. Keep cords out of reach and check the setup often, especially after bedding changes. Consider incorporating DIY Chick Waterer to further reduce your brooder costs. As the chicks grow, you’ll gradually lower the heat by about 5°F each week, so by week six, the temperature should be around 70°F. Use a reliable thermometer to monitor the temperature, but also watch your chicks’ behavior—if they spread out, it means it’s too hot, and if they huddle, it indicates they need more warmth. Prioritizing safety not only protects your chicks but also keeps your setup secure. For an alternative that reduces fire risk, consider using brooder plates which provide radiant heat from below and are more stable than hanging lamps. For a detailed comparison of similar safe options, review the top radiant heat panels available on the market.

SMART TEMPERATURE CONTROL: Adjust the temperature from 82°F to 95°F (28°C to 35°C) with digital controls. The built-in thermostat helps maintain the selected setting for chicks, ducklings and other suitable young poultry.
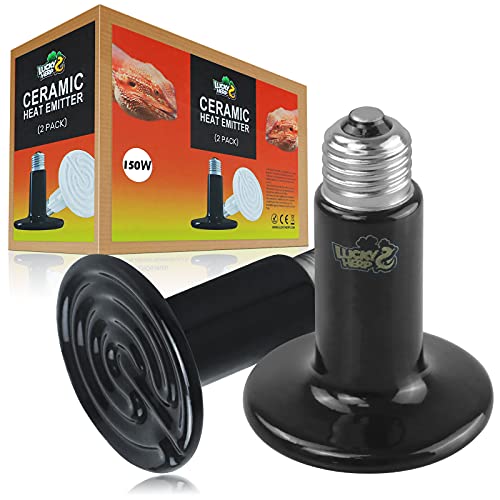
🦎No Light Emitted - The heat lamp bulb only generates heat during use, and does not emit light. It provides sufficient heat for your pets so that they can feel the warmth you made for it in a cold environment. Especially when it is used at night, it will not affect the pet's sleep.

SMART TEMPERATURE CONTROL: Adjust the temperature from 82°F to 95°F (28°C to 35°C) with digital controls. The built-in thermostat helps maintain the selected setting for chicks, ducklings and other suitable young poultry.
Add Bedding, Feeders, and Waterers for Daily Chick Care
Consistent bedding, feeders, and waterers are essential for daily chick care. Use pine shavings as bedding material; spread a 2- to 3-inch layer across the brooder floor. This depth helps absorb moisture, control odor, and provides a comfortable surface. Avoid cedar shavings because the oils can irritate chick lungs. To further reduce costs, you can use cardboard boxes as a temporary barrier for the brooder walls. For mature chickens housed in coops, ensuring proper fresh air circulation is equally important for respiratory health. For outdoor runs, mulch options like pine shavings can also help manage moisture and odor effectively.
For the first few days, line the brooder with paper towels to help chicks find their feed easily. After that, replace the paper towels with shavings. Remove wet spots daily, particularly around waterers, to keep the environment dry and minimize ammonia buildup.
Set up small, clean feeders and keep them filled with poultry starter feed. As the chicks grow, raise the feeders to prevent contamination and spillage. Always ensure that feed is available and clean to promote healthy growth.
Use chick-specific waterers with shallow lips to prevent drowning. Clean and refill waterers daily to ensure fresh water at all times. Place two 1-quart waterers for every 25 chicks; having enough water sources encourages proper hydration. Regular maintenance and attention to dryness help keep your chicks active and healthy.

Highly Absorbent : Superior absorbency to keep cages or coops dry and clean by locking in moisture. Natural pine scent helps neutralize, reducing the need for frequent changes

Our Product Includes: 1 lb of poplar wood shavings pet bedding, this product is compressed packaging, please rub the wood shavings with your fingers before use
