

If you’re wondering how to install sturdy metal fence posts, you’re in the right place. Properly setting posts ensures your fence will stay straight and last for years.
You’ll learn step-by-step how to mark, dig, and secure each post for a professional-looking finish.
Keep reading to get your fence installed quickly and confidently.
Why Metal Posts Need Different Handling
Because steel posts rust when moisture contacts the base metal, you must treat them differently from wood posts. Start with protective coatings like galvanization or specialized rust inhibitors to prevent corrosion. Be careful when handling coated posts to avoid scratching or scuffing the protective layer, as damage exposes iron and accelerates rust. Every weld, drilled hole, or cut edge creates a potential entry point for moisture and corrosion, so touch up these areas immediately with cold-galvanizing spray or similar repair products. You’re not just installing a post; you’re sealing it against moisture infiltration. Just as chicken coop toys require careful selection to prevent harm, selecting the right protective coating for your metal posts is critical to avoid rust. Similarly, galvanized hardware cloth is widely relied upon by backyard chicken keepers for its corrosion-resistant properties. For organic pest control around the post base, a light dusting of diatomaceous earth can also help deter crawling insects that are attracted to moist soil conditions.
Avoid trapping water at ground level with uncoated metal ends. Instead, slope the concrete dome away from the post to prevent water pooling around the base, which speeds up rust formation. Incorporating a gravel drainage layer helps carry moisture away from the junction where the post meets the ground, significantly extending the post’s lifespan in moisture-prone environments.
Map the Fence Line With Stakes and String
To map the fence line accurately, start by setting your endpoints and corners with stakes placed just outside the planned fence path. Drive stakes at every start, end, corner, and gate opening, ensuring they are outside the boundary so the string can run freely without obstruction. Double-check each stake against the property line before proceeding. Choose a mason’s line and stretch it tightly, like a guitar string, between the stakes to define the fence plane; position it on the outside edge where fence panels will align. For sharp corners, use the 3-4-5 method: measure 3 feet in one direction, 4 feet perpendicular, and adjust until the diagonal measures exactly 5 feet; this ensures perfect right angles. Square each corner carefully to keep your fence straight along its entire length. When determining line-post locations, measure on center from corner to corner, matching typical spacing for your fence style and gate setup. Mark each post spot with spray paint directly under the string. Before you start digging, verify each post location by dropping a plumb bob from the string. Additionally, inspect the string’s tension to ensure it remains taut and straight; a loose string can lead to misaligned posts and an uneven fence line. If you were instead constructing a DIY duck egg incubator, you would similarly prioritize precise temperature and humidity control to ensure successful hatching. For a related project, top quail egg incubators offer reliable temperature regulation for smaller eggs. For poultry bedding needs, hemp bedding for hens provides excellent moisture control and dust-free comfort.
Choose Metal Post Depth: One-Third Rule and Frost Line
The recommended depth for setting metal posts is at least 36 inches, especially in colder climates. Start with the one-third rule: bury about one-third of the total post length. For example, an 8-foot post for a 6-foot fence would be approximately 32 inches below grade. However, in freezing conditions, this rule alone is not sufficient. You must check the local frost line and ensure the bottom of the footing is at least 6 inches below that level. If the frost line is deeper than your calculated one-third depth, dig to the frost line instead. Duck keepers seeking optimal nutrition should consider high-quality cracked corn to support healthy growth and feather condition. Always opt for the deeper depth to prevent frost heave, which can push shallow posts up and damage your fence. Additionally, consult local building codes, as they often specify minimum depths—commonly between 36 and 48 inches—that take precedence over general guidelines. For the best stability, choose the greater of the two depths: the frost line or the one-third rule. This process mirrors the precision required when using t post clips to secure fencing rails, as both methods rely on correct fastening and depth for long-term durability. As a simple guideline, using the one-third rule along with frost line requirements ensures your posts remain stable and level through seasonal ground shifts.

H-Shaped Design for Maximum Stability: The H-shaped double-layer steel bracket wraps around your wood post on both sides, locking it in place with 5 assembly screws. Widened...
Dig a Stable Hole: Diameter, Sides, and Gravel Base
For a stable metal fence post, dig a hole about three times the width of the post. This size provides enough space for support and ease of installation. Ensure the sides are shaped to enhance stability; a bell-shaped hole—wider at the bottom—is preferable, especially in looser soil types, as it resists lateral movement better than straight-sided holes.
Prepare the soil according to its type: clay retains shape well but drains poorly, so extra drainage features are helpful; sandy soil tends to collapse, so additional stabilization may be necessary. Add a layer of 2 to 6 inches of gravel at the bottom of the hole, which improves drainage and reduces moisture around the post’s base. Compact the gravel in small lifts to create a firm, level footing, but remember that this gravel layer reduces the total space available for your main fill—so adjust the hole depth accordingly. Similar to how laying hens require oyster shell to support strong eggshell production, ensuring proper drainage here prevents base corrosion and structural weakness. For the best results, select gravel that is clean and angular to lock together well and maximize drainage. When installing wire panels, you may need to cut welded wire to fit precisely around the posts.

1/2" CLEAN CRUSHED LIMESTONE – #78 Limestone is an angular crushed stone approximately 1/2 inch in size with natural gray tones, providing a clean, durable stone for outdoor projects.
1/2" CLEAN CRUSHED LIMESTONE – #78 Limestone is an angular crushed stone approximately 1/2 inch in size with natural gray tones, providing a clean, durable stone for outdoor projects.
1/2" CLEAN CRUSHED LIMESTONE – #78 Limestone is an angular crushed stone approximately 1/2 inch in size with natural gray tones, providing a clean, durable stone for outdoor projects.
Set, Brace, and Adjust the Metal Post Plumb
After placing the gravel base and compacting it, insert the metal post into the hole. Use a level on two adjacent sides to check if the post is perfectly plumb, verifying both front-to-back and side-to-side alignment. Attach temporary angled braces to these sides, driving stakes 24 to 36 inches away. Secure each brace with one screw, allowing adjustments later by loosening or tightening as needed.
Next, perform adjustments by pushing or pulling the post against the braces until the bubble in the level centers on both axes. Adjust each direction separately to prevent disturbing the other. Frequently recheck the alignment with a taut string line to ensure the fence run remains straight. Use tension on the braces to make micro-adjustments, rather than forcing the post directly, which could cause misalignment.
Once the post is perfectly plumb, tighten the braces securely to their stakes. Keep the post supported from multiple angles to resist movement and drift. After tightening, recheck that the post remains plumb. Leave the braces in place until the concrete sets fully, as removing them early can cause the post to shift and ruin your alignment.

Premium Material: The fence post repair kit is made of heavy-duty thickened metal, it's 13-gauge with a seamless welded structure that eliminates weak joints, delivering outstanding strength to withstand high pressure and heavy loads. The upgraded heavy-duty post repair kit weighs 3.97lbs per piece, ensuring maximum stability for reinforcing leaning or damaged fence posts

HEAVY-DUTY FENCE POST REPAIR KIT: Made from heavy-duty galvanized steel with special coated surface, it's incredibly sturdy and can withstand heavy loads. Suitable for 4x4/6x6 post stakes, it secures them firmly

Suitable for wooden and metal post bracing
Mix and Pour Concrete Around the Metal Post
Once the metal post is plumb and braced, you can mix and pour concrete around it. For quick-setting concrete, use the dry-pour method: place the mix directly into the hole, then add water according to the manufacturer’s instructions. This technique is simple and effective, but you can also use ready-mix or site-mixed concrete with a strength of 3,000 PSI. Typically, two 50-pound bags are enough for a 4×4 post in a standard post hole. Building your own DIY feed bin can help reduce overall project costs by repurposing leftover concrete and materials.
Pour the concrete in layers, or lifts, for better compaction. Use a shovel to work the concrete and fill any voids, ensuring the post makes solid contact with the base. Add water gradually to prevent dry pockets and to achieve a uniform set. After pouring, allow the concrete to cure for at least 24 to 48 hours before removing the braces. Follow the curing times specified on the concrete bag, especially when using fast-setting mixes which harden more quickly. Proper curing and mixing techniques are essential to create a strong, lasting foundation for your fence. For maximum stability, concreting is the most durable method for securing posts.

QUICK SETTING: Sets in 20 minutes
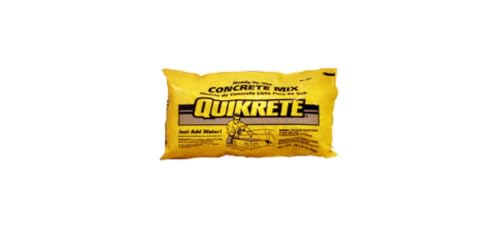
It is easy to use
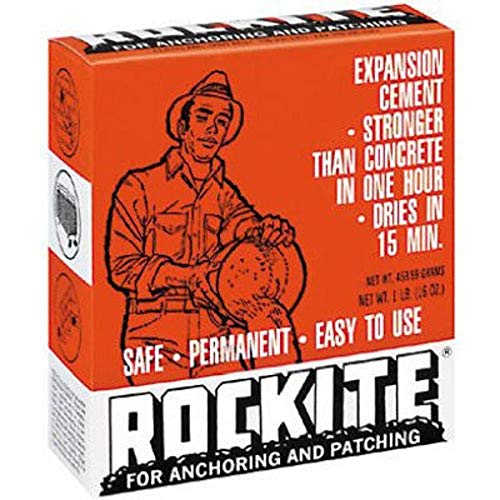
This item Rockite expansion cement 15 min 1 lb
Stop Concrete at Ground Level and Slope for Drainage
Pour concrete up to ground level and shape the top with a gentle crown or slope to direct water away from the post. Keep the concrete flush with or slightly above the surrounding soil—not buried below grade. This raised collar prevents surface water from pooling at the post base, reducing the risk of corrosion. To promote water runoff, create a slight outward slope or taper around the post on all sides, avoiding flat basins that trap rainwater. This shape sends moisture away from the metal post rather than allowing it to collect at ground level. The slope’s importance is due to the higher corrosion risk where moisture persists. A well-formed top combined with a gravel base beneath the footing helps minimize standing water, further protecting your post’s longevity.
Wait 24 to 48 Hours Before Attaching Panels
You should wait a full 24 to 48 hours before attaching your fence panels. Although the concrete might feel firm within a few hours, it hasn’t yet developed enough strength to support the weight and pull of the panels. Post curing isn’t complete after the initial set, and attaching panels too early can cause the posts to shift out of alignment. This premature adhesion can lead to leaning posts or uneven fences over time. For those also building a coop, the best chicken coop for 12 hens requires similar patience to ensure structural stability.
Even if the top of the concrete feels dry, the base remains vulnerable. For standard concrete mixes, a 24-hour wait is the minimum to ensure adequate stability, but waiting 48 hours provides even better support. Quick-setting concrete can sometimes be handled in as little as 4 to 8 hours, but always check the manufacturer’s instructions for specific timing.
Weather conditions can influence curing time significantly. Cold, wet, or windy weather may extend the necessary wait. Rushing the process risks compromising your fence’s durability and appearance, so patience is key. Proper curing ensures your posts stay plumb and your fence remains level and secure for years to come.
Avoid Spacing Errors With Pre-Sized Panels
Matching post spacing precisely to your panel width is crucial when installing pre-sized metal fence panels. For 6-foot panels, set bays to 72 inches plus the width of the posts, ensuring the center-to-center spacing aligns with the panel length. For 8-foot panels, the spacing should be 96 inches. Always refer to the manufacturer’s spacing chart rather than relying on generic rules, as variations can occur between brands and products. Rapid extraction techniques similar to those used for removing concrete-set posts can help if a post needs to be relocated due to spacing errors. If you are building your own setup, consider that DIY chicken harness materials can offer insights for low-cost custom posts.
Use a fixed string line to measure from one point to another, maintaining alignment for all posts. Double-check each mark to avoid cumulative errors that can cause misalignment over the entire fence line. Remember to account for post width and bracket thickness; both reduce the open space available for panels to fit into. If the system specifies a 72 1/4-inch bay, follow that measurement exactly to ensure proper fit. Regular replacement schedules prevent nesting pad degradation, which can compromise safety.
Avoid mixing metric and imperial measurements, as this complicates spacing calculations and can lead to installation errors. Keep in mind that you need one more post than the number of panels to properly support the fence structure. For a clean, finished look, match your post color to the fence material, but prioritize accurate spacing since it directly affects the ease of panel installation and overall appearance.

Backyard Privacy Enclosure: Our vinyl fence panel set includes 3 panels measuring 50 x 48 in, ideal for concealing outdoor items like trash bins, pool equipment, and air conditioners, keeping your backyard neat and attractive while meeting HOA guidelines

The white garden fence size & material: Fence panel 18” high, overall length 20feet in one set (1set composed by 13 panels), The metal garden border panel made of iron wire inside then powder coated surface outside for rustproof material.

【𝐍𝐨-𝐀𝐬𝐬𝐞𝐦𝐛𝐥𝐲 & 𝐏𝐫𝐞-𝐋𝐢𝐧𝐤𝐞𝐝 𝐃𝐞𝐬𝐢𝐠𝐧】Our decorative garden fence with single panel size 32" high x 15" wide,8 panels in total.Simply unfold the folded fence and place it directly for immediate use! No tools and one person can finish the setup,perfect for busy homeowners, garden enthusiasts who need a hassle-free garden edging solution.The tight pre-linking structure ensures stability while allowing easy unclipping of individual sections for custom length adjustments.
Check Alignment, Fasteners, and Stability Before Loading
Ensure alignment, fasteners, and stability before loading panels or tensioning the fence. Start by sighting down a string line to check for straightness and verify each post with a level to confirm verticality. Tighten bolts following a consistent pattern, and dry-fit rails before making final fastening to prevent misalignment. Use temporary braces to keep posts plumb while the concrete cures, and do not remove them until the post stands stable on its own. Confirm that the soil or concrete fully surrounds the base, ensuring proper support. Wait at least 24 to 48 hours for concrete to cure before applying any load. When testing stability, apply light pressure first—any movement indicates rework is necessary. Finally, inspect the entire fence line for even spacing and a uniform vertical plane before tensioning panels or attaching hardware.