

Wondering how to keep your chicken coop clean and healthy? A thorough cleaning not only keeps pests and disease at bay but also creates a cozy environment for your flock.
You’ll want to remove manure and old bedding, scrub surfaces, and disinfect properly—then give everything plenty of time to dry before adding fresh bedding.
Keep reading to learn exactly how to do it right.
How Often Should You Actually Clean Your Chicken Coop?
Cleaning your chicken coop should be done regularly to maintain a healthy environment. You’ll want to remove visible droppings and refresh food daily to prevent buildup. Weekly bedding changes are essential to keep ammonia levels low, which helps protect your flock’s feather health. Immediately spot-clean wet litter to prevent moisture issues that can lead to diseases. Using predator-resistant poultry netting can further secure the coop by keeping rodents and other pests from entering.
Inspect the coop monthly for leaks and unusual odors. Adjust your cleaning schedule if you notice signs like persistent smell or dampness. Smaller coops or those with high stocking densities may require deeper cleanouts every 1 to 3 months. For those raising smaller breeds, selecting a well-ventilated coop can significantly reduce moisture buildup and extend the time between thorough cleanings. Larger, well-ventilated coops can often go up to twice a year between thorough cleanings. Maintaining a clean coop not only supports your chickens’ health but also deters predators by reducing hiding spots for rodents and insects. Always clean sooner if you see visible droppings, damp litter, or a strong ammonia smell, regardless of your regular routine. To further simplify daily care, an automatic chicken coop door can help regulate access and keep the coop secure between cleanings.
3 Reasons a Dirty Coop Risks Your Whole Flock’s Health
A dirty coop actively threatens your entire flock’s health through several harmful effects. First, ammonia from decomposing droppings accumulates quickly in unventilated spaces, damaging your birds’ respiratory systems. This buildup irritates their eyes and lungs, making them more vulnerable to bronchitis and pneumonia. Ensuring proper coop ventilation prevents ammonia from reaching dangerous levels, thus protecting their breathing. Second, unsanitary conditions foster the growth of bacteria and parasites. Damp litter and manure are ideal environments for pathogens like E. coli and Salmonella, which can cause serious illness. Additionally, coccidia thrive in caked waste, further increasing disease risks. Regular cleaning and dry bedding disrupt the life cycle of these harmful organisms, reducing health threats. Applying dehydrating diatomaceous earth to dry bedding can further suppress mite and parasite populations by physically damaging their exoskeletons. Finally, a dirty coop also invites pests such as lice, mites, flies, and rodents. Wet waste and accumulated feed attract these parasites, which cause stress and weaken your flock’s immune system. These pests can also spread disease and reduce egg production. Keeping bedding clean and dry, along with proper pest management, is essential to maintaining a healthy, productive flock. For cost-effective storage, consider building a DIY feed bin to keep feed dry and free from pest contamination. Choosing the best poultry grit also supports digestion, as it helps birds grind feed in their gizzards for better nutrient absorption.
Step 1: Move Your Chickens and Clear Everything Out
To start cleaning a chicken coop effectively, you first move your chickens to a temporary, predator-proof enclosure that is dry and shaded. Choose a spot close enough for easy monitoring but far enough away to prevent re-entry. Do this during daylight when chickens are calmer and less stressed, making the relocation smoother.
Next, clear everything out of the coop. Remove feeders, waterers, nesting trays, and removable perches. Empty the nesting boxes completely, stripping out old bedding, eggs, and feathers. Take out all clutter, such as toys and extra containers, that might block access or trap dirt. Clearing the space exposes every surface for thorough cleaning. If you are building the coop yourself, selecting cost-saving materials from the start can simplify future maintenance and cleaning. Choosing a design with a well-built run reduces the areas where debris and waste accumulate, making this initial clearing step faster. Consider using T post clips to secure temporary fencing around your cleaning area for added safety.
With the interior empty, you improve airflow inside the coop, which helps it dry faster after washing. Removing all items first prevents contamination between dirty accessories and disinfected surfaces. Don’t put anything back until the coop is fully dry and odor-free.

Prevent Predators:2 roll chicken coop predator proof apron total about 11-5/8in W x 65 ft L, expertly designed to effectively block predators.Extending the wire mesh to the bottom of the coop prevents predators from digging their way in

Durable Steel Material: Our metal running chicken coop is made of high-quality steel frame, and the chicken coop is strong enough. Stainless steel and galvanized technology make our chicken coops less susceptible to rusting outdoors and more resistant.
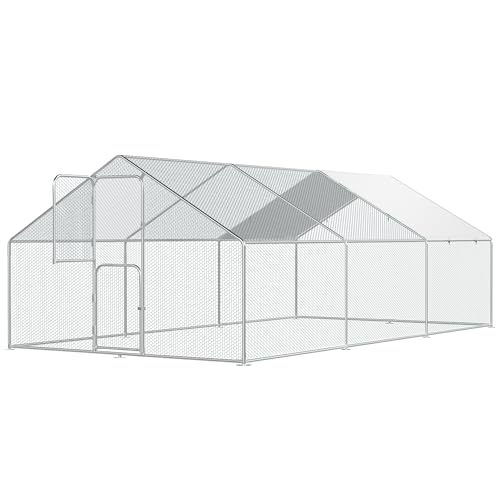
【Upgraded Double Door Design】: This large chicken coop features two up and down lockable doors, make to separate feeding port to prevent escapes, making it safe for animals and easy for everyone to use. No more chickens escaping during feeding! The upgraded version has provided more zip ties to make the coop more secure, added additional ground stakes at frame corner joints.
Step 2: Scrape Out Manure and Remove Old Bedding
To remove manure and old bedding, start by scraping off stuck droppings from roost bars, perches, and nesting boxes. Use a stiff brush or drywall knife to loosen the debris, focusing on areas where droppings accumulate most. Wear gloves and a dust mask, as dried droppings can release irritating dust. Once the manure is loosened, thoroughly strip out all old bedding from the floor and nesting boxes. Use a shovel or pitchfork to lift away compacted litter, leaving the floor completely bare to reduce mold growth and pest hiding spots. Collect all debris from corners and under roost bars until only fine dust remains, then dispose of everything immediately. Avoid letting waste sit near the coop to prevent odor and pest issues. Before moving on to scrubbing, inspect the roof and check for any predator entry points, and ensure your metal roof is securely fastened to prevent leaks and animal intrusion. Leaving the coop empty and bare allows proper airflow and sets a clean stage for further cleaning. Choosing the perfect roost for your chicken coop also requires proper drainage and spacing to prevent manure accumulation and simplify daily scraping. Keeping the coop clean also supports the effectiveness of automatic waterer systems that reduce spillage and contamination.

2-in-1 Chicken Poop Rake - Friendly to your back and knees, ideal for tall users and elderly people for daily chicken coop cleaning. Can be operated with one or two hands. The three-section handle allows for single-handed use, while the four-section handle allows for standing and using both hands, making it even more effortless. Features a stainless steel handle with adjustable rubber grips to reduce hand and back fatigue.

Industrial-Grade Spring Steel Head: Engineered with premium spring steel, our chicken coop scooper offers superior resilience and durability compared to flimsy plastic or standard metal alternatives. It is rust-resistant, weather-proof, and built to withstand heavy-duty daily use in farms or backyard coops without bending or snapping
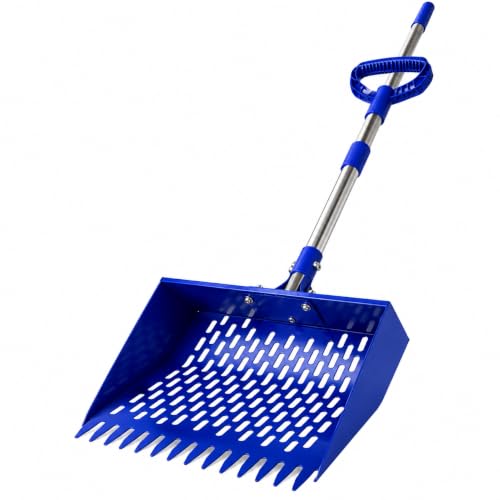
CLEAN YOUR COOP IN MINUTES Spend less time cleaning and more time enjoying your flock. The 10.2" wide metal scoop and built-in rake help sift chicken manure, sand, hemp bedding, and coop debris in fewer passes with less mess.
Step 3: Scrub Every Surface Until It’s Spotless
Scrubbing every surface until it’s spotless is essential to maintaining a healthy coop. Start by gathering a stiff brush, mild dish soap, and warm water. Use these tools to scrub all surfaces, including walls, ceilings, roosting bars, nesting boxes, floorboards, ramps, and beams. Work from top to bottom to prevent dirty water from re-soiling cleaned areas. Consider using a mobile chicken coop design to make washing down walls and floorboards easier by tilting the structure for drainage. Pre-soak caked-on manure for 10 to 15 minutes to soften it before scrubbing. Focus on corners and hidden areas where waste tends to hide. Use enough water to loosen debris and rinse thoroughly between passes to remove grime effectively. Using a brooder plate during the chick stage can reduce early messes by keeping chicks warm and contained. After scrubbing, open doors and windows to allow airflow and help everything dry completely. This step helps prevent residual buildup and keeps pests at bay. Avoid moving on to disinfecting until all surfaces are fully dry. When raising young birds, always verify that protein-rich treats are size-appropriate to prevent choking.
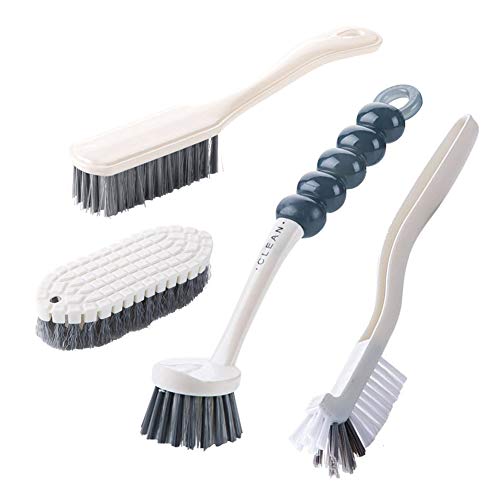
Versatile 4-Piece Cleaning Brush Set : This set comes with a dish brush with built-in scraper, a bendable kitchen scrub brush, an angled grout brush, and a multi-use laundry & shoe brush. From greasy pots to soap-scummed tiles, this cleaning brush set tackles messes everywhere in your home

Scrubbing brush with high quality stiff fibers Brush bristles are soft and firm without damaging surfaces Scrubs large areas with ease Cleans dirt effectively

Ergonomic Design: The peanut-shaped wood body of this hand scrub brush offers an ergonomic grip, ensuring comfortable use during extensive cleaning sessions. Ideal for those seeking a reliable bristle brush for cleaning various surfaces efficiently.
Step 4: Disinfect Without Sending Your Hens Running
Disinfecting your coop effectively involves applying a poultry-safe disinfectant like diluted bleach (1:10) or white vinegar, ensuring all surfaces stay wet for at least 10 to 20 minutes. This contact time is crucial to eliminate microbes hidden in crevices and on surfaces. Be sure to evenly coat floors, roosts, and nesting boxes, paying attention to corners and hard-to-reach spots where germs can hide. Regular deworming with top poultry dewormers can also prevent parasite infestations that complicate cleaning efforts. After the contact period, rinse thoroughly with clean water to remove any residue that could irritate your hens. Proper outdoor ventilation is essential during and after disinfecting; open doors and windows to air out fumes and ensure good airflow. Always follow label instructions for dilution ratios to avoid over- or under-concentrating disinfectants, which can reduce effectiveness or cause harm. Never skip the rinsing step or the contact time, as incomplete disinfecting may leave microbes behind. Finally, let the coop air out completely before reintroducing your hens to a clean and safe environment. For baby chicks, maintaining accurate temperatures with Top Brooder Thermometers provides a similarly essential step for their health. Choosing a raised wire floor design, as recommended in coop reviews, can simplify this cleaning process by allowing droppings to fall through.
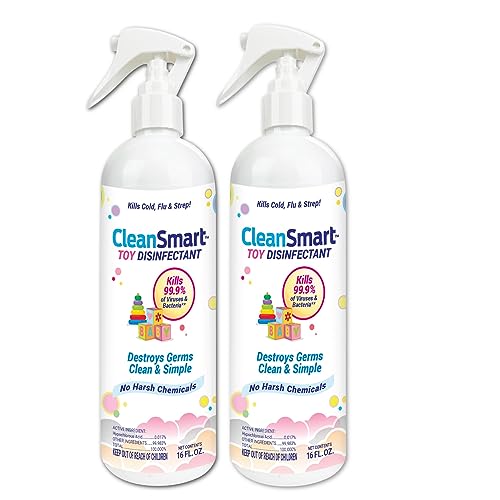
HIGHLY EFFECTIVE AND APPROVED for sanitizing DAY CARE CENTERS in all 50 states

Kills 99.99% of bacteria and viruses

3 IN 1 DISINFECTANT, FABRIC REFRESHER, ODOR ELIMINATOR*: Color safe**** formula disinfect hard surfaces*, eliminate odors and sanitize fabrics
Step 5: Let the Coop Dry Completely Before Reassembly
After cleaning and disinfecting, it is essential to let the coop dry completely before reassembling. This step should take at least 48 hours to minimize the risk of bacterial growth. Check all corners, seams, and under perches thoroughly, as hidden damp spots can harbor moisture and bacteria. Surfaces must feel completely dry to the touch, with no condensation or wet patches remaining. For those on a budget, selecting a model from top chicken coops can ensure durability and ease of cleaning. A well-designed run with galvanized mesh prevents predators and allows airflow, contributing to a cleaner, drier coop overall.
Optimize airflow to speed up drying. Open all doors, windows, and vents to create cross-ventilation. Use fans if it’s safe to do so, ensuring the environment stays warm and maintains a relative humidity between 40% and 60%. Proper ventilation not only accelerates drying but also helps prevent residual moisture from lingering. Remember, reassembling the coop too soon risks trapping dampness inside, which can lead to new bacterial or mold growth. Patience and thorough drying are key to maintaining a healthy environment for your poultry.
When and How to Add Fresh Bedding After a Deep Clean
Once your coop is completely dry, it’s time to add fresh bedding. Start by spreading a 3 to 4-inch layer of bedding for materials like pine shavings or hemp, which provides good insulation and absorbency. If you prefer straw, apply 4 to 6 inches to better support its natural bedding qualities. Spread the bedding evenly across the floor, paying extra attention under the roosts where droppings tend to concentrate. In nesting boxes, a shallower layer of about 2 to 3 inches with softer bedding material offers comfort for your hens. For the deep litter method, begin with a 4-inch base, then build it up gradually to 6 to 12 inches over time. Fluff the bedding to keep it loose and better at absorbing moisture. Be sure not to compress it, as fluffy bedding controls odors more effectively. Always ensure surfaces are completely dry before adding bedding; damp floors mean less freshness and increased risk of mold or bacteria growth.


Elevate Your Coop with Our Premium Pine Bedding—meticulously crafted from 100% natural radiata pine. Super absorbent (3x+ its weight), low dust, and naturally odor-controlling, it keeps the coop dry, comfortable, and fresh. Compostable, fluffy and gently cushioning, it turns your chicken house into a clean, forest-fresh haven.
Daily Habits That Delay Your Next Deep Clean
Daily habits like removing droppings from roosts and boards every day can significantly delay your next deep clean. Doing this prevents the buildup of waste and makes thorough cleaning less labor-intensive later. Avoid overfeeding by removing leftovers each night; this helps deter rodents and keeps the area cleaner. Check waterers regularly for spills that can soak bedding and promote dampness, which breeds bacteria. Collect eggs daily and discard any broken ones immediately to prevent pests and contamination. Inspect nest boxes routinely, replacing soiled materials on the spot rather than letting dirt accumulate. Manage litter by fluffing compacted spots and removing damp patches near drinkers, which helps control moisture and reduces odors. Conduct quick checks for wet spots or damage to equipment that might cause leaks. Keep high-traffic areas swept and debris cleared from coop accessories like door tracks to ensure mechanisms function smoothly. Establishing these brief daily routines keeps mess and odors manageable, so your next deep clean is less time-consuming.