

Thinking about building a backyard coop for your quails but not sure where to start? You can keep a small flock comfortably in a coop that provides about 0.5 to 1 square foot of space per bird.
With a straightforward plan, you’ll create a safe, functional space that keeps your quails happy and protected. The full details are below to help you get started.
Choose Your Flock Size to Calculate Quail Coop Floor Space
Your flock size determines your minimum coop floor space. For standard Coturnix quail, allocate at least 0.5 to 1 square foot per bird. If you plan to keep 10 quail, this means you need a minimum of 10 square feet. Jumbo Coturnix require more room, about 0.75 to 1 square foot per bird. Always add a 15% buffer for feeders and waterers, as these do not count toward the birds’ living space. Overcrowding can cause stress, leading to health issues and aggressive behavior. Consider predator-proofing your coop during design, since a cramped space is harder to secure. The calculation is straightforward: multiply your flock size by the space allowance per bird and then add your buffer space. To ensure long-term quality, you can refer to top chicken coops with runs that offer durable construction and predator-resistant features. Providing a separate calcium supplement is similarly important for quail to prevent eggshell defects. Additionally, applying diatomaceous earth to the coop floor and bedding helps control mites and parasites without chemicals.
Build the Frame With Sturdy Posts and Crosspieces
Building the frame with sturdy posts and crosspieces is essential for long-term stability. Use 2×2 or 2×4 lumber for a single-tier structure, but opt for 4×4 posts if you’re constructing larger or multi-level hutches. Measure and cut your corner posts to your desired height, ensuring they are perfectly plumb before attaching the top and bottom rectangular frames. These frames lock everything into a rigid box, providing a strong foundation. Secure the connections with heavy-duty wood screws, and drill pilot holes beforehand to prevent splitting, especially in cedar. Keep the corners square during assembly to ensure a proper fit for later mesh installation. For added strength, incorporate diagonal bracing and floor supports to prevent twisting or shifting under load—this is especially important for larger coops or multi-level designs. Using treated or heat-treated posts enhances durability against moisture and outdoor elements. This solid frame forms a stable base for interior features like perches or nesting boxes, making your coop both sturdy and functional. For a cost-effective material solution, ripping three 2x4s on a table saw provides six 2x2s since 2x2s are nearly as expensive as 2x4s. Many designs also allow you to incorporate a perfect roost into the frame itself, eliminating the need for extra hardware. To keep costs low, consider sourcing scrap lumber from local construction sites or salvage yards, which can further reduce material expenses while maintaining structural integrity. For quail housed in this coop, supplement their diet with a high-protein game bird feed to support optimal health and egg production.

Made from 18 gauge galvanized steel to increase rust and corrosion resistance, creating a stronger, long-lasting joist-to-header connection

By Crafters, For Crafters: Crafting and building with wood is our number one priority. Bringing you more of the wood craft supplies you love is our job. Please dont hesitate to get in touch
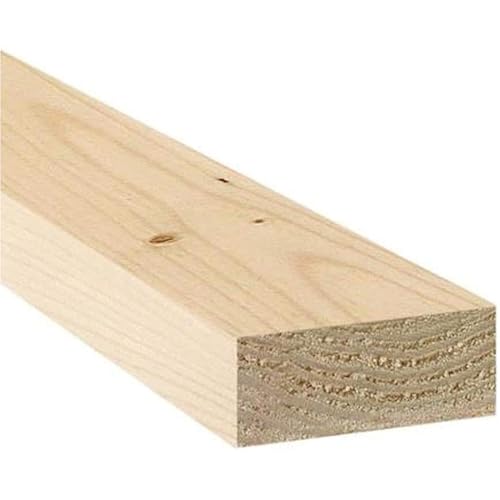
By Crafters, For Crafters: Crafting and building with wood is our number one priority. Bringing you more of the wood craft supplies you love is our job
Set the Right Ceiling Height to Prevent Head Injuries
Setting the ceiling no higher than 12 to 18 inches above the floor helps prevent head injuries in quail. This height limits the birds’ acceleration, so they can’t build enough speed to cause skull fractures or broken necks upon impact. Measure from the floor to the first hard surface they might strike, not the roofline, to ensure accuracy. Avoid the middle range of roughly 18 inches to 5 feet, where quail gain momentum but may not be able to level off before hitting the ceiling. If your coop needs to be taller, consider installing a flexible roof material such as soft netting or shade cloth to cushion any strikes. Also, keep overhead framing and protruding fasteners out of the strike zone. A smooth, low, or padded ceiling is best for keeping your flock safe and injury-free. When supplementing their diet, ensure cracked corn portion sizes are appropriate to avoid nutritional imbalances and obesity. For additional protection in colder climates, apply chicken coop insulation to the walls to maintain temperature without raising ceiling height. To further cut expenses while building, repurpose scrap wood and hardware cloth from other projects, which is a key cost-saving strategy for the entire enclosure.
Install 1/2-Inch Hardware Cloth on Walls and Roof
Start by selecting 1/2-inch hardware cloth for both walls and roof to effectively block small predators while allowing air to circulate. Opt for 19-gauge galvanized steel with a hot-dipped coating, which offers durability for outdoor use. Measure each section carefully, then cut the mesh with tin snips and pre-fit the panels to your framing before attaching. Fasten the mesh using galvanized staples or screw-and-washer combos every 4 to 6 inches, ensuring a secure hold. The double galvanizing process enhances longevity, ensuring extended service life for this outdoor application.
Overlap each seam by at least 2 to 3 inches and secure with hog rings spaced every 3 to 6 inches to prevent gaps. Work from one corner outward, keeping the mesh tight to avoid sagging. After installation, trim any sharp wire ends for safety and reinforce the roof-to-wall connection with extra hardware if needed. Check all gaps and openings, making sure none exceed 1/2 inch, as even small gaps can allow predators to intrude. Properly installed hardware cloth creates a secure, ventilated environment for your quail.

High-Quality Anti-Rust Process This hardware cloth is made from high-strength low-carbon steel wire, combining excellent strength with flexibility. After precision welding, the entire product undergoes a premium anti-rust treatment—hot-dip galvanization—with special reinforcement at all seams and corrosion-prone areas to ensure uniform, dense coating and outstanding rust resistance. This process grants the product superior weather resistance, making it an ideal choice for wire mesh fencing and long-term outdoor applications.
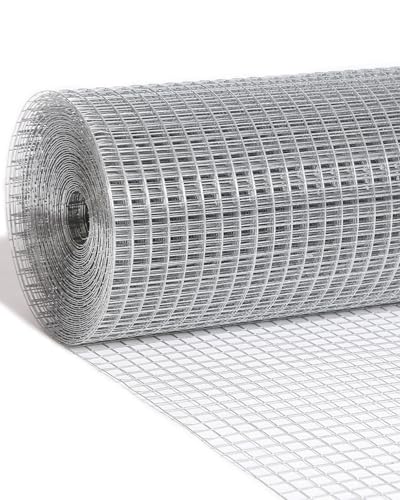
Premium Galvanized Construction – Made with 1/2 inch x 1/2 inch mesh, 48 inches x 100 feet (1.22m x 30.5m), from galvanized annealed steel wire. The wire mesh is double-galvanized after welding, offering exceptional corrosion and rust resistance. It’s securely packed in a durable carton to ensure no torn edges and to keep the product in perfect condition during shipping

Galvanized After Welding: Hot-dip galvanized after welding coats every welded joint, so the heavy duty mesh resists rust and breakage far longer than pre-galvanized wire in rain, soil, and sun.Thicker wire builds a sturdier fence that resists bending and animal push-through
Add a Predator Apron and Secure Two-Action Latches
Add a predator apron and secure two-action security latches to enhance your bird enclosure’s safety. A predator apron extends outward from the base of your coop or run, making it harder for raccoons or other predators to dig underneath. Secure each door with two-action security latches, which require two separate movements to open—such as a spring-loaded carabiner plus a locking latch body. This prevents raccoons from manipulating or bypassing simple hooks or sliding bolts. For additional protection, you can also apply diatomaceous earth around the base of the coop to deter pests like ants and mites. Mount the latches so that doors cannot twist or leave gaps, ensuring maximum security. Regularly check the latches for looseness or damage, and replace if they become compromised. Combining strong mesh, smart locks, and these secure latches creates a layered defense to keep your quail safe from predators. For visual reference, cracked corn is often characterized by bright yellow kernels that are coarsely broken, making them easier to identify and compare to whole grains when selecting feed. When used as a treat, cracked corn provides a palatable energy source for quail, but it should never replace a balanced game bird feed.

【Prevent Predators】The chicken coop bottom wire mesh is designed to prevent digging intruders from burrowing their way into the coop, help ensure the safety and security of the chickens housed inside the coop.

Prevent Predators:2 roll chicken coop predator proof apron total about 11-5/8in W x 65 ft L, expertly designed to effectively block predators.Extending the wire mesh to the bottom of the coop prevents predators from digging their way in

18 Spacious Pockets for Easy Egg Collecting - Our egg collecting apron is designed with 18 individual, secure pockets—perfect for safely gathering fresh eggs without cracks or drops.The pocket is deep enough to hold two eggs. As a premium chicken egg apron and essential chicken coop accessory, it keeps your hands free while you collect eggs, making your daily egg collecting routine simpler and more efficient than using an egg basket for gathering fresh eggs or an egg grabber.
Place Roof and Wall Openings for Safe Ventilation
Place roof and wall openings high on the walls near the roofline, well above your birds’ resting zone, to keep airflow above them while still removing heat and moisture. These openings should be positioned at least 12 inches above the highest roost to prevent chilling your quail. Use opposite walls for cross-ventilation, aiming for about one square foot of vent area per bird. This creates a consistent airflow that helps regulate temperature and humidity inside the enclosure. The same principle of using a simple thermostat to maintain stable conditions is often applied in DIY incubators to prevent overheating. Cut long, narrow slots between studs, then frame them and cover with hardware cloth to ensure security against predators and debris. Consider storm-proofing features such as roof overhangs to block rain and wind, and add adjustable covers for seasonal control, allowing you to close vents during harsh weather. When installing insulation, high placement helps reduce drafts at bird level while sealing lower walls prevents heat loss but keeps ventilation effective. Avoid openings directly above roosts, keeping a clearance of at least 12 inches to prevent chilling your quail while still maintaining good airflow. If you also feed scratch grains, note that they are a high-energy treat and should be given in moderation to avoid nutritional imbalances. For additional protection, ensure the mesh covering your vents has 1/2-inch hardware cloth to block predators and rodents. Proper placement and design of these openings are essential to providing a safe, comfortable environment with adequate ventilation and protection from the elements.
Choose Wire Flooring or Solid Flooring for Easy Cleaning
Wire flooring is the easier option for cleaning your quail coop because droppings fall through the gaps into a tray below, allowing for quick scraping and reassembly. This system requires less daily maintenance since waste removal is efficient and mess-free. Additionally, wire flooring provides better predator protection as its sturdy, suspended design makes it difficult for rodents to burrow in or reach your birds. To ensure safety and durability, select small-gauge, welded wire mesh to avoid foot injuries and prevent sharp edges that could harm your quails. However, wire cages can cause bumblefoot, a sore on the bottom of the feet that may lead to bleeding and infection. You can incorporate cost-saving ideas such as using salvaged materials to build the frame and tray. Applying diatomaceous earth to the flooring helps control any maggots that may develop in waste below the tray. Diatomaceous earth also works as a natural pest control by dehydrating external parasites like mites and lice.

High-Quality Anti-Rust Process This hardware cloth is made from high-strength low-carbon steel wire, combining excellent strength with flexibility. After precision welding, the entire product undergoes a premium anti-rust treatment—hot-dip galvanization—with special reinforcement at all seams and corrosion-prone areas to ensure uniform, dense coating and outstanding rust resistance. This process grants the product superior weather resistance, making it an ideal choice for wire mesh fencing and long-term outdoor applications.
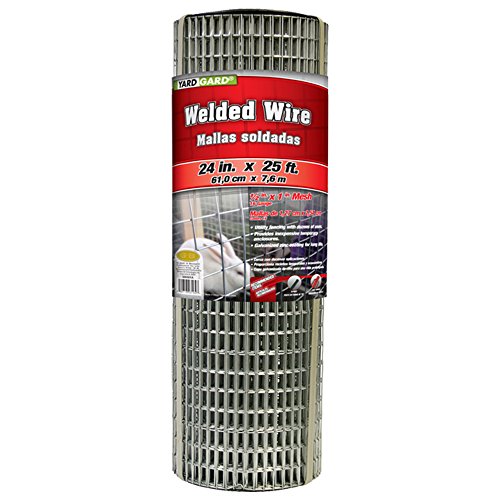
WELDED WIRE FENCE ROLL FOR SMALL ANIMAL CONTAINMENT AND GARDEN PROTECTION – 1/2 in. x 1 in. mesh galvanized welded wire fence roll designed for rabbit fencing, chicken coops, cage wire, and garden protection, helping contain small animals while preventing pests and wildlife from entering fenced areas.

WELDED WIRE FENCE ROLL FOR SMALL ANIMAL CONTAINMENT AND GARDEN PROTECTION – 1/2 in. x 1 in. mesh galvanized welded wire fence roll designed for rabbit fencing, chicken coops, cage wire, and garden protection, helping contain small animals while preventing pests and wildlife from entering fenced areas.
Position Feeders and Waterers for Quick Daily Access
Position feeders and waterers for quick daily access by placing them at ground level or just above the birds’ backs. This reduces waste and contamination while making refilling easier. Position feeders along a fence line or enclosure edge to streamline maintenance. If you’re using a floor pen, elevate stations on a wire rack to prevent birds from trampling waste into the containers. Keep water stations separate from feeders to avoid splashing feed into water containers. Choose shaded, clean areas out of direct sunlight to prevent algae growth and keep water cooler. Use shallow reservoirs that are less than an inch deep or nipple drinkers for safety and cleanliness. Make sure all containers are stable enough to resist tipping over and are easy to inspect quickly. For additional cost savings, consider using a DIY chick waterer built from common materials. For detailed guidance, consult backyard chicken keepers resources for expert insight on positioning feeders and waterers.

Adjustable Height for Growing Chicks: The three sturdy legs can be folded to three different height settings (low, medium, high) as your chicks grow. This keeps the feeder and waterer at the ideal level, ensuring easy access while reducing feed spillage and keeping water clean.

MULTI-USE FEEDER: Lixit's Chick Feeders have a reversible base for food or water! Simply unscrew the reservoir and flip the base to use as desired

Anti Drowning Design for Quail and Baby Chicks: Specially designed to prevent drowning, this quail water feeder ensures quails and baby chicks can drink safely without the risk of drowning, providing peace of mind for pet owners