

Tired of wasting feed, dealing with messes, or contaminating your chicken’s eating area? Building a simple hanging feeder from a five-gallon bucket and a shallow catch pan can be done in under an hour and helps keep things clean.
With just a few drilled holes and a secure attachment, you’ll create a practical feeder that minimizes waste and keeps your flock happy.
By the end of this, you’ll know how to tune the feed flow and position the feeder for optimal use.
Let’s get started on making your own easy, effective hanging chicken feeder.
What Makes a Hanging Chicken Feeder a Smart Weekend Build
Elevating your chicken feeder off the ground makes a significant difference. It helps eliminate three major issues: wasted feed, contamination, and messiness around the coop. When placed higher, spillage can decrease by 5% to 25%, meaning each refill lasts longer. This setup also prevents droppings and damp bedding from entering the trough, reducing bacteria growth and spoilage risks. Fewer contact points with the floor mean fewer pests attracted to leftover feed or damp areas. When choosing your materials, weigh options like galvanized steel for durability against food-grade plastic for lighter weight, and consider comparing coops with runs for additional structural inspiration. Ensure the hanging points are secure and that edges are smooth to avoid injuries and accidents. This smart build simplifies daily chores by keeping conditions cleaner and feed consumption more efficient. Chickens naturally scratch the ground, so an elevated feeder restricts scratching at the feed and minimizes waste. For those who prefer set-it-and-forget-it convenience, consider adding a timer for easy feeding to automate the process. A well-designed coop layout also prevents moisture buildup that can ruin feed and bedding.
Hanging Feeder Supplies: Bucket, Pan, Bolts, and Rope
To set up your hanging feeder, start with a 5-gallon food-grade bucket. Its thick walls make it ideal for drilling holes without cracking. A secure lid is essential to keep the feed dry and prevent rodents from accessing it. For the catch pan, choose a shallow metal or plastic container; it helps reduce waste and keeps the feed stable as birds perch and feed. Use a 1/4-inch bolt, washers, and a wing nut for easy assembly. Alternatively, an eye bolt can connect your rope directly to the bucket’s rim. For suspension, a strong rope or chain should support the entire weight of the full bucket. Use equal-length hangers on both sides to keep the feeder level. Always deburr drilled holes to prevent sharp edges that could damage the rope or harm birds, and check your hardware regularly for rust or wear to ensure safety and longevity. Four evenly spaced holes drilled with a spade bit allow chickens to scratch and access fresh feed. For a more durable build, consider using galvanized hardware to prevent rust over time. To further reduce costs, repurpose a sturdy bucket from bulk food supplies instead of buying new. A step-by-step assembly guide can help ensure the holes are positioned correctly to avoid feed spillage.
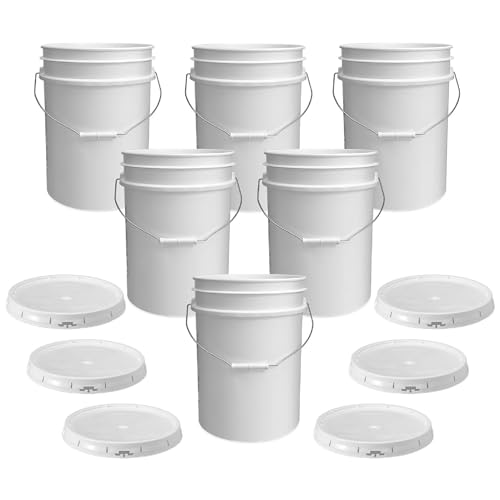
Made To Handle More: Tackle bulk storage with a plastic bucket and airtight gasketed tear strip lid made from sturdy 90 mil HDPE plastic. It’s a dependable pick for pantry staples, utility use, and everyday organization when lightweight containers won’t cut it.

BAGS ONLY, NO BUCKET INCLUDED: The package comes with food grade bags for 5 gallon to 7 gallon buckets.

Made To Handle More: Tackle bulk storage with a plastic bucket and airtight gasketed tear strip lid made from sturdy 90 mil HDPE plastic. It’s a dependable pick for pantry staples, utility use, and everyday organization when lightweight containers won’t cut it.
Build the Easiest Bucket-and-Pan Feeder in Under an Hour
To build a sturdy hanging feeder in under an hour, you’ll need a 5-gallon bucket, a shallow feed pan, a drill, and a 2-inch hole saw. Start by marking three to four evenly spaced holes near the bottom edge of the bucket. Drill through these marks carefully, then smooth out any sharp edges with a file to prevent injury or feed from catching on them. This design ensures ample food supply and minimizes waste, as the gravity feed system automatically refills the pan. For a similar waterer, you can use a chicken waterer kit to simplify the process. Next, place the bucket inside the pan, aligning it centrally. Secure them together using a bolt, washer, and nut through the bottom of the bucket. This mechanical fastening method avoids the need for glue or adhesives, saving time. Attach the lid tightly to keep the feed dry and prevent moisture buildup. Hang the feeder off the ground, ideally from a sturdy hook or branch. For added stability, use T post clips to secure the hanging hook to the support structure. The gravity feed system will automatically refill the pan as your flock eats, and the elevated position helps deter predators by making it harder for rodents to access the feed. Once assembled, check the balance, make any necessary adjustments, and hang your feeder—all in less than an hour. For additional pest prevention, you can dust the feed pan with food-grade diatomaceous earth to naturally control mites and insects.

No-waste design: Chicken feeder features a no-waste design with the feed opening extending downward, solving the problem of spilled feed, avoiding feed waste and providing a cleaner coop for your chickens. With the chicken feeder you can feed your chickens efficiently, avoiding mess and waste, saving you money and time. We recommend a distance of 3 inches between the feeder hole and the bottom of the bucket

No-waste design: Chicken feeder features a no-waste design with the feed opening extending downward, solving the problem of spilled feed, avoiding feed waste and providing a cleaner coop for your chickens. With the chicken feeder you can feed your chickens efficiently, avoiding mess and waste, saving you money and time. We recommend a distance of 3 inches between the feeder hole and the bottom of the bucket

HIGH-CAPACITY DESIGN: Built to hold up to 30 lbs of feed, this large chicken feed dispenser ensures multiple days of feeding without the need for constant refills, making it ideal for busy poultry keepers managing flocks of various sizes.
Hang It at the Right Height for Your Flock?
Hang your feeder so the lip or feed opening aligns with your chickens’ backs or where the neck meets the back. This height typically ranges from 6 to 10 inches above the ground for most standard breeds. Proper placement ensures comfortable feeding, minimizes waste, and keeps feed cleaner by reducing excess spillage and contamination. As your flock grows or changes, adjust the height accordingly. For broilers, position the feeder level with the top of their breast or back. For smaller or mixed breeds, reference the shortest birds to ensure access without strain. Keep in mind that deep litter buildup can shift the optimal height, so check and readjust periodically. Too low increases the risk of contamination, while too high can make it difficult for the birds to reach the feed comfortably. Using a food-grade diatomaceous earth can also help with external mite control in your coop environment. Top quail egg incubators also require careful height adjustments to ensure comfortable access and minimize waste. For a flock of eight, selecting a coop with ample space helps maintain proper feeding dynamics and reduce competition.

【Elevated Design Keeps Feed Clean】Unlike traditional ground-level models, our chick feeder and waterer set features a stable tripod base with adjustable legs. This raises the unit off the ground, helping to prevent baby chicks from scratching bedding or dirt into their food and water for a cleaner feeding area.

HEIGHT ADJUSTABLE: 2 Pack Metal stand has 4 adjustable height options (7.5" to 12.2"). Keep your coop dry and clean by easily customizing it to the perfect height for your chickens.

Easy Top Fill Feeder: The chick feeder designed with top fill feature,it can be simply remove the lid and filled with chick feed.Make refill the feeder more easier. US Patent: US 11,844,333 B2 Any unauthorized copying or imitation of this BASE FOR PET FEEDER AND PET FEEDER for commercial purposes will result in patent infringement
Test Your Hanging Feeder Before Letting Birds Peck
Before allowing your birds to peck at the new feeder, it’s essential to run a few straightforward tests to identify potential issues. First, focus on safety: give the feeder a firm tug and shake it thoroughly to ensure all hooks, chains, and cords are secure. Look for loose fasteners, bent hardware, cracked plastics, or frayed or worn ropes. Make sure your support structure can handle the filled weight without sagging or showing signs of strain. After filling the feeder, recheck all joints to see if the added weight causes any weak spots or instability. Similarly, applying the same quick fence staple removal technique of testing each fastener under tension can reveal hidden weaknesses in your hanging hardware. Choosing the best cracked corn for your feeder will also help ensure consistent flow and reduce waste. For optimal chick health, consider using a brooder box designed to minimize drafts and maintain stable temperatures.
Next, assess the feed flow. Tap along the edge of the pan as if a bird was pecking to observe how feed responds. If feed clogs or rushes out too quickly, adjust the opening accordingly. Ensure the feeder hangs perfectly level; tilting can cause spilled feed and waste. Simulate pecking to confirm the feed drops smoothly without bridging or clumping, and watch for spills during this test. Finally, monitor your birds during their first hour of access. Look for signs of hesitation, blocked flow, or over-swinging; if any issues arise, fix them before giving the entire flock access.
Reduce Waste on Your Hanging Chicken Feeder
Hang your feeder at beak level, approximately in line with your chickens’ backs. This height prevents them from scratching and tossing feed outside the trough. Keep it off the ground to avoid contamination from bedding and manure, which can lead to spoilage and health issues. Mount the feeder steadily on a support that won’t tip easily, reducing spills and waste. Position it away from high-traffic areas to prevent accidental bumps. To conserve feed, place a catch tray underneath to collect crumbs and prevent them from scattering on the ground. Regularly measure daily portions and refill only about a third full to avoid overfilling and spoilage. Smaller, more frequent refills keep feed fresh and minimize waste.

Coloch small poultry feeder set contains 3 colors: red, green and yellow, 2 for each. You can use different colored feeders for different birds to avoid confusion. The feeder measures 11.9x 3.9x 2.8 inches, perfect for farm or home use.

【16 Gallon Large Capacity with Clear View Window】This chicken feeder features a clear acrylic window, allowing you to instantly check the feed level without lifting the lid. With a 16-gallon capacity, it supports medium to large flocks for extended feeding sessions. Avoid frequent feed replenishment, saving you valuable time and energy.

【TURN KITCHEN SCRAPS INTO FEED — CLOSE THE LOOP BETWEEN YOUR KITCHEN AND COOP】 Most backyard keepers compost or feel guilty tossing veggie scraps, bread ends, and fruit peels. This feeder sends them to your flock. Load today's kitchen or garden scraps into the tray, place it in the coop, and let your flock turn leftovers into feed. It creates a simple kitchen-to-coop cycle: scraps become feed, feed becomes eggs, and eggs return to the kitchen. Sustainable keeping doesn't have to be complicated.