

If you’re trying to create a reliable automatic water source for your chickens, you might wonder where to start. Building your own can save money and be tailored exactly to your flock’s needs.
By following simple steps to drill, seal, and set up poultry nipples on a 5-gallon bucket, you’ll have a functional waterer that keeps your chickens hydrated and safe.
Keep reading to see how you can master the process with ease.
Build Your Own Automatic Chicken Waterer in 3 Steps
To build your own automatic chicken waterer, start by planning the water flow and layout to ensure maximum hydration for your flock. Place the waterer in a clean, shaded spot that’s easy for you to access regularly. Set the nipple height at your chickens’ head or neck level to reduce waste and spillage. Space the nipples evenly—one for every three to four birds—and add more during hot weather to keep everything well hydrated. Incorporate vent holes into sealed containers to prevent vacuum formation, which can block water flow. When drilling holes for the nipples, use a clean drill bit suited for your container material. Insert the nipples so their sealing surface sits correctly without over-tightening; leave a few threads exposed on horizontal nipples to avoid a poor seal. To prevent leaks, wrap thread tape around the nipples’ threaded parts before tightening them into place. Be careful not to crack thin plastic containers by forcing the nipples in too deeply. For those raising multiple species, a quail egg incubator requires similar precision in temperature and humidity control. Use spacers to create additional space between birds and prevent bullying at the water source. Repurposing materials from a DIY feed bin can further reduce costs for this waterer project. For a durable setup, consider the materials featured in quality coops that withstand weather and daily wear.

【Complete Chicken Watering Kit】Includes 12 horizontal poultry nipples, 12 rubber gaskets, 12 wing nuts, a drill bit, 1 installation tool,and leakproof tape. Everything you need to easily set up a durable and efficient watering system for your chickens
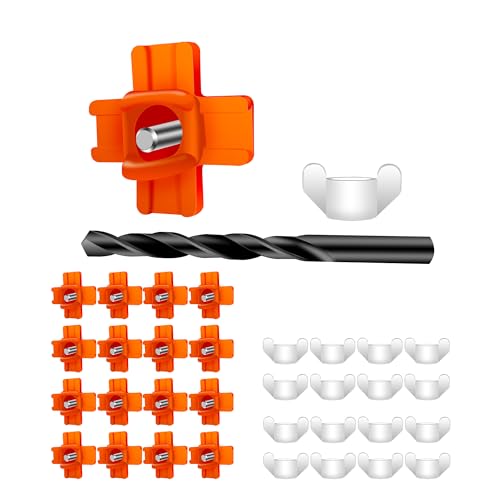
HORIZONTAL CHICKEN NIPPLE: The Eggluuz Chicken Waterer Nipples are the chicken coop accessory to supply your poultry the fresh, clean water that will be very important for them to stay healthy

HORIZONTAL CHICKEN NIPPLE: The Eggluuz Chicken Waterer Nipples are the chicken coop accessory to supply your poultry the fresh, clean water that will be very important for them to stay healthy
Gather Materials: Bucket, Nipples, Drill, and Sealant
To build a reliable automatic waterer, you’ll need a 5-gallon food-grade plastic bucket, stainless steel poultry nipples, a drill with an appropriate bit, and aquarium-safe silicone sealant. The 5-gallon bucket provides enough water capacity while remaining manageable to handle and clean regularly. Selecting food-grade plastic ensures your water remains uncontaminated and free from cracking over time. Stainless steel nipples resist rust and corrosion, making them suitable for long-term outdoor or indoor use regardless of weather conditions.
Choose a drill bit that matches your bucket’s wall thickness, typically 11/32 inch for standard 5-gallon buckets. This size creates a clean hole for the nipples without risking cracks or leaks. Aquarium-safe silicone sealant is crucial because it bonds well with plastic and metal, creating a watertight seal that won’t leach harmful chemicals into your water supply. Ensure your silicone is labeled as safe for aquariums to prevent any toxic contamination.
Don’t forget to include a lid to cover the bucket, which keeps debris and algae out. Opt for poultry-rated nipples rather than generic plumbing fittings to guarantee proper water flow and fit for your birds. With these materials gathered, you’ll be well on your way to a durable, hygienic, and easy-to-maintain automatic watering system. Considering the potential cost savings from repurposing common household items can further reduce your initial investment in this project. A quail coop build often benefits from similar low-cost construction methods to keep expenses down. Just as chicks require consistent access to water, removing the brooder plate is a key transition when they are fully feathered and can regulate their own temperature.
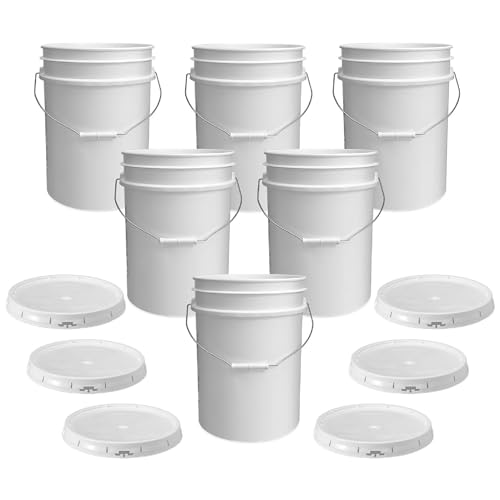
Made To Handle More: Tackle bulk storage with a plastic bucket and airtight gasketed tear strip lid made from sturdy 90 mil HDPE plastic. It’s a dependable pick for pantry staples, utility use, and everyday organization when lightweight containers won’t cut it.

SMART FUNCTIONAL DESIGN: Turn any standard utility bucket into a sealed storage container. Great for storing everything from bird seed and livestock feed to tools, charcoal, pool, and lawn supplies. Fits standard 3.5, 5, 6, and 7-gallon buckets.

SECURE SNAP-ON LIDS – Keep contents protected with included snap-on lids, perfect for food storage, pet food, paint, cleaning supplies, and more.
Drill and Install Chicken Nipples on Your Bucket
Choose the correct drill bit size for your chicken nipples, typically 3/8 inch. Some kits may require 5/16 or 11/32 inch bits, so check the specifications beforehand. Use a sharp bit and drill slowly to prevent cracking in the plastic bucket. Keep the drill perpendicular to ensure a snug, clean fit for the nipples. For instance, selecting a high-quality lime for the coop floor can help manage moisture and odors, but that is separate from the waterer installation. A well-designed chicken run provides a secure outdoor space for your flock to exercise while protecting them from predators.
Mark the holes about 1 inch above the bucket’s bottom rim and space them evenly—3 to 5 nipples for a small flock. Avoid curved areas where the nipples might not seat properly. Drill each hole carefully before inserting the nipples. For added protection against predators, consider using heavy-duty hardware cloth to reinforce the bucket lid or surrounding enclosure. Wrap thread tape around the threads 2 to 3 times, but avoid the O-ring or pin area. Thread the nipple into the hole until it is snug, being careful not to over-tighten or force it, which could cause damage. Check that the nipple seats straight to prevent cross-threading. If your design calls for it, leave the threads slightly exposed. Testing for leaks will come later, so focus on installing securely for now. These nipples are made of high-quality material and are durable and long-lasting over 5 years.

🐔【Leak Proof Design】:The chicken nipple waterer features a more pressure resistant tapered thread design. Simultaneously using sealing tape, rubber washer, wing nut, and other materials with good sealing properties can effectively fill the small gaps between interfaces and prevent moisture leakage. Keep the chicken coop dry and clean.

Design Works Great: automatic nipple that keep all the water clean and sanitary, perfect design that chicken learn fast, works for chicks, ducks, quails, hens, even your birds and so on.

Free Your Hands: With our chicken waterer horizontal, you no longer have to hang your waterer or clean the bucket every day. Simply place the waterer on the ground for easy refilling and cleaning after use, saving you time and effort
Seal the Reservoir and Test for Leaks
To ensure the reservoir is sealed and leak-free, start by verifying that your lid has a proper gasket material. A tight, even compression around the entire rim prevents water from escaping. Check the gasket for tears or flattening before assembling the lid to maintain an effective seal. Apply a compatible sealant at all penetrations, such as where the nipples pass through the lid, to create a continuous barrier around each base. Always clean all sealing surfaces of grit and debris beforehand to ensure the sealant adheres properly. Note that, unlike diatomaceous earth, the silicone sealant used here does not expire and remains effective for years if stored correctly. This sealing method is similar to the approach used in roll-away nesting boxes to prevent moisture ingress around fittings. For installations involving wood posts, ensuring proper spacing and tension around the wire attachment points further prevents the reservoir from warping under stress.
Next, perform a static fill-and-invert leak test. Fill the reservoir to a realistic level, then close the lid completely. Lay it on its side on absorbent material to allow water to reach all corners. For leak detection, spray a soap and water solution around the rim and fittings. Any escaping air bubbles indicate a leak. If you see wetness or bubbles, dry the area thoroughly and retest. Skipping this step could result in a reservoir that leaks, which can cause water loss and potential damage once in use.
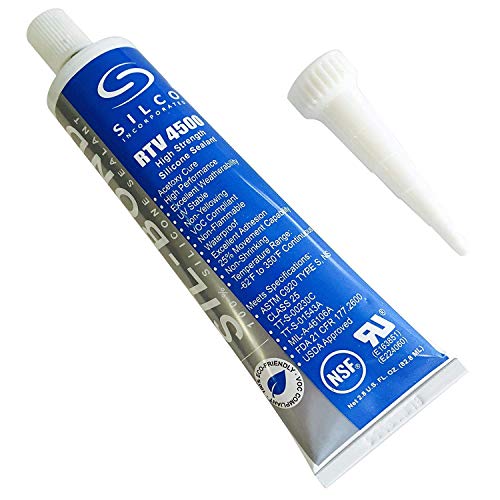
Food Contact Safe 350F high temp

Waterproof sealant: This clear caulk seals out air, water, and moisture with 100% silicone as cured

High Strength, Excellent Weatherability
Mount Your Waterer at the Right Height
Mount your waterer so the nipple trigger pin sits at your chicks’ eye level, about 4 inches off the floor for day-olds. This height prevents them from craning or dipping their heads, making it easier for them to access water comfortably. A slight upward reach encourages natural, efficient drinking behavior. Raise the line every other day in the early days, then daily for fast growers. Once your flock reaches adulthood, aim for a height of 18 to 24 inches. You’ll know it’s correct when your birds drink with a slight upward head tilt of about 45 to 55 degrees. This posture ensures they stretch naturally without strain. Adjust the height based on breed size—smaller birds need a lower line than heavier breeds at the same age. Always ensure the lowest birds can reach the water without difficulty. For optimal nutrition, pair this setup with top layer feed to support healthy egg production, and choose Non-GMO Chicken Feeds to avoid genetically modified ingredients in your flock’s diet. For consistent water delivery, choose a float valve system that maintains a stable reservoir level without overflowing. Mount the waterer securely away from feeders and regularly check the height, especially as your flock grows, to prevent the setup from becoming obsolete.

【Elevated Design Keeps Feed Clean】Unlike traditional ground-level models, our chick feeder and waterer set features a stable tripod base with adjustable legs. This raises the unit off the ground, helping to prevent baby chicks from scratching bedding or dirt into their food and water for a cleaner feeding area.

Adjustable & Foldable Legs: Designed for all stages of chickens, the extendable legs ensure a clean and dry coop environment as your chicks grow

VISIBLE WATER LEVEL MONITORING: The bucket wall allows for external water level checks without opening the lid. This saves time during daily chores and helps avoid unnecessary disturbance to the chickens while ensuring you can refill before they run dry
Fix Clogged Nipples and Leaky Seals
Clogged nipples and leaky seals are common issues that can disrupt your watering system. To prevent clogs, flush your entire line at 15–30 psi to dislodge debris and keep water flowing smoothly. If a nipple remains blocked, tap it gently to free trapped grit. If it won’t clear after tapping, replace it with a new one for reliable operation. Installing and checking filters weekly helps prevent sand and scale from entering the system, reducing clogging risk.
For leak prevention, regularly inspect gaskets and replace any flattened ones that cause drips. Ensure the nipple assembly is tightened snugly and properly aligned. If you notice cracks or signs of wear, swap out the defective nipple instead of repeatedly patching it. Always check for leaks after each repair; even a small defect can wet litter quickly. Maintaining good water quality also helps by limiting biofilm buildup, which can clog lines and increase stress on seals.
Clean Your Automatic Chicken Waterer Monthly
To effectively clean your automatic chicken waterer monthly, start by fully emptying it. Use hot, soapy water to scrub all interior surfaces, paying close attention to corners, threads, and seams where bacteria and biofilm tend to gather. Rinse thoroughly to remove soap residue. Then, apply a sanitizing solution such as diluted bleach or hydrogen peroxide, following the manufacturer’s recommended contact time to ensure its effectiveness. Rinse again to wash away any chemical residues, then allow the waterer to air-dry completely before refilling. This step reduces the moisture that bacteria thrive on. Top Chicken Coops for Your Flock often feature integrated watering systems that share the same maintenance principles. Remember to flush connected lines and clean filters as well. Maintaining this routine every month helps prevent biofilm buildup, which can form in wet, unseen areas—even when the waterer appears spotless. Applying these cost-saving tips when assembling your own waterer can further reduce maintenance expenses. Refill with fresh water on each cleaning, and keep the water source free from bedding or droppings to support long-term water quality. For a more thorough approach, clean the brooder periodically to prevent cross-contamination between water and living areas.