

Noticing rats getting into your chicken feed can be frustrating. Thankfully, you can build a simple, effective feeder that keeps rodents out and keeps your chickens fed.
With just a few common supplies and a couple of hours, you’ll create a sturdy, rat-proof setup that lasts.
Keep reading to see how you can do it step by step.
Why Regular Feeders Are a Rat Magnet
Leaving feed accessible creates easy entry points for rats. Open feeders without barriers allow rats to eat without disturbance from chickens. When feeders are left on the ground, rats have a direct path to the food. Your timing also worsens the problem. Since rats forage mainly at night, leaving feed out after dusk aligns perfectly with their peak activity. Overnight access turns your coop into a reliable food source, encouraging rats to establish nearby burrows. This simple oversight can quickly lead to a full-blown infestation. For instance, layer feed is safe for roosters in moderation, but its high calcium content can pose health risks to non-laying birds if fed exclusively. Providing a separate oyster shell supplement ensures laying quail get needed calcium without altering the base feed for all birds. Investing in a quality coop with run can help secure the feeding area and reduce rat access points.
What Makes a Feeder Rat-Proof?
A feeder is truly rat-proof when it limits access through specific design features. The entry points should be carefully sized to allow chickens’ heads but exclude rat bodies—typically around 1 inch in diameter. Self-closing doors, such as treadle or spring-loaded mechanisms, shut automatically after a chicken feeds, preventing rats from pushing their way in later. Physical barriers like smooth, pest-resistant coatings on metal surfaces make climbing difficult for rats. Using hardware cloth with 1/4-inch mesh prevents rats from squeezing through or gnawing around openings. All seams and corners need to be sealed tightly to eliminate gaps. Mount the feeder on a pedestal or hang it on a hook to keep it off the ground, and avoid flat bottoms or sheltered spots that offer hiding or nesting places for rodents. A covered reservoir with a sturdy lid shields the feed from weather and pests. Insulating the feeder helps keep feed dry and reduces spoilage, which can attract rats. To ensure the unit is structurally sound, all joints should be secured with welded wire construction rather than simple crimps for added durability. Together, these features create a barrier-filled feeding system that unauthorized rodents cannot breach. For added defense, consider dusting the feeder’s entry points with diatomaceous earth to desiccate and deter any maggots that might appear from spilled feed. Building the feeder from smooth metal sheets can further prevent rats from climbing or gnawing through the structure.
Rat-Proof Feeder Tools and Materials
Gathering the right tools and materials is essential for building a rat-proof chicken feeder. You’ll need a food-grade bucket or bin—a 2.5- to 5-gallon size works well for small flocks, while larger HDPE bins are suitable for bigger needs. For the feeder body, use PVC pipes, elbows, and T-joints, then seal gaps with PVC glue to prevent rodents from squeezing through. For optimal chick health, consider also using a heat lamp for chicken brooder to maintain proper warmth during early growth stages. Applying a thin layer of food-grade diatomaceous earth around the feeder base can further deter insects and small pests without harming your birds. Chickens also require soluble grit to aid digestion of their feed, but make sure any grit offered is kept dry and clean to avoid clogging the feeder.
To block rodent entry effectively, galvanized hardware cloth or metal sheets are your best options. These pest barriers should be tightly fitted and securely attached to prevent rats from gnawing or slipping inside. While bird deterrents aren’t your main focus here, wrapping smooth, sealed edges around openings can help keep other pests out as well.
For assembly, gather hardware such as eyebolts, pipe straps, and zip ties. These enable secure attachment of parts and make disassembly easier for cleaning. You will also need a drill, a hole saw, a jigsaw, tin snips, and a rivet gun for cutting metal and fastening components. Don’t forget to use sandpaper or a file to smooth any rough edges after cutting to prevent injuries and ensure a snug fit.

【Premium & Durable PVC Material】This pvc chicken feeder is constructed from high-quality PVC with a wall thickness of approximately 0.2 inches, ensuring excellent sturdiness and wear resistance. Easy to wipe clean, and effectively keeps the feed dry and fresh.

1. NO-WASTE DESIGN FOR A CLEANER COOP JYHY chicken feeder cups feature an extended feed inlet design that helps reduce spilled feed while chickens are eating. The smart structure keeps feed inside the feeding area, minimizes waste, saves poultry feed costs, and helps maintain a cleaner chicken coop with less daily maintenance.

Chicken Feeders No Waste: This feeders are mounted on the wall of chicken coop, allowing chickens to feed without creating a mess. By inserting their heads, they access a continuous supply of food, reducing waste and cutting down on feed costs
How to Drill the Feed Outlet for Rat-Proofing
Drill the feed outlet in the bottom or lower side of the container to ensure gravity feeds the feed properly. Start with a small pilot hole, then enlarge gradually to the desired size. Pellets usually need an opening about the size of a nickel, roughly 16 millimeters, while crumbles can work with a 16-millimeter hole. Keep in mind the size of your feeder; an outlet too large wastes feed and provides easy access for rats. For optimal hen comfort in the coop, consider the importance of proper nesting pads to encourage hens to lay elsewhere. Choosing a durable and smooth material for the feeder will help it withstand chewing, much like the best hardwood chips used for long-lasting chicken run bedding. Supplementing your flock’s feed with key poultry vitamins can further support their health and egg production.
Use a hole saw or spade bit for a cleaner cut, drilling slowly to prevent cracking. Position the hole centrally to keep the container balanced when hanging and avoid spots where hardware might block feed flow. After drilling, smooth the edges with sandpaper to allow feed to slide freely without obstruction. Always test the opening with your chosen feed, starting small and gradually enlarging if clogs occur.

Easy install, come with a 3.15"/80mm hole saw, make an outdoor chicken feeder in a minute

Transform Any Container Into a Lifetime Feeder: With RentACoop's DIY Medium Port Feeder Kit, you can change any wasted container into a feeder for your chicks 3 days or older, adult chickens, and other small birds like Quail, Pigeons, Doves, and more

NO MORE FEED SCATTERED ON THE GROUND: This chicken feeder uses a gravity-fed port design to deliver chicken feed directly to your flock, keeping it inside the feeder, off the ground, and away from pests. The enclosed port design reduces spillage and wasted feed, making it an ideal chicken feeder option for backyard chickens.
Install the Eyebolt Hanger and Wood Block
To install the eyebolt hanger and wood block correctly, start by marking the center point on the feeder body where the lift point will be balanced and aligned. Ensure the eye of the eyebolt is oriented in the pull direction so it sits squarely under load. Select a solid wood block that is at least as thick as the maximum load force to prevent crushing and pullout. Place the wood block flush against the mounting surface to evenly distribute the hanger’s force. Consider using scrap lumber from other projects to reduce material costs. For a budget-friendly setup, review top chicken coop ratings to ensure the feeder matches your coop’s design. Choosing a durable 19 gauge hardware cloth for any wire mesh parts can prevent rodent intrusion.
Drill a pilot hole slightly smaller than the root diameter of the threaded eyebolt for proper threading. For a bolted connection, drill a clearance hole for the shank, then insert the eyebolt through the hole. Place a washer on the threaded end on the opposite side of the mounting surface, then screw on the nut and tighten fully. Make sure the eyebolt is secure and the load path is aligned correctly. After tightening, check for any looseness or wiggle—looseness can weaken the hold over time. Remember that for angled loads, shoulder eye bolts or swivel hoist rings are preferred to avoid capacity reductions from angular effects.
Finally, inspect the wood for splits or cracks before testing the setup with a light load to confirm stability and security.
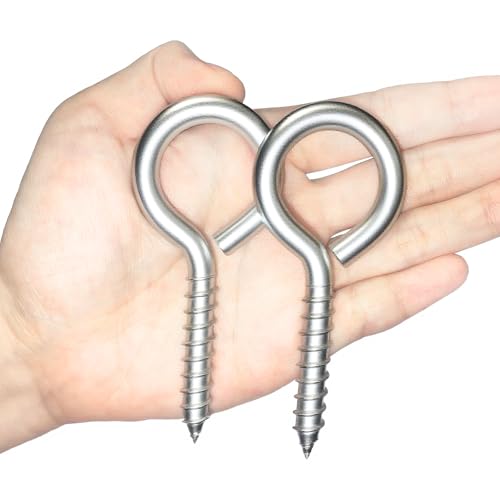
Durable Stainless Steel: Eye hooks screws are crafted from robust 304 stainless steel, resistant to breakage, rust, and corrosion, ideal for a variety of light to medium hanging tasks

Premium Material: These eye hooks are made of stainless steel 304 which has superior rustproof, waterproof and anti-corrosion properties. Perfect for indoor and outdoor applications.

Rust-Resistant Stainless Steel Construction: Crafted from 304 stainless steel, these eye bolts offer excellent water resistance for reliable outdoor use. The durable build ensures these stainless steel eye bolt components maintain their integrity through exposure to moisture, making them ideal for marine, bath, and garden applications.
Fill the Bucket and Secure the Lid
Fill the bucket with dry chicken feed only. Damp feed molds quickly in an airtight container, so avoiding moisture is essential. Do not overpack the bucket; leave enough space for the lid to sit evenly and create a full seal. Before loading, inspect the feed for clumping or visible moisture, and keep the interior of the bucket free of crumbs to prevent contamination. Using pine shavings as bedding in the coop can also help absorb moisture and reduce odors. Including a chicken toy inside the coop can also help keep your flock active and stimulated. For the coop itself, installing secure windows can improve ventilation while still protecting against rodents and weather.
When sealing the lid, thoroughly clean the bucket rim to ensure the gasket seals tightly. Choose a heavy-duty, food-safe bucket with a gasket-sealed lid that fits snugly. Seat the lid evenly around the entire perimeter; forcing a misaligned lid can cause warping and weaken the seal. For extra security, attach a bungee cord if necessary. A tight-fitting lid reduces scent leakage, helping to prevent rodents from being attracted to the feed. Always check for cracks or debris on the lid and replace any warped or damaged lids promptly.
The Best Way to Hang or Place Your Feeder
Position your feeder at about the chickens’ back height, where the neck meets the back, to make feeding comfortable and natural for them. Hang it 6 to 18 inches above the ground to prevent rodents from reaching the feed. Use sturdy hooks or shepherd’s hooks anchored into the ground or a fixed structure to keep the feeder stable. Place the feeder in a sheltered area with enough space—at least 3 feet—from walls, fences, or overhanging branches that rodents might use as launch points. A pulley system allows you to adjust the height as your flock grows. Ensure the mounting is secure to prevent tipping and avoid placing the feeder directly on the ground where spilled feed can collect and attract pests. Level ground and a wide base help maintain stability if the feeder is not fully suspended. If you choose to offer cracked corn in addition to feed, consider popular cracked corn options that ducks enjoy. When marking the wall for bracket placement, draw a straight line across the top to ensure accurate mounting.

25LBS Capacity: The automatic poultry feeder holds up to 23 pounds of feed, reducing the frequency of refills and saving you time and effort
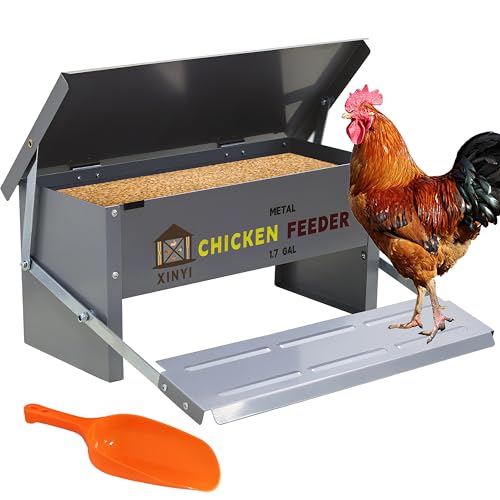
Treadle chicken feeder:This metal chicken feeder is made of high quality galvanized steel plate,built to last.

See-through feed window: Instant feed level checks without opening; this metal chicken feeder makes knowing when to top-up easy. With this extra large chicken feeder, you won't be left guessing everyday if it is time to refill
Test and Adjust for Chicken Access
After hanging or placing your feeder, observe your flock during their first few feedings to ensure they can access the food comfortably. The feeder edge should be near chicken height—around back or neck level—so pecking feels natural. If the chickens stretch to reach or crowd together, adjust the height gradually by raising or lowering the feeder.
Next, fine-tune the feed flow. For pellets, set the internal plate to its highest opening to prevent over-spilling; for crumbles or scratch, choose a low to medium setting to control the flow. Simulate a peck to confirm that the feed trickles out smoothly without spilling or causing waste. Check for blockages or overflow and observe if smaller birds are able to access the feed as easily as larger ones. To further reduce waste, consider that radiant heat panels can help keep the feeding area dry and comfortable in cold weather.
After any height adjustment or switch in feed type, repeat the testing process. Keep adjusting until feeding becomes smooth, accessible for all sizes of birds, and waste is minimized.
Daily Habits That Keep Rats Away for Good
To keep rats away permanently, you need to make a daily routine of removing their food, water, and shelter sources. Start with indoor cleaning: sweep up spilled feed immediately, as even tiny bits can attract rodents. Store all feed in sealed metal bins off the floor and remove feeders at dusk, when rats are most active. Don’t leave water or damp bedding overnight; tidy waterers and collect eggs promptly to eliminate potential water sources. For predator prevention, maintain a hostile perimeter by keeping grass short, clearing overgrowth, and removing clutter where rats might hide or nest. Check daily for signs like droppings or burrows. By consistently denying food, water, and shelter every day, you make your space invisible to rats, encouraging them to seek easier places elsewhere. Stick to this routine, and you’ll effectively keep rats away for good.

【Airtight Seal Preserves Bird Seed Freshness】Our bird seed storage container has tight airtight lid to block moisture & pests, keeps wild bird feed, mixed bird seed and grains dry, avoids mold & bugs spoiling your bird food for long-term feed storage.

Built to Last - Built with Mighty Tuff quality materials, this pet food storage container is a durable, all-purpose storage option. Indoor or outdoor, it is fit for any season and guaranteed to remain rust, water, damage and corrosion-proof.

DEAYOU pet food storage canister container can safely store your pet food where no paw can reach and keep the food fresh. It is perfect for storing dry food items such as birdseed, biscuits, feed and treats, a much better choice than leaving food in cardboard boxes or paper bags