

Struggling to pull out a stubborn fence post? Whether it’s wooden, T-posts, or concrete-set, the right approach can make the job much easier.
Knowing a few quick techniques and prepping the area can save you time and effort. Keep reading to learn simple methods for pulling fence posts efficiently and safely.
Why Prep the Work Area Before You Pull a Fence Post
Preparing the work area before pulling a fence post is essential for safety and efficiency. Start by creating an inspection checklist: clear all vegetation, rocks, and loose hardware from the post’s base. This clean-up eliminates tripping hazards and allows your tools to move freely without snagging.
Next, confirm the locations of buried utilities such as gas, water, or electrical lines to prevent strikes, which can cause dangerous accidents. Mark any hazards like irrigation or wiring so you know exactly where to dig and avoid collateral damage.
Remove fence panels and attachments to free up space and expose a solid grip point above ground. Ensure you have all necessary safety gear—gloves, eye protection, and closed-toe shoes—before starting. Keep bystanders and animals clear of the work zone. Finally, stage your tools and backfill supplies nearby to minimize movement and reduce resistance during the pull. For quail-related tasks, consider researching top quail egg incubators to find the perfect fit for hatching eggs efficiently. If you are replacing the fence, choosing between chicken wire and poultry netting depends on your flock’s needs for cost, durability, and ease of use. For maintaining a healthy flock, selecting the best heat for your chicken coop ensures optimal comfort during cold weather.
This thorough prep work helps prevent injuries, limits tool damage, and makes pulling the post smoother and faster.
Pull Stubborn Posts With the Lever and Fulcrum Method
To pull stubborn posts using the lever and fulcrum method, you’ll need a long, rigid lever like a 2×4 or pry bar and a solid fulcrum, such as a concrete block. The placement of the fulcrum is crucial: position it close enough to the post to generate effective lifting force, yet far enough away to keep clear of the hole. To lift the post, push down on the free end of the lever, which converts your downward force into an upward lift on the post. For added leverage, notch a wood post, screw a cleat into rotted wood, or wrap rope around steel posts to secure your attachment points. Always keep the lever aligned vertically during the lift to prevent sideways kick-out and check the attachment before each attempt to ensure safety. Posts often move incrementally, so reset the lever between lifts. Using a longer lever increases mechanical advantage, making the task easier. Apply controlled pressure instead of jerking or forcing, which reduces the risk of damage or injury. When dealing with rotten wood, driving large screws into the post for grip and attaching a rope can provide additional upward force, though dampness and swelling may hinder progress. To ensure your flock stays well-fed while you work, consider using a sturdy trough feeder for their feed. A well-constructed coop also helps keep your chickens safe and comfortable during this task. A chicken coop with run offers both shelter and enclosed outdoor space for your birds.
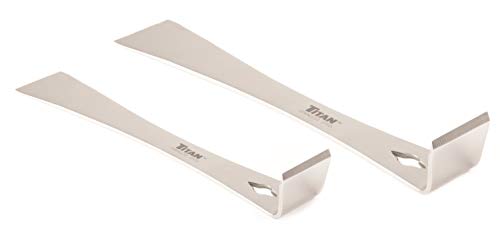
Set Contents: (1) 7-1/4" and (1) 9-1/4" Stainless Steel Pry Bar Scraper

Furniture lifter tool with 5 wheels, 4 large cart sets 5.3"x5.3", 1x pry bar, 4x hightening spacer, 4x flannel non-slip mats, 1x pair of safety gloves, 2x rubber anti-slip mats, 1x drawstring storage bag, 1x leveler and 1x measure tape

Heads rotate 180° through 14 locking positions for unparalleled access and leverage
Choose the Right Post Puller for T-Posts vs. Wood Posts
Choosing the right post puller depends on the post material. T-posts require a clamp-style puller with cam jaws that grip the steel profile for a straight, controlled pull, helping to preserve the post for reuse. These pullers are designed specifically for the studded steel shape and provide a strong, secure grip without damaging the post. For jobs involving lighter-duty T-posts, a steel model with a 5-inch base provides additional sturdiness during extraction. For accurate grip, a hygrometer for incubator can be used to measure environmental conditions during tool storage. Storing your tools in a dry, insulated shed helps prevent rust and maintain accuracy. Proper wire-to-charger connections also rely on dry storage to avoid corrosion and signal loss.
For wooden posts, a chain-and-hook system or wider V-jaw grip is necessary to accommodate larger, round, or square surfaces. These systems wrap around the post and apply even pressure for easier extraction. Do not attempt to use a T-post clamp on a wood post, as it will likely lose grip and make the pull more difficult.
If you frequently remove both types of posts, a multipurpose puller with interchangeable attachments offers the most versatility. Always check the puller’s diameter and weight limits carefully to match your specific post size and material, ensuring safe and efficient removal without risking damage to the post or the tool.

MAKES POST REMOVAL SIMPLE: Fence post puller tool clears posts without the usual fight. Built for fast, easy use around the home, garden, or farm

Built to Last: This T-post puller features a heavy-duty steel frame and AR400 hardened steel jaws with a wear-resistant coating. It is built to withstand harsh outdoor conditions for long-lasting performance

REPLACEMENT: T-Post Puller Replaces S16110400 Speeco T Post Puller
Use a Farm Jack for a Controlled, Steady Lift
Using a farm jack allows for a controlled, steady lift during post removal. Place the jack on a solid, flat surface like plywood to prevent sinking or rocking. Tilt and brace it so the post stays centered under the jack, which minimizes sideways movement. Wrap a chain low around the post near the ground and secure it with a screw or hook to prevent slipping or sliding during the lift. A chain and strap setup with the farm jack provides a reliable method for yanking out posts that are not cemented.
Pump the jack slowly and steadily, making small increments to gradually loosen soil suction and reduce the risk of sudden shifts. Watch the post closely for signs of leaning or instability; if the jack shifts or the post starts to tilt, stop lifting immediately, reset the bracing, and reassess. Keep your hands clear of the release lever to avoid accidental sudden drops. The ratcheting mechanism of the farm jack allows precise control, making the removal process safer, more efficient, and less likely to cause damage to surrounding structures.

HEAVY-DUTY POST REMOVAL WITHOUT DIGGING - Quickly remove T-posts, 4x4 wood posts, and broken or rotted fence posts without back-breaking digging, saving time and labor on farms, ranches, and construction sites.

Fast, Simple Post Removal – No Digging, No Back Strain Pull stubborn fence posts in minutes. Just loop the cable low around the post, hook the chain to your jack or 4×4 lever, and lift. The snare-style grip tightens automatically as you raise, freeing even broken or buried posts without tearing up surrounding soil. Designed for farm, ranch, and residential repairs.

How to Pull a Fence Post Set in Concrete
To pull a fence post set in concrete, follow these steps:
Start by clearing the work area around the post, removing surface debris and exposing the top of the concrete footing. Mark the location of any nearby utilities and dig a hole wider than the footprint of the concrete to provide leverage. Expose 4 to 6 inches of the footing, then saturate the dry soil around it to reduce resistance. For consistent results, maintain a stable incubation temperature during the process to avoid uneven material expansion. A similar principle of controlled setup can be applied when planning a DIY mobile chicken coop for efficient construction. Ensuring your poultry has consistent access to clean water is just as important, so consider using automatic chicken waterers to simplify daily care.
Next, to weaken the bond, rock the post back and forth—this helps break the adhesion without relying solely on pulling force. Dig a deep trench around the concrete to loosen the soil’s grip further. Wrap a heavy-duty chain around the concrete neck of the footing, then position a high-lift jack on a level surface to lift the post.
If the concrete resists lifting cleanly, drill fracture points into it and use a sledgehammer to chip away edges. To improve grip and minimize slippage, cut a notch in the post with a reciprocating saw using a wedge-shaped cut. Break the concrete into manageable chunks, remove them separately, and backfill the hole solidly once the post is out. Always wear gloves and goggles for safety throughout the process.
Avoid These 3 Mistakes That Break Your Fence Post
Pulling a fence post without making common mistakes can save you time and prevent damage. First, avoid skipping proper fence post maintenance. Always detach connected wire, rails, or brackets before pulling. Pulling against attached materials transfers load to the post, causing twisting and increasing the risk of breakage. Isolate the post completely to ensure a safer, easier removal process. For best results, use safe handling techniques similar to those applied when opening a roll of chicken wire.
Second, never pull a post without loosening the soil around it. Hard, dry, compacted ground creates significant resistance that can bend or split the post. Water the area thoroughly or dig around the shaft to loosen the soil before lifting. Forcing a post upward in resistant soil often damages the material, making removal much more difficult. The recommended approach using a car jack minimizes this risk by applying upward force through a chain wrapped around the concrete base, requiring minimal digging even in rocky or hard-packed soil.
Third, apply force at the correct point. Use a secure grip point such as a wrapped chain or a metal bracket, rather than weak wood fibers or the ground line. Lift straight upward, avoiding side loads that can crack or bend the post shaft. Maintaining a stable fulcrum and controlled lift minimizes the chance of snapping the post during removal.
Speed Up the Job Without Sacrificing Safety
To speed up the job without sacrificing safety, start with thorough work zone preparation. Call 811 to mark buried utilities, clear the area of children and pets, and remove grass or mulch. Expose a shallow ring around each post to provide better leverage. These prep steps help prevent accidents and tool damage by creating a clear, safe workspace. For efficient removal, always check the post puller’s fulcrum position to maximize mechanical advantage and reduce effort.
Next, choose the appropriate pulling setup. Use a post puller for standard posts, or pair a jack with a chain for heavier ones. Position the puller at waist height and ensure the fulcrum is far enough away to maximize leverage. Regularly inspect tools, especially chains and pivots, to keep the pull smooth and avoid breakage. Understanding what wire cutters look like helps when you need to quickly snip fencing materials during post removal.
Loosen the base with a shovel or digging bar. Use a sledgehammer to cut roots and break up concrete footings. Apply vertical force gradually, maintaining steady pressure throughout. Wear gloves, safety glasses, and sturdy boots during the entire process. When finished, backfill the hole and tamp the soil to ensure stability. For extra cushioning in the backfilled hole, consider adding pine shavings to improve drainage and prevent future post rot.

Effortless Post Extraction in Minutes: Fence post remover helps you say goodbye to back strain. Galvanized cable loops securely around 4x4 fence posts, including broken or rotted ones, while the 1/4" chain connects to any jack or lever. Simply tighten and lift with no digging or hammering required, suitable for concrete-set posts and DIYers of all skill levels
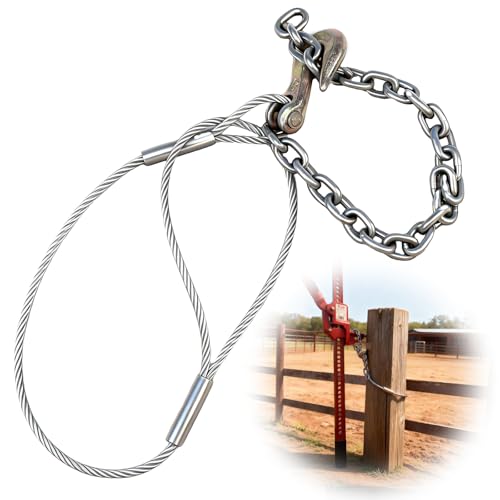
【Effortless Fence Post Extraction】Tackle stubborn 4x4 fence posts (even broken, rotted, or deeply embedded ones) with minimal sweat! Pair this fence post puller chain with a jack or lever—its heavy-duty galvanized cable & chain grip posts securely, transferring force to lift poles from soil, concrete, or gravel. Ideal for residential yard fixes or agricultural pasture fence repairs.

Heavy-Duty Steel Build: Crafted from reinforced steel, this T post puller supports up to 660 lbs (300 kg) without bending. It tackles deep-set wood posts or tough metal stakes with ease, and the powder-coated surface resists rust and wear for durability
When Hand Tools Aren’t Enough: Call a Tractor
If stubborn roots or concrete footings won’t budge with hand tools, a tractor’s extra pulling power can do the job. Wrap a log chain low around the base of the post—never near the top—and attach it to your tractor’s front-end loader or three-point hitch. Position the chain tightly to prevent slipping, which helps avoid snapping the wood and ensures maximum grip. Use the bucket curl or breakout force to gradually loosen the soil and break the post free. For a solo operation, drop the removed post into the bucket or onto a bush hog to keep the work area organized and avoid manual lifting.
Before pulling, loosen surrounding soil with a digging bar and clear away any wire or brush that could interfere. Check your tractor’s stability: a hard pull might lift the front wheels off the ground. If the machine begins to lift or shift, stop immediately to prevent tipping or damage. Apply force gradually, rocking the post back and forth rather than jerking. Match the tractor’s power to the resistance of the post to avoid strain or breakage, ensuring a clean and efficient removal. For long-term reliability, consider that proper charger spacing is critical to maintaining consistent voltage along the fence line. Building your own feed bin can save money by using repurposed materials like treated lumber and lag bolts.

【2000 LBS HEAVY-DUTY LIFTING】 Reinforced high-strength steel with durable anti-rust powder coating. Pallet forks for tractor bucket easily handle up to 2000LBS for moving heavy logs, lumber, and hay bales, won't bend or deform under heavy loads.

HEAVY-DUTY FORGED CONSTRUCTION: Our tractor bucket hook features a robust forged hook design with a massive 1500LB weight capacity. The thick 0.3'' mounting base plate (4.3'' L x 3.2'' W) ensures exceptional stability and strength for lifting heavy loads, pulling stumps, or towing equipment without bending or breaking.

Extra heavy duty spring tensioners designed for large tractor, loader, and grader tire chains
Fill the Hole After the Post Is Gone
Once the post is removed and the tractor is turned off, fill the hole with native soil unless you need better drainage, in which case gravel or crushed stone works well. For added stability in loose ground, use a soil-and-gravel blend. To ensure proper soil stabilization, break up large clods and remove any roots first. If you plan to install a new fence for your chicken coop, choose a durable fence that keeps predators out and your flock secure. You can also sprinkle food-grade diatomaceous earth in the surrounding coop area to help control pests without harming your pets.
Add backfill in thin layers of 3 to 6 inches, tamping each layer firmly to prevent future sinking. If drainage improvement is your goal, start with a gravel base to help move water away from the bottom of the hole. Lightly water each lift to allow particles to settle more tightly. Continue compacting until the material feels firm underfoot. To prevent runoff pooling, leave the surface slightly mounded. After rain, check the area; you may need to add extra dirt because compacted fill takes up less volume than loose soil.