

Are you tired of spending a lot on commercial egg washers that can break or get damaged during transport?
Building your own egg washer with just a few cheap materials can save you hundreds and work as well as the expensive models.
Once you have a simple setup with a bucket, PVC pipe, and a small compressor, you can quickly rinse eggs at home.
Keep reading for easy step-by-step instructions.
Benefits of Building Your Own Egg Washer
Building your own egg washer offers four main advantages. First, it saves money by avoiding the high costs associated with commercial units, which is especially beneficial if you have a small flock. Simple, DIY builds use basic components, reducing your initial investment, and if parts break, common replacements keep repair costs low. Additionally, a DIY build avoids the potential for transport damage seen in commercial units, such as broken pressure gauges. Using common materials like plywood and PVC as outlined in a DIY feed bin guide further reduces costs. Unlike many commercial units, a DIY build also allows you to avoid the risk of frozen components that can plague unheated outdoor waterers during winter. For instance, a well-constructed DIY system can mirror the quality and performance of top commercial models without the premium price tag.
Second, it cuts cleaning time significantly. Semi-automated systems process eggs faster than hand washing, giving you more time for grading or other chores. Third, it enhances egg hygiene by mechanically removing manure, feathers, and other contaminants, reducing microbial loads and lowering Salmonella risks.
Finally, it provides more consistent results. Standardized cycles ensure each batch is cleaned evenly, eliminating missed spots and pressure fluctuations. This uniformity improves egg quality and makes your products more appealing, which can boost your marketability and profit margins.
DIY Egg Washer: What You Need to Gather
To build your DIY egg washer, you’ll need several essential components and tools. Start with a 5-gallon bucket, which serves as the most common base for the setup, providing enough volume for efficient washing. If space is limited, a compact 3.5-gallon version works well for sink-friendly arrangements. A food-safe container is crucial to ensure safe egg handling and to protect the shells during washing. Just as sharpening wire cutters requires avoiding dulling the cutting edge, maintaining clean tools prevents damage to the bucket’s surface.
Next, acquire a wire basket that fits inside the bucket with enough clearance for plumbing connections. This basket holds about a dozen eggs per batch, making it manageable and easy to unload. For the wash system, gather 3/4-inch PVC pipe along with tees, elbows, and a threaded adapter designed for your air supply. An air compressor with a pressure regulator capable of delivering 20 psi at 4 CFM is necessary to generate the appropriate airflow for cleaning.
Your toolkit should include a drill, hacksaw, and appropriate drill bits suitable for cutting PVC. Zip ties help secure components temporarily or permanently, while rubber stoppers allow for removable fittings and quick access for maintenance. Lastly, include a ball valve in your list of fittings to enable flow control, giving you the option to turn the system on or off as needed without disconnecting any parts. For the air delivery setup, air is blown through a drilled pipe via a vertical PVC shaft connected to that ball valve to control airflow.
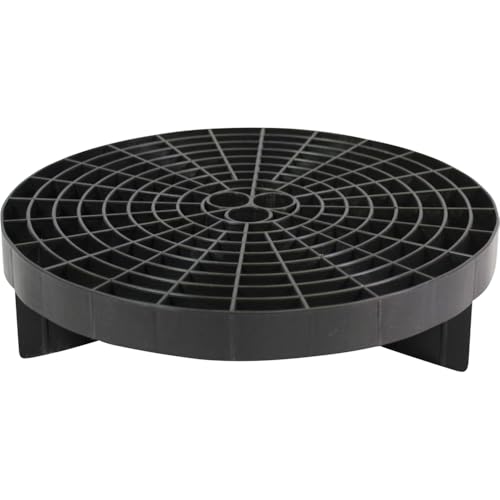
Traps Grit And Debris To Prevent Scratches: The HI-TECH Guard Insert keeps dirt and grime at the bottom of your wash bucket, reducing the risk of swirls and scratches during car washes—perfect for maintaining a flawless finish on paint, glass, and trim

✅ SEPARATES THE DIRT AND DEBRIS FROM YOUR WASH MITT OR PAD! When washing your vehicle, you’re picking up constant contamination from the miles traveled on your car! As the wash pad dunks back into the bucket, you’re removing the harmful contaminants with each pass over the Grit Guard!

Ultra-Compact 5 Gallon Bucket:This collapsible bucket folds to a slim profile (13"L x 5"W), saving space in backpacks, car trunks, or kitchen cabinets. Weighing only 250g, it’s a lightweight camping water container, RV supply, or beach bucket. This cleaning bucket can be stashed under sinks—perfect for decluttering small cleaning tools, household essentials, or first apartment supplies.
Build the PVC Bubble Manifold for a 5-Gallon Bucket
Build the PVC bubble manifold using a 1/2-inch pipe frame with a central upward fitting for your airline. First, dry-fit all elbows and tees to confirm clearance and proper fit before gluing. The frame should sit flat on the bottom of the bucket, with no obstructions to the basket above. Drill 1/8-inch holes spaced approximately 1 inch apart along the top surface of the pipe. This pattern ensures even air distribution, preventing bubbles from accumulating in one corner and promoting gentle agitation of the eggs. Use PVC primer and cement to securely glue each joint, creating a leak-free, permanent seal. Attach a valve to your air supply to adjust airflow post-assembly, allowing you to fine-tune bubble production for optimal aeration without excessive agitation. Selecting a wire cutter with proper jaw alignment and clean cutting edges is similarly essential for achieving precise, clean cuts on PVC pipe during assembly. This design is similar to welded vs. woven wire fences in that choosing the right material and construction method directly impacts long-term durability and performance. When transitioning chicks to full heat independence, the brooder plate removal timing depends on observing their behavior and ambient temperature rather than a fixed schedule.

【Durable Male Couplings】: Includes 5 x 1/2” NPT male thread adapters. These connectors have male threads on both ends to join two female-threaded pipes or fittings. Made from high-quality PVC for high impact strength and a long service life.

Comprehensive Type Selection:This 42-piece set includes six distinct fitting configurations: 12 pieces 1/2 pvc fittings of 3-way PVC fittings, 8 pieces of 3-way corner elbow fittings, 4 pieces of 90 degree angle PVC fittings, 6 pieces of 45 degree elbow PVC fittings, 4 pieces of 4-way PVC fittings, 8 pieces of 4-way corner elbow fittings. This diverse assortment of PVC pipe fittings provides adequate component variety for constructing both simple linear structures and complex three-dimensional frameworks without requiring supplemental purchases for connection points.

Complete PVC Pipe Fittings Set: Includes 10 x 1/2" 3 Way Tee Fittings, 10 x 1/2" 2 Way Couplings, and 10 x 1/2" 90 Degree PVC Elbows for versatile construction needs
Assemble the Bucket and Position the Basket
Place your clean 5-gallon bucket as the main wash chamber. Choose a rigid wire basket that fits inside with about 2.5 gallons of clearance, suitable for a compact setup holding 70 to 80 eggs. Set the egg basket low in the bucket, then use a spacer to offset it by approximately one inch from the bottom. This elevation enhances water circulation underneath and prevents eggs from resting directly on the floor. Center the basket to ensure stability and prevent tipping during agitation. Load the eggs evenly across the basket, avoiding piles to lessen stress on the lower layers. Place the dirtiest eggs on the outside for easier cleaning. Confirm that the basket clears the manifold and tubing, then dry-fit it to verify stability. A well-centered, secure position will provide consistent cleaning without excessive bouncing against the wall. For quail eggs, the same wash chamber design works well if you adjust the basket’s mesh to account for the smaller egg size. The base inserted into the bucket also facilitates water circulation and prevents eggs from sitting on the bottom. For added cost savings, consider using repurposed fencing materials for the spacer to reduce expenses. Pairing this washer with a shaded, well-ventilated station can help maintain stable egg temperatures during the cleaning process.
DIY Egg Washer Water Temp and Detergent Guide
For detergent selection, choose a nonfoaming, unscented formula to prevent residue buildup and odors. Use approximately 1 ounce per 2 gallons of water. Do not mix detergent with sanitizer at this stage — handle sanitizer separately during the wash, rinse, and sanitize cycle. Always ensure there is a 20°F temperature difference between your wash water and sanitizer to optimize cleaning effectiveness. Regularly refresh the wash solution to maintain its cleaning power. Precise control of these factors helps prevent food safety issues and keeps your eggs properly sanitized. Feeding your layers a balanced layer feed rich in calcium and protein further supports strong eggshells that resist cracking during washing. Using hardware cloth in your coop’s ventilation and predator-proofing helps keep eggs clean and reduces the risk of contaminants entering the nesting area. For cutting that hardware cloth, use top wire cutters to ensure clean, precise cuts without fraying the mesh.

SHIPMENT CONTAINS: One 82.5 fl oz bottle of concentrated liquid laundry detergent, enough for 110 loads of clean, fresh laundry

all free clear is the #1 laundry detergent brand recommended by dermatologists, allergists and pediatricians for sensitive skin.100% free of perfumes and dyes, all free clear liquid laundry detergent provides an effective clean that's gentle on skin

all free clear is the #1 Brand Recommended by Dermatologists, allergists and Pediatricians for Sensitive Skin.
Wash, Rinse, and Sanitize Eggs in Your DIY Washer
Wash eggs individually under running water—never soak them. Remove visible dirt carefully without aggressive scrubbing, as protecting the shell’s integrity is essential for egg safety. Rinse immediately with clean, slightly warmer water to prevent contaminants from being pulled inside the egg. After rinsing, sanitize the eggs with a fresh chlorine solution of about 50–200 ppm. Make sure the shell is fully wet, then avoid rinsing again—let the eggs drain and air-dry completely before storage. Only process intact eggs and avoid cold water during any step to maintain shell strength and safety. Using sturdy chicken wire around the coop can also help keep eggs cleaner by preventing debris and pests from entering. For a reliable setup, consider the top chicken coops that keep your flock healthy and produce cleaner eggs. For additional flock care, water cups for chickens can help keep your hens hydrated and reduce mess in the coop.

PLANT-BASED FORMULA YOU CAN TRUST: Created with 99% food-grade ingredients, this naturally derived solution harnesses plant-based enzymes to gently cleanse farm-fresh eggs—no harsh chemicals, dyes, or artificial foaming agents involved. A thoughtful choice for those who value simplicity and safety in their routines.
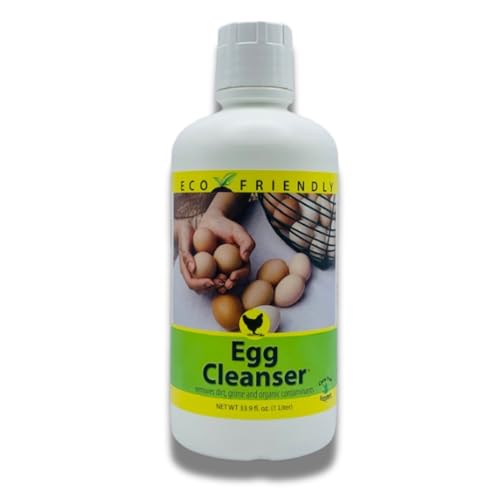
SAFE & NATURAL EGG WASHING — CareFree Enzymes Egg Cleanser uses plant-based food-grade enzymes to safely remove dirt, bacteria, fecal matter, blood, and protein residue from fresh farm eggs. A gentle alternative to harsh detergents and bleach — won't damage the bloom (cuticle) or leave chemical residue on your eggs.

Naturally Clean, Gently Effective: Made with just salt, water, and electricity, Fresh Nest uses pure hypochlorous acid to remove dirt and residue from freshly laid eggs, without harsh chemicals or additives
Clean, Store, and Troubleshoot Your DIY Egg Washer
After washing, thoroughly clean your DIY egg washer to prevent biofilm and residue buildup. Drain all standing water, detach removable brushes, and wipe down the housing with a damp cloth. Wash basins with hot, soapy water—then rinse with clear water to remove any soap residue. Dry eggs completely on clean racks before cartoning, and store them pointy end down at or below 45°F with 70 to 85 percent humidity. Use a first-in, first-out rotation to keep eggs fresh. Choosing the correct feed, such as layer feed for laying hens, supports overall egg quality and shell strength. Adding a small solar-powered fan to your washing area ensures continuous airflow that aids drying and prevents moisture buildup. For superior incubation results, consider using one of the best egg incubators with turners to automate the turning process after washing.
For equipment maintenance, troubleshoot common issues promptly. Dirty eggs suggest you need faster collection or gentler brushing. Off odors indicate incomplete drying or contaminated surfaces. Slime on equipment shows standing water left inside, which can cause mold. Replace worn seals or brushes as soon as you notice wear. Store battery components at partial charge in a cool, dry place to extend their life. Before long-term storage, clean and dry all removable parts to prevent mold and corrosion.