

Thinking about building your own chicken run but not sure where to start? You can create a secure, cost-effective space that keeps your hens happy with just a few simple guidelines.
By using sturdy materials and a bit of planning, you can keep costs low while providing enough space to reduce stress and pecking.
Everything you need to know to build a durable chicken run is right here.
How Much Room Do Your Chickens Actually Need? A Quick Size Guide
Chickens require about 3 to 4 square feet of coop space per bird if they are kept in confinement. If your flock free-ranges during the day, you can reduce the coop space to 2 to 3 square feet per bird. For confined flocks that do not free-range, aim for at least 10 square feet of run space per chicken. Heavy breeds, which are larger and more active, need more room—about 12 to 15 square feet in the run per bird. For a budget-friendly setup, plan on 4 square feet in the coop and 10 square feet in the run per standard hen. Providing more space than the minimum reduces stress and manure buildup, leading to healthier chickens. For example, runs with at least 15 square feet per heavy breed significantly lower the risk of feather pecking and disease. For chickens that are taken out of the run on a leash, a proper chicken harness ensures safety and comfort during walks. Remember to consider the breed size too; larger breeds need proportionally more room. Overall, more space correlates with happier, healthier chickens. For a detailed comparison on quality and value, check out reviews of top picks for chicken pens with runs.

Sturdy Structure & Wire Mesh: Are you ready to create the perfect living space for your treasured animals? Look no further than this amazing chicken house! Crafted from 1" thick galvanized steel pipes, precise welding, sturdy frames, and featuring a protective hexagonal mesh, our chicken coop with run is built to last and provide a safe space and beautiful living experience for your cherished animals.
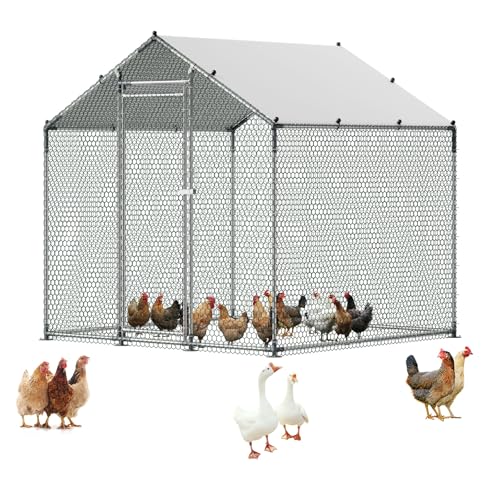
Sturdy Structure & Wire Mesh: Are you ready to create the perfect living space for your treasured animals? Look no further than this amazing chicken house! Crafted from 1" thick galvanized steel pipes, precise welding, sturdy frames, and featuring a protective hexagonal mesh, our chicken coop with run is built to last and provide a safe space and beautiful living experience for your cherished animals.
The Best Fencing for Your Predator-Proof Chicken Run (Skip Chicken Wire)
Avoid using chicken wire altogether. Instead, opt for 1/2-inch hardware cloth, which raccoons and dogs cannot tear or reach through. Chicken wire tends to deform easily under pressure, making it ineffective against predators. If full hardware cloth costs too much, reinforce the lower 2 to 3 feet of welded wire fencing with hardware cloth. This hybrid setup targets the most vulnerable zones without overspending. Use washers and screws, not staples, to secure all fencing. Overlap seams tightly to eliminate gaps. Galvanized hardware cloth offers superior resistance to rust, so choose it for longer durability. The galvanized coating is a protective layer that prevents moisture from causing corrosion over time. Remember to cover the top securely, as aerial predators can exploit open ceilings. For a balanced approach, consider comparing top chicken coops with runs for pre-built quality and value. To keep costs low, you can also build your own DIY wire tensioner to ensure the fencing stays tight and secure over time.

HEAVY DUTY MATERIAL – Flexible yet strong 19‑gauge hexagonal zinc‑coated steel wiring prevents sagging and withstands long‑term outdoor weather exposure

High-Quality Anti-Rust Process This hardware cloth is made from high-strength low-carbon steel wire, combining excellent strength with flexibility. After precision welding, the entire product undergoes a premium anti-rust treatment—hot-dip galvanization—with special reinforcement at all seams and corrosion-prone areas to ensure uniform, dense coating and outstanding rust resistance. This process grants the product superior weather resistance, making it an ideal choice for wire mesh fencing and long-term outdoor applications.

Galvanized After Welding: Hot-dip galvanized after welding coats every welded joint, so the heavy duty mesh resists rust and breakage far longer than pre-galvanized wire in rain, soil, and sun
How to Stop Digging Predators in Your Chicken Run
To stop digging predators, you need to reinforce the perimeter of your chicken run, focusing especially on the lower edges. Foxes, raccoons, and coyotes tend to target weak spots like corners and the bottoms of gates, especially after rain softens the soil. To prevent this, install a continuous L-shaped barrier that extends outward 12 to 24 inches from the run’s perimeter. Secure it tightly with staples so it won’t shift over time. Bury the barrier shallowly beneath the soil and add a layer of soil or gravel on top to hide it and keep it in place. Make sure to overlap any joints tightly to eliminate gaps that predators could exploit. For a simpler installation that still provides effective protection, use a hardware cloth apron extending roughly 18 inches outward to act as a physical barrier. For a budget-friendly version, consider using a 5 gallon bucket as a base for a low-cost waterer that frees up funds for predator-proofing. You can also incorporate a DIY feed bin to further save on materials and consolidate your predator-proofing efforts. While focusing on predator-proofing, you can also consider feeding dried mealworms to your ducks as a nutritious treat in moderation.
Scatter predator scents near entry points and vulnerable sections of the barrier to discourage testing. If wildlife crossings are near your run, reinforce those areas with rocks or heavier cover to make digging less appealing. After heavy rain or storms, inspect the perimeter for fresh scrapes or disturbed soil, and repack or repair as needed. Combining sturdy perimeter hardening with secure doors creates an effective barrier that deters digging predators and keeps your chickens safe.
Buried vs. Surface Apron: Which Works Best?
A buried apron typically works better for a chicken run, especially if you’re installing a new barrier. Dig a trench about 6 to 12 inches deep along the fence line and place hardware cloth or wire mesh into it. Burying the apron hides the wire, preventing predators like foxes and raccoons from testing it by digging. This method creates a strong, almost invisible barrier that discourages diggers from attempting to tunnel under the fence. It’s best suited for new builds or the initial setup, as installation requires more time and effort. For lasting results, ensure the correct spacing between posts before burying the apron. Additionally, providing cracked corn can help chickens generate extra body heat during cold weather to stay warm. Quail owners should note that chick starter feed contains 20-24% protein and is generally safe for adult quail in moderation, though it lacks essential niacin for proper leg development.
Surface-mounted aprons can be effective but are generally less secure for preventing digging predators. To install, lay hardware cloth flat on the ground extending 12 to 24 inches outward from the fence line. Secure it with staples, landscape stakes, or cover with gravel to hold it in place. This method is faster and less costly, ideal if you’re retrofitting an existing run or have limited time. However, because the wire is exposed, predators may try lifting the edges or digging at the surface, so you’ll need to check and reinforce the apron periodically. Ultimately, if you prioritize durability and long-term security, a buried apron is the better option; for quick fixes or budget considerations, a surface apron may suffice.

Prevent Predators:2 roll chicken coop predator proof apron total about 11-5/8in W x 65 ft L, expertly designed to effectively block predators.Extending the wire mesh to the bottom of the coop prevents predators from digging their way in
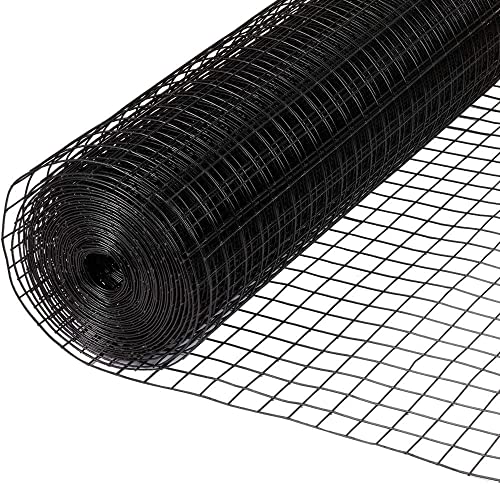
✔ Vinyl-coated Galvanized Steel - Our hardware cloth is made of durable steel. Galvanization and a black vinyl coating provide maximum rust & corrosion resistance, and high ductility. The premium material also ensures ultimate longevity.

HAIR REPELLENT MATERIAL: The Barber Vest series by Barber Strong features our Nano Shield material. Allows for maximum hair repellency to provide comfort all day. Also includes a hair removal system in the front bottom pockets. Made with 100% polyester that's easy to clean and maintain. Machine washable, cold. The hair repellency also makes the Barber Vest great for grooming cats and dogs.
5 Cheap Frame Options to Build a Predator-Proof Chicken Run
A pressure-treated lumber frame is a cost-effective and sturdy option for building a predator-proof chicken run. Using 4×4 corner posts and 2×4 rails, this type of frame resists rot and maintains strength over time, even when exposed to moisture and pests. Its durability helps keep out a wide variety of predators, from foxes to raccoons, while remaining affordable. Similar setups can also incorporate a duck coop with pool for combined waterfowl and poultry housing. Proper installation involves ensuring the posts are set deep enough and securely anchored, so the structure stays firm and predator-resistant. For additional protection, pairing this frame with poultry netting offers superior predator resistance compared to standard chicken wire. This method is ideal if you want a reliable, long-lasting fence without overspending. If you also plan to feed visiting wild birds, note that mourning doves readily eat cracked corn as a nutritious supplement.

Anti- Rust and Durable Steel Structure with Perch:The chicken coop uses a high-quality steel pipe frame, coupled with galvanizing technology, don't worry about rusting in outdoor. The steel pipe is strong and stable enough in windy and heavy rain
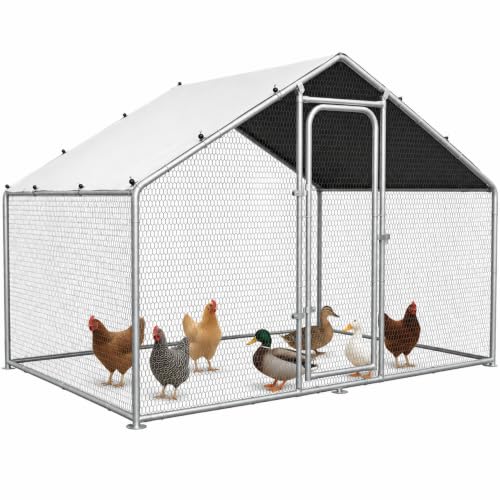
SPACIOUS WALK-IN CHICKEN RUN: Measuring 5x10x6.5 FT, this large metal chicken coop provides ample outdoor space for 5-8 chickens. The full-height walk-in design lets adults enter comfortably for feeding, cleaning, collecting eggs, and daily flock care. Capacity may vary by breed and setup.

High-Strength Rust-Resistant Metal Structure: Chicken coop are made of heavy-duty, high-quality steel tubing and multi-layer galvanisation, which provides superb resistance to rust and withstands harsh environments such as humidity, rain and snow. The reinforced frame is rigorously stress-tested to ensure excellent resistance to wind and loads for long-term stability
Build a DIY Gate That’s Secure and Easy to Open Daily
To build a secure and easy-to-open gate for daily use, start with self-closing hinges rated for outdoor conditions. These hinges ensure the gate closes automatically behind you, providing consistent security without extra effort. Choose a two-step gate latch that is accessible from outside but difficult for raccoons or other predators to manipulate; avoid simple hook-and-eye designs. Reinforce all edges of the gate with screws and washers on 1/2-inch hardware cloth to prevent predators from pulling it loose. Regularly check and maintain the latch alignment, as wood movement can shift it over time. Use heavy-duty, adjustable spring hinges to enhance hinge security and durability against outdoor elements. For added peace of mind, attach a carabiner clip as a secondary lock. Design the gate to be wide enough for one-handed bucket carrying, but always ensure it is fully closed before dark. For additional predator-resistance, consider the top options for your flock’s overall coop setup. When tightening the fence fabric around the gate frame, use a fence tension bar to pull the wire taut before stapling. For a low-cost approach, you can repurpose materials like a plastic storage bin as a simple dust bath container to keep your chickens clean and healthy.
Your Complete Materials List and Where to Save Money
Use pressure-treated 2x4s for the frame, mixing 8-foot and 6-foot lengths to save money on transportation and cutting. For the posts, opt for 4×4 fence posts or T-posts, which are more affordable and straightforward to install. Use 1/2-inch hardware cloth for predator-proofing; it’s more resistant than welded wire and worth the slightly higher cost. Deck screws, hinges, latches, and staples are necessary hardware, so choose durable options to prevent future replacement.
For the base, gravel is a cost-effective alternative to concrete and provides good drainage for your run. Roofing materials like corrugated panels or polycarbonate sheeting are affordable choices that protect your chickens from the weather. Instead of expensive paint finishes, use exterior-grade, UV-resistant stain or leave the lumber untreated if it’s pressure-treated—this keeps costs down and still offers weather protection. Swap welded wire for hardware cloth only if predators are unlikely; hardware cloth offers better security and durability.
Cut lumber costs further by replacing trim and bracing with furring strips, which are cheaper and just as effective. When selecting lumber at the store, choose straight, knot-free strips to avoid wasting money on unusable pieces. Carefully choosing materials and substitution options can significantly reduce your overall expenses without sacrificing safety or durability. For the interior, consider using hemp bedding as an absorbent and dust-free option that naturally controls odors and moisture. If you plan to keep ducks in the run, avoid feeding them scratch grains as a primary diet because it lacks balanced nutrition and can lead to health issues.

By Crafters, For Crafters: Crafting and building with wood is our number one priority. Bringing you more of the wood craft supplies you love is our job. Please dont hesitate to get in touch
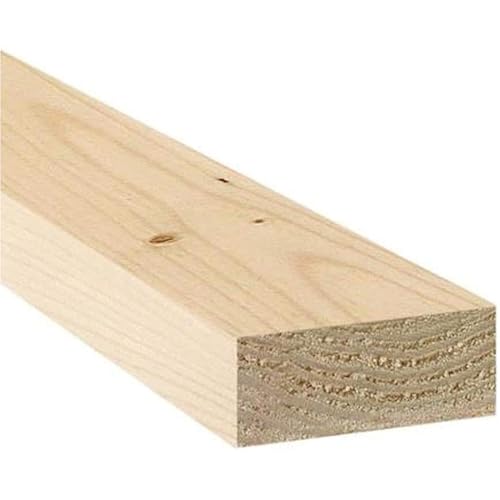
By Crafters, For Crafters: Crafting and building with wood is our number one priority. Bringing you more of the wood craft supplies you love is our job

Many Uses - This product is suitable for new home construction, renovation projects, and more and has been tested for many different jobs.
Protect Your Run With a Partial Roof and Shade
To protect your run with a partial roof and shade, start by covering a portion of the space with a sturdy roof. Use materials like corrugated metal or polycarbonate panels that are durable and weather-resistant. The roof should have a slope to allow rain and snow to drain effectively and be supported by a solid frame, ensuring it can withstand strong winds and heavy precipitation.
For the open section, install shade cloth to provide relief from harsh sunlight while maintaining airflow. Aim for 50–70% shade in most climates, and increase to 80–90% in hotter regions to prevent heat stress. Attach the shade cloth securely to your frame or stretch it over supports, avoiding loose or sagging areas that could flutter in the wind. Unlike tarps, shade cloth won’t trap heat or cook your chickens, making it a safe and cost-effective option.
This combination of partial roof and shade cloth offers ground moisture control, improves ventilation, and provides your flock with a choice between sun and shade. Make sure all components are properly secured against wind to ensure a long-lasting, low-maintenance solution.
Adapt These Plans to Any Backyard Size
To accommodate any backyard size, your chicken run should be at least 10 to 15 square feet per bird. For example, a flock of six hens requires about 60 square feet of space, which can be fulfilled by a 6×10 foot run. Small yards don’t necessarily require reducing the number of chickens but instead focus on optimizing space. Bantam chickens, which are smaller, can thrive in as little as 8 square feet per bird, making them ideal for tighter spaces.
Overcrowding in the run can lead to stress, which reduces egg production. Additionally, limited space makes chickens more vulnerable to predators and increases the likelihood of fights. Using narrow rectangular runs along fence lines helps maximize limited lot space without sacrificing safety or comfort. Always plan for future flock growth by building larger runs—aiming for about 15 square feet per bird—so you have room for breed changes or new additions without needing to resize later.
Taller Runs Make Cleaning and Maintenance Easier
A taller run makes cleaning and maintenance significantly easier by allowing you to stand upright while raking, scooping, or replacing bedding. This reduces the need to bend or crouch during routine tasks, helping to prevent strain and fatigue. You can effortlessly wheel in a barrow or bucket for quick cleanouts and reach into corners where waste tends to collect.
Maintaining your setup also becomes simpler without cramped conditions. Tasks like refilling feeders or changing water become less awkward, saving you time and effort. Plus, the extra height improves vertical ventilation, which dries damp litter faster, reduces odors, and prevents sticky buildup.
Better airflow makes deep cleaning—hose, scrape, and dry surfaces—more practical. It also helps manage deep-litter systems by allowing you to stir and level bedding with ease. Taller structures also aid in predator deterrence; you can spot and repair damaged mesh quickly and apply lime or bedding evenly without hitting a low ceiling, as lime neutralizes odors and keeps the ground clean.