

Struggling with constant refills for your chickens’ feeder? A simple DIY PVC gravity-fed design can cut your refill times significantly.
Using just a few tools and parts, you can build a sturdy, efficient feeder in a weekend that holds around 10 pounds of feed and keeps your flock fed with minimal fuss.
Keep reading to see how it all comes together.
What PVC Pipe Size and Length Work Best for Your Flock?
A 3-inch PVC pipe is the most reliable size for a standard DIY chicken feeder because it offers a good balance between feed flow and durability while minimizing clogs. For medium-sized flocks, a 4-foot section of this pipe typically provides enough capacity and is easy to handle. Smaller flocks of 1 to 5 birds can use 2-inch pipe, but beware that feed bridging becomes more likely with pipes smaller than 2 inches. Using schedule 40 PVC helps ensure safety and strength, preventing cracks under the weight of feed. Matching the pipe diameter with elbows and other components creates a uniform system that reduces feed jams and improves appearance. When installing, cut openings around 2.5 to 3 inches wide for easy access, avoiding waste and providing smooth feed access for your birds. This design mimics the automatic gravity feed system of commercial feeders to ensure a consistent food supply and reduce the need for frequent refills. To keep the feeder functioning properly, you should incorporate a regular cleaning routine as part of your overall chicken run maintenance to prevent mold and pest buildup. For the best results, consider pairing your feeder with high-quality coop windows that enhance ventilation and reduce moisture inside the chicken coop. Selecting a durable PVC feeder further supports the long-term value and quality of your flock’s feeding setup, similar to the considerations found in top-rated chicken coops with runs.
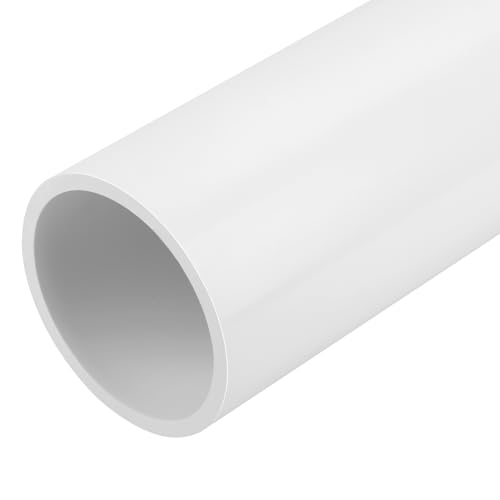
Size - Length of each: 17";The 3 inch Schedule 40 PVC pipe has an outer diameter of 3.50 inches and an inner diameter of 3.03 inches. This PVC pipe is suitable for various DIY projects.Please confirm before purchase.

SIZE & FIT: Every section is measured, not guessed. This one is a true 3.50 in OD, the diameter that slides into a standard 3 in fitting socket. Nominal labels rarely match real sizes, so check your own pipe or coupling before ordering.

Size - Length of each: 34"(2.83FT);The 3 inch Schedule 40 PVC pipe has an outer diameter of 3.50 inches and an inner diameter of 3.03 inches. This PVC pipe is suitable for various DIY projects.Please confirm before purchase.
The 7 Parts and 4 Tools You Need for a DIY PVC Chicken Feeder
Building a DIY PVC chicken feeder requires seven parts and four tools. The main components include 3-inch PVC pipe, a 45-degree Y or 90-degree elbow, end caps, a cap adapter or cleanout plug, hanging hardware like pipe straps, plus cement and fasteners. These parts are essential for constructing a functional and durable feeder. For additional savings, consider using a DIY Feed Bin approach to repurpose leftover materials from a larger project. When choosing hanging hardware, brooder plates offer a safer, heat-free alternative to heat lamps for warming chicks if you plan to place the feeder in a brooder setup. To ensure your flock stays healthy while feeding, look for best layer feed that matches the nutritional needs of laying hens.
For your tools, you’ll need a hacksaw to cut the PVC, a drill for making holes or attaching hardware, a measuring tape with a marker for precise cuts, and a file or sandpaper to smooth sharp edges. Having these tools ready before starting ensures smooth assembly and reduces mistakes. Always file down sharp PVC edges to prevent injury during handling or from chickens pecking.
If you consider using alternative materials like galvanized pipe straps or wood screws, verify they are food-safe and rust-resistant. Using the right combination of parts and tools streamlines the process and helps create a secure, long-lasting feeder without multiple trips to the hardware store.

No-waste design: Chicken feeder features a no-waste design with the feed opening extending downward, solving the problem of spilled feed, avoiding feed waste and providing a cleaner coop for your chickens. With the chicken feeder you can feed your chickens efficiently, avoiding mess and waste, saving you money and time. We recommend a distance of 3 inches between the feeder hole and the bottom of the bucket

Upgrade Poultry Feeder: The internal height of our poultry feeder port has been increased by 0.6 inches. The clever design effectively reduces 30% feed spillage and mess. Every grain of feed is fully utilized, allowing the chicken coop to say goodbye to messiness and maintaining a clean automatic dining environment for the flock

Easy install, come with a 3.15"/80mm hole saw, make an outdoor chicken feeder in a minute
Step 1: Measure, Mark, and Cut Your PVC Sections to Size
To ensure each PVC section fits perfectly, start by measuring the pipe run precisely with a tape measure. Use end-to-end measurements for straight sections and center-to-center measurements when fittings are involved to account for their impact on spacing. Mark a clear, visible line around the entire pipe circumference, wrapping tape around the pipe if needed to create a more accurate and straight guide. Secure the pipe firmly in a vise or clamp to prevent movement during cutting. Use a hacksaw or miter saw, keeping the blade aligned with your marked line to ensure a straight, accurate cut. After cutting, verify that the end is square by checking for right angles, and smooth any burrs with a file or sandpaper. This clean finish guarantees tight joints when solvent welding and helps prevent gaps that could lead to leaks. Planning your cuts carefully now also allows for space to add pipe insulation later, which can help reduce noise or provide weather protection. For extra protection of your setup, consider reviewing the best netting for poultry to keep birds safe from predators.
Step 2: Drill Feeding Holes Your Chickens Can Actually Use
Chickens should be able to poke their heads through openings that are 2 to 3.5 inches in diameter, which suits most standard breeds. Bantams, being smaller, need slightly smaller holes to comfortably access feed. Using a hole saw ensures clean, round cuts that align with their natural feeding behavior and prevent injuries. Space the holes every 2 to 3 inches along the top half of the pipe, centering each one to keep the feed inside and make sure multiple chickens can feed at the same time without crowding. Offset the holes on opposite sides to allow more birds to access feed simultaneously and reduce competition. Avoid placing holes near edges or joints to maintain the pipe’s structural integrity. Drill slowly to prevent cracking, then remove burrs and shavings to create smooth edges that protect their wattles and combs during feeding. For the smoothest finish, consider using wire cutters to trim any plastic burrs from the hole perimeter. To further protect your flock from external pests, you can also apply top mite sprays around the coop after building the feeder. Many chicken keepers also reinforce the feeder’s entry points with hardware cloth to prevent rodents from chewing into the feed supply.

Easy install chicken feeder, use with a 3.15"/80mm hole saw, make an outdoor chicken feeder in a minute

[NO-WASTE DESIGN]: The feeder inlet extends downwards by 0.8 inches, which helps prevent uneaten feed from spilling out, effectively reducing feed waste and mess, keeping the chicken house clean, and thus saving you cleaning time and feed costs.

Keep it clean & No Waste: You just place DIY chicken feeders anywhere on your farm or coop, fill it with feed and poultry feeders will be driven by gravity. Feed your chickens in an easy way, prevents spilling of feed and no waste. Chicken feeders can save you 15-32% of feed and make your coop cleaner and more comfortable
Step 3: Smooth Every Sharp Edge Before Assembly
To ensure safety and proper fit, you need to smooth each sharp edge before assembly. Start by wearing gloves and safety goggles, as freshly cut PVC edges can cause cuts or abrasions. Use a deburring tool for quick removal of roughness on both the inner and outer edges, or opt for a round file if you don’t have one. A utility knife can scrape away external burrs but always cut away from your body to avoid injury. Internal burrs should be thoroughly cleared, leaving no ridges or rough spots. For quail eggs specifically, understanding the optimal incubator temperature is crucial for successful hatching. Similarly, when selecting a solar heater for your chicken coop, proper installation prevents fire hazards and ensures efficient warmth.
Next, chamfer the outer edge with fine-grit sandpaper to create a smooth bevel that helps the pipe slide into fittings without snagging. Be careful not to remove too much material—just enough to make the edge feel smooth to the touch. Inspect both the inner lip and outer rim, reworking any rough spots. Finally, wipe away all plastic shavings with a clean rag or paper towel. A smooth, clean pipe end ensures a faster, safer fit and promotes a strong bond when using solvent cement. Providing similar deburring techniques can also be applied to chicken toys made from plastic to prevent injury in the coop.
Step 4: Dry-Fit Elbows, Caps, and Splitters for Perfect Alignment
Dry-fitting elbows, caps, and splitters without adhesive is essential for verifying your layout before making any permanent joints. It allows you to check the orientation and face each fitting correctly, especially at elbows and splitters where the direction impacts feeder flow. Insert pipes roughly one-third to two-thirds of the way into the fitting’s socket wall for a snug, functional fit. Avoid parts that feel too loose or too tight, as poor fits can weaken the material and compromise the system’s durability. For stubborn joints, mastering wire cutters helps you trim pipe ends to achieve a precise fit without damaging the socket. You can also apply similar logic from a DIY fence wire tensioner to ensure tight, aligned connections without excess force. If you are building the feeder for a mobile chicken coop, consider how the feeder will attach securely to the movable frame.
Mark the socket depth on the pipe, then add a witness mark beyond it for rechecking after applying primer. Use the internal stop of the fitting as your reference point to ensure proper alignment. When dry-fitting splitters, assemble the entire branch layout to confirm symmetry and even distribution. Limit yourself to about four dry-fit connections to prevent cumulative length errors that can affect overall alignment.
Gently rotate each piece during dry fitting to test how the final joint will index and ensure correct orientation. Keep the assembly level and square throughout this process to avoid misalignment. A successful dry fit should produce a clear, repeatable pathway for final assembly, minimizing surprises during glue-up.

No Guesswork on Fit for 1/2" PVC Pipe: Tired of loose or mismatched PVC fittings? This 3-way PVC elbow is precisely designed for standard 1/2" Schedule 40 PVC pipe (OD approx. 0.84"), delivering a snug, secure fit that reduces wobble and saves time during assembly, ideal for stable PVC structures

Note: 1-inch pipe has an actual inner diameter of 1.315" [Schedule 40] and is used to connect PVC pipe with an outside diameter of 1.315".

INSTALLATION EFFORTLESS: Each package comes with 4 x 3-Way SCH40 PVC Pipe Fittings. Just trim 1/2" PVC pipe to your preferred length and place it into the slots to construct cubes or different shapes using this PVC connector. Every opening on this PVC joint features a deep-set socket on three distinct angles, each 90 degrees apart.
Should You Use PVC Cement or Keep It Removable?
Using a hybrid approach works best for a DIY PVC chicken feeder. Cement the structural, load-bearing parts, such as the main tube and connectors, to ensure stability and resistance to vibration or bumps. These fixed joints provide long-term strength and keep the feeder securely assembled. However, keep at least one section removable, like a bottom cap or a threaded end, to make cleaning and maintenance easier. Removable parts allow you to access the interior for clearing clogs, removing debris, and inspecting for mold or moisture build-up. This maintenance helps prevent feed dust from causing mold and keeps water sources clean. By combining glued joints for stability with removable ones for serviceability, you create a durable yet manageable feeder that accommodates both strength and convenience.

【Premium PVC Material】Made from high-quality, thickened PVC for superior durability and resistance to damage, ensuring long-lasting performance in farm environments.

【Premium & Durable PVC Material】This pvc chicken feeder is constructed from high-quality PVC with a wall thickness of approximately 0.2 inches, ensuring excellent sturdiness and wear resistance. Easy to wipe clean, and effectively keeps the feed dry and fresh.

🐓【Automatic Chicken Feeder】Our Chicken Feeder Is Mounted On The Wall, Allowing Chickens To Access Food By Simply Sticking Their Heads In. This Design Prevents Chickens From Standing On And Scattering The Feed, Significantly Reducing Food Waste And Lowering Feed Costs.
Where to Hang Your DIY PVC Chicken Feeder in the Coop
Hang your DIY PVC chicken feeder at the back height of the shortest bird, typically about 6 to 10 inches off the ground. This height ensures all chickens can eat comfortably without crouching or stretching, promoting natural feeding behavior. For larger chickens or in bigger setups, place the feeder about 12 to 18 inches off the ground. For duck owners, similar principles apply, as adjustable hanging height allows you to modify the position as your flock grows or as needed. When choosing a coop, consider models that include a built-in roosting area to keep your hens off the feeder at night. Additionally, using hemp bedding for the coop floor is a top option that reduces dust and absorbs moisture, enhancing the overall cleanliness of the feeding area.
Keep the feeder off the floor to reduce contact with litter and droppings, which eases cleaning and minimizes contamination. Position it in a low-traffic corner but away from roosting bars and nesting boxes to prevent spoilage of feed. This placement also allows chickens to eat without competition, respecting their natural foraging habits.
Space multiple feeders at least one foot apart for every four to five chickens to prevent crowding and promote access. If your coop has a run, hang the feeder under a roof or overhang to keep feed dry and reduce waste from rain. Using an adjustable hanging height allows you to modify the position as your flock grows or as needed.
How Much Feed Will a Full PVC Feeder Hold?
A full PVC feeder’s capacity depends on the pipe’s interior volume. For a typical 3-foot, 4-inch diameter pipe, you can expect it to hold approximately 10 pounds of feed. This calculation is based on the volume of the pipe interior — about 151 cubic inches per foot — so a 3-foot section provides roughly 452 cubic inches. Converting this volume to weight using the standard factor of 43.3 cubic inches per pound yields around 10.4 pounds of feed. The DIY PVC chicken feeder can be built with rainproof gravity feed kits that include a rubber seal ring to ensure dry feed and prevent wastage from weather.
Keep in mind that feed type influences weight. Pellets and crumbles settle differently, which can cause slight variations in capacity. For larger needs, a longer pipe with the same diameter can hold 20 to 30 pounds of feed, ideal for a medium-sized flock. To determine your specific pipe’s capacity, measure its interior volume accurately, then multiply by 0.0231 to convert cubic inches to pounds.
Why This Weekend Project Saves You Daily Feeding Time
Building your own PVC chicken feeder this weekend can save you 15–20 minutes each day. By reducing the need for repeated trips to the coop for feeding, you free up time in your mornings and evenings. The gravity-fed design allows you to refill the feeder every 6–7 days, cutting down on manual scooping and carrying feed. It also helps reduce feed waste by 12–30%, meaning less time spent sweeping up spilled feed and refilling. The durability of PVC material ensures your feeder withstands rain, snow, and sun without rust or rot, so you only need to build it once for year-round use. This simple project means you never have to worry about missed feeding times, as the feeder consistently delivers feed on schedule. For even better feeding efficiency, you might consider integrating insights from expert reviews of forced air incubators. The time saved each day can then be redirected toward flock health checks, cleaning, or other chores.