

Ever wonder how to keep your chickens fed without constant refilling? A simple DIY automatic feeder can do the trick, costing under $15 using just a bucket, some PVC fittings, and basic tools.
It’s a straightforward setup that uses gravity to deliver food at your chickens’ level, with no motors or wiring involved. Keep reading to see how you can customize it for your flock.
Why a Bucket-and-PVC Feeder Costs Under $15 and Works Instantly
Because you’re building with just a few common parts, a bucket-and-PVC gravity feeder costs under $15. The essential components include a short length of pipe, an elbow fitting, and caps—nothing elaborate. Using thinwall PVC can cut material costs in half compared to standard pipe, making it even more affordable. This simple setup doesn’t rely on advanced automation; no motors, batteries, or wiring are needed. The feeder works instantly because it relies on gravity: fill the bucket, and feed drops into the ports immediately. No calibration or setup time is necessary to get it functioning. Minimal parts and a dry-fit assembly process significantly reduce your build time. Small access openings help prevent spillage and keep the feed dry, which helps protect your investment. For a backyard coop, this design conserves space and provides quick, effective feeding, all while staying well within the $15 budget threshold. To further reduce costs, you can salvage materials from old construction projects or plumbing leftovers. This design similarly uses a gravity-fed port to continuously supply feed, keeping it enclosed and off the ground. Many of the top-reviewed chicken pens also prioritize enclosed feeding systems to keep feed dry and waste-free. In fact, these pens are often evaluated for their overall quality and value alongside other key features.

No-waste design: Chicken feeder features a no-waste design with the feed opening extending downward, solving the problem of spilled feed, avoiding feed waste and providing a cleaner coop for your chickens. With the chicken feeder you can feed your chickens efficiently, avoiding mess and waste, saving you money and time. We recommend a distance of 3 inches between the feeder hole and the bottom of the bucket

Easy install, come with a 3.15"/80mm hole saw, make an outdoor chicken feeder in a minute
Materials and Tools for Your Bucket-and-PVC Feeder
To build your bucket-and-PVC feeder, you need a few essential supplies. Start with a food-grade, BPA-free 5-gallon bucket with a lid to protect feed from contamination and allow for easy monitoring. Clear plastic buckets make it simple to see when feeding levels are low. For the PVC pipe, select 3- or 4-inch diameter sections, along with 90-degree elbows to create a smooth feed flow. To ensure safety and avoid contamination, reuse only clean, rust-free, food-safe containers, such as restaurant buckets. This design is a great way to explore cost-saving ideas by repurposing inexpensive or free materials.
You will also need a drill equipped with hole saw bits that match your pipe size, as well as a hacksaw or jigsaw for cutting the PVC. A utility knife is useful for refining holes and openings. Accurate placement requires a tape measure and marker. To secure components, use pop rivets or silicone sealant—both provide a tight, durable hold. Finally, smooth out any sharp edges on cut PVC with sandpaper. Optional hardware like pipe straps or zip ties can facilitate mounting and securing your feeder, but the core list remains straightforward and durable.
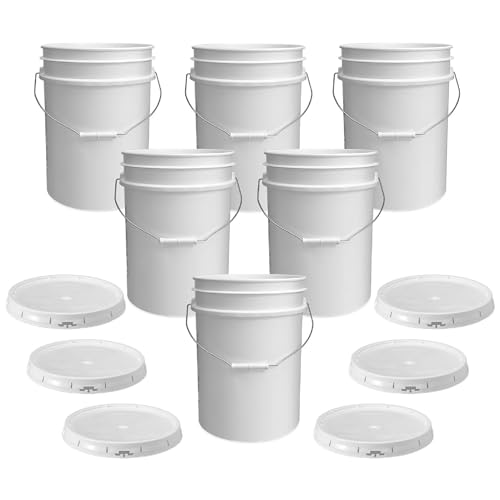
Made To Handle More: Tackle bulk storage with a plastic bucket and airtight gasketed tear strip lid made from sturdy 90 mil HDPE plastic. It’s a dependable pick for pantry staples, utility use, and everyday organization when lightweight containers won’t cut it.

SECURE SNAP-ON LIDS – Keep contents protected with included snap-on lids, perfect for food storage, pet food, paint, cleaning supplies, and more.

Built to Last - Built with Mighty Tuff quality materials, this pet food storage container is a durable, all-purpose storage option. Indoor or outdoor, it is fit for any season and guaranteed to remain rust, water, damage and corrosion-proof.
How to Cut and Drill the Feed Opening
To cut and drill the feed opening, start by measuring and marking the bucket’s lower third carefully. This ensures balanced access for your birds. Space your marks evenly around the circumference, with four openings providing good distribution. Select your opening size based on your needs: a 2-inch diameter works for single birds, while 5 to 6.5 inches allows multiple birds to feed simultaneously. For young chicks, feeding chick starter requires smaller openings to prevent waste and overfeeding.
Use a hole saw that matches your fitting’s outside diameter for precise cutting. For example, a 2 1/2-inch hole saw creates a snug fit for a 2-inch bushing. Secure the bucket firmly to prevent it from spinning during drilling. Drill the center point with a steady, perpendicular aim, which guarantees the fitting will sit flush with the surface. Always Secure the bucket firmly to avoid wobbling, a common mistake that causes uneven cuts.
After cutting, smooth sharp edges with a razor blade to prevent injury and improve fit. This step also helps ensure your fitting sits level, reducing gaps and feed wastage. Remove all plastic shavings thoroughly before use. Always test each opening for fit before assembly to confirm proper flow and avoid mismatched sizes or loose connections.
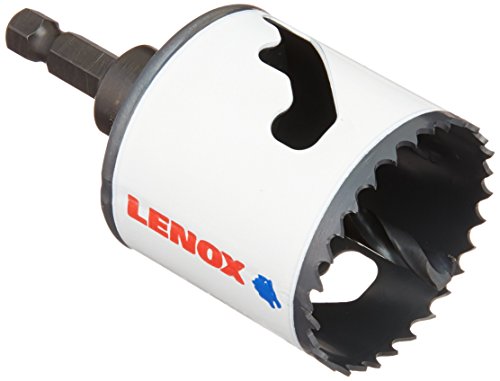
2X more durable with 50% longer life than previous LENOX hole saws

Package Includes: 1 pc 2" hole saw, 1 pc arbor with drill bit, 1 pc pilot drill bit (replacement), 1 pc hex key

Transform Any Container Into a Lifetime Feeder: With RentACoop's DIY Medium Port Feeder Kit, you can change any wasted container into a feeder for your chicks 3 days or older, adult chickens, and other small birds like Quail, Pigeons, Doves, and more
Attach PVC and Test Feed Flow
Start with a dry fit before applying any glue. Assemble all your PVC fittings without cement to ensure proper alignment and fit. Check that the main pipe sits at your intended height and that the angled feed section is slightly upward from horizontal to control flow and prevent dumping. Make sure the feeding lip is at chicken back height for easy access. Use a drain and sewer Y fitting to maintain the correct angle during assembly. Make any final adjustments with a properly sized wire cutter to trim the PVC ends for a precise dry fit. A consistent feed flow depends on the same principles used in forced air incubators to regulate air movement. Additionally, keeping your feed storage area dry is important because diatomaceous earth works by desiccating pests, and moisture can reduce its effectiveness.
Once satisfied with the dry fit, apply PVC primer and cement to each joint. Insert the pipe into the fitting with a quarter-turn twist, then hold firmly for about 30 seconds to ensure a strong bond. Cap the top (keeping it removable for refilling) and attach the bottom elbow or Wye as needed.
After the cement has cured overnight, test the feed flow by filling the pipe. Observe if the feed moves smoothly into the lower access section. If the flow is sluggish, try adjusting the angle of the outlet. If it pours too fast, reduce the outlet tilt. A consistent, gravity-fed trickle indicates that you’ve achieved the correct setup.

Waste Free Pvc Chicken Feeder: The wall-mounted chicken feeder, chicken feeder, enables continuous feeding for chickens, minimizing feed waste and reducing rearing costs. Please note: This PVC chicken feeder is 19.3 inches long, 6.7 inches wide, and has an inner tube diameter of 3.8 inches.

Minimize Waste: The feeding opening is not big which can minimize the spilled and wasted feed; this pvc chicken feeder kit also keeps the feed clean; with 3 lids, this chicken gravity feeder is easy to refill and easy to clean

[NO-WASTE DESIGN]: The feeder inlet extends downwards by 0.8 inches, which helps prevent uneaten feed from spilling out, effectively reducing feed waste and mess, keeping the chicken house clean, and thus saving you cleaning time and feed costs.
Protect Feed From Rain, Pests, and Spills
To protect feed from rain, pests, and spills, start by weatherproofing your feeder. Use a tight-sealing lid with a rubber gasket to keep moisture out, and install a rain hood over ports to prevent water intrusion during storms. Incorporate a slanted roofline to help shed water efficiently. Elevate the feeder under shelter, away from runoff zones, to reduce exposure to wet conditions and dripping runoff. These measures help keep feed dry, safe, and minimize waste caused by moisture or accidental spills. For added protection, place the feeder on a base of dry pine shavings to absorb any minor spills and further deter ground moisture. Additionally, using fermented chicken feed can improve nutrient absorption and reduce spoilage issues from moisture exposure. For a complete setup, ensure your feeder is paired with a top chicken coop that offers proper ventilation and shelter to keep your flock healthy.

VERSATILE FEEDING SOLUTION: Perfect for various chicken feeds like oyster shells, grits, corn, and more. A must-have for poultry owners looking for a multi-purpose feeder.

【EXTRA-LARGE 95 LB CAPACITY】:Designed for larger flocks, this feeder holds up to 95 pounds of feed—perfect for chickens, ducks, geese, and other poultry.

25LBS Capacity: The automatic poultry feeder holds up to 23 pounds of feed, reducing the frequency of refills and saving you time and effort
Match Hopper Size to Your Flock’s Weekly Intake
Estimate your flock’s weekly feed demand first. A standard adult layer consumes about 1.75 pounds per week, so multiply your flock size by that number. For example, four hens need roughly 7 pounds weekly. Your hopper’s feed capacity should be at least that total. A hopper holding 9 to 14 pounds suits a small flock. For larger flocks, a 50-pound hopper can feed about four hens for around 8 weeks. Don’t undersize—consider your heaviest feeders, such as heavy breeds that eat up to 0.30 pounds daily. It’s wise to add a small margin for periods of increased demand, like cold snaps or laying peaks, but avoid significantly oversizing. Weekly intake provides the most accurate basis for choosing your hopper size. For mite prevention, applying top mite sprays can protect your flock from infestations that stress birds and reduce feed efficiency. For water, best water cups for chickens ensure your flock stays hydrated alongside their feeder. To support strong eggshells during laying peaks, supplement with oyster shell grit for calcium.