

Struggling with pests or messy spillage in your chicken feeder? Building your own 5-gallon bucket feeder can solve both problems while being affordable and simple to make.
With just a food-grade bucket, a drill, and some basic supplies, you can create a sturdy, pest-proof feeder that keeps feed dry and accessible for your flock.
In the sections ahead, I’ll guide you through how to mark feed holes, drill and smooth edges, and choose the best holes for your chickens.
By the end, you’ll have a reliable feeder ready for your next weekend project.
Stop Wasting Feed: Build a Cheap 5-Gallon Bucket Feeder
A 5-gallon bucket is an effective size for a poultry feeder because it provides enough capacity to reduce the frequency of refills while minimizing waste. By building a simple port-style design, you control feed loss through spill and scratch damage, which can cut waste by up to 15% each year. Position the ports above the bucket floor so chickens reach in without raking grains outward, keeping feed contained and reducing scatter. When drilling the holes for these ports, ensure drilling debris is cleaned thoroughly to prevent feed contamination. To prevent moisture buildup and spoilage, always seal the lid tightly and clean the ports regularly. Wet feed deteriorates quickly, increasing waste and risk of illness. Using materials like PVC elbows or metal pipes can improve durability, but ensure edges are smooth to prevent injury. If you want to cut costs further, consider using recycled materials like old buckets or scrap PVC. Fill the feeder only up to one-third full at a time to avoid overloading and encourage frequent refills. Mount the feeder at chicken back height to minimize tipping and scratching, which also helps maintain feed cleanliness and reduce waste. These design choices improve feed efficiency and help keep your flock healthy.

No-waste design: Chicken feeder features a no-waste design with the feed opening extending downward, solving the problem of spilled feed, avoiding feed waste and providing a cleaner coop for your chickens. With the chicken feeder you can feed your chickens efficiently, avoiding mess and waste, saving you money and time. We recommend a distance of 3 inches between the feeder hole and the bottom of the bucket

Keep it clean & No Waste: You just place DIY chicken feeders anywhere on your farm or coop, fill it with feed and poultry feeders will be driven by gravity. Feed your chickens in an easy way, prevents spilling of feed and no waste. Chicken feeders can save you 15-33% of feed and make your coop cleaner and more comfortable

Keep it clean & No Waste: You just place DIY chicken feeders anywhere on your farm or coop, fill it with feed and poultry feeders will be driven by gravity. Feed your chickens in an easy way, prevents spilling of feed and no waste. Chicken feeders can save you 15-30% of feed and make your coop cleaner and more comfortable
What You’ll Need: Tools and Materials for This Build
You’ll need a handful of tools and materials to ensure your build goes smoothly. Start with a 5-gallon plastic bucket that has a tight-fitting lid—using a clear bucket allows you to check feed levels without opening it. Make sure to choose a food-grade bucket to ensure safety and durability. For the base, a sturdy metal feed pan or a plastic planter saucer works well and provides a stable platform. When selecting the pan, consider quality and value compared across top-reviewed chicken runs to ensure long-lasting performance. For additional guidance on choosing an effective applicator for any powder treatment, consult reviews of the best diatomaceous earth dusters for quality and value. You may also need solar lighting to keep your coop illuminated during evening feed checks.
For cutting, gather a drill equipped with a hole saw or paddle bit, along with a jigsaw or utility knife for trimming the material. Always practice safety by wearing eye protection and securing your work surface to prevent accidents. Assembly will require bolts, washers, and nuts to hold everything together securely.
Additionally, have a tape measure and marker on hand for precise layout work. Use sandpaper to smooth any rough edges after cutting, and keep a damp rag nearby for quick cleanup during and after your project. Having these tools and materials ready before you start will save time and help you achieve a cleaner, safer build.

USA 3 PACK COMBO: Red, White & Blue Lids - Made in the USA. Perfect for color coding among different storage uses

Safe Assured Material: food grade, BPA free, non-toxic, and environmentally friendly.
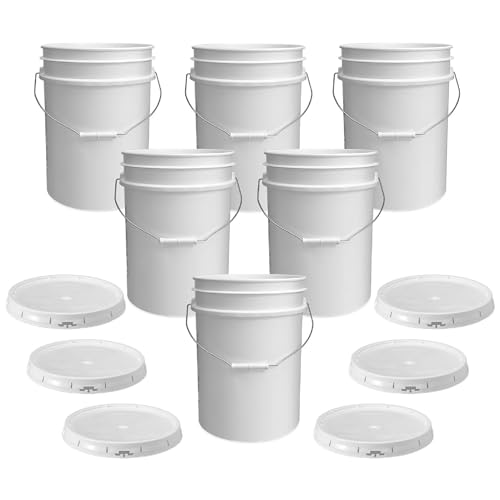
Made To Handle More: Tackle bulk storage with a plastic bucket and airtight gasketed tear strip lid made from sturdy 90 mil HDPE plastic. It’s a dependable pick for pantry staples, utility use, and everyday organization when lightweight containers won’t cut it.
Choose Your Dispensing Style: Open Holes or PVC Ports
Choosing between open holes and PVC ports depends on your priorities for feed control, weather protection, and minimizing waste. Open holes are quick to set up: just cut openings in the bucket wall, allowing feed to flow freely. This makes for a fast building process but increases the likelihood of feed scatter and rain exposure. As a result, you’ll need to refill and clean more often, which can be time-consuming and less efficient over time. PVC ports require additional parts and a bit more effort during installation, but they direct feed downward to contain it better and keep it dry. Their built-in weather shields also serve as effective deterrents against predators like rodents and wild birds by hiding feed from their view. Ports significantly cut spillage, leading to savings on feed costs—often the largest recurring expense in poultry management. The kit includes a rainproof, covered design with a connect seal to keep feed dry and reduce spillage even further. For a quick weekend project, open holes offer simple, immediate results. However, PVC ports are better if you’re aiming for a setup that reduces waste, offers longer feed protection, and maintains a cleaner feeding environment over time. This approach shares a similar principle to hatching duck eggs at home, where careful moisture control prevents common failures.

Easy install, come with a 3.15"/80mm hole saw, make an outdoor chicken feeder in a minute

NO MORE FEED SCATTERED ON THE GROUND: This chicken feeder uses a gravity-fed port design to deliver chicken feed directly to your flock, keeping it inside the feeder, off the ground, and away from pests. The enclosed port design reduces spillage and wasted feed, making it an ideal chicken feeder option for backyard chickens.

Easy install chicken feeder, use with a 3.15"/80mm hole saw, make an outdoor chicken feeder in a minute
Mark and Drill Feed Holes in Your Bucket Feeder
Start by marking your bucket feeder 2 to 4 inches up from the bottom edge. Space your marks evenly at 90-degree intervals around the lower wall to ensure balanced feeding. You can use four holes for a no-waste, efficient layout, but three holes also work depending on your needs. Use a marker or tape line to keep the positions consistent around the bucket. For predator resistance, you can later attach hardware cloth over the feeder openings with metal zip ties to block rodents. Over time, however, exposure to moisture can cause the hardware cloth to rust if it is not galvanized. Using a harness designed for a chicken instead of a bucket might seem unrelated, but a well-fitted chicken harness provides secure restraint during outdoor handling, similar to how proper hardware protects feeder openings.
Match each hole center to your chosen fitting or hole saw template. A key design tip is to transfer the exact opening size from your hardware to avoid misalignment. Keep the pattern level by rotating the bucket consistently between marks, ensuring symmetrical spacing for even feed flow.
Here’s a DIY secret: drill a single pilot hole first and test-fit it against your hardware to verify placement before cutting all openings. Check the height and inside bucket clearance to prevent misaligned or obstructed openings. If the first hole is off, adjust the pattern now. Use light drilling pressure with a hole saw to prevent deforming the bucket into an oblong shape. Controlled drilling produces clean, round openings that won’t crack or weaken the bucket. For a cleaner cut on plastic, drill in reverse with your hole saw to minimize burrs and jagged edges.
Smooth Rough Edges to Protect Your Chickens
Inspect every opening inside and out for burrs or jagged plastic after cutting the feed holes. Run your fingertip around each rim to identify hidden rough spots. This safety check is crucial—any scratchy edge can cause injuries. Use sandpaper to smooth the edges, starting with coarse grit and finishing with fine grit for a smooth finish. If stubborn burrs remain, trim them carefully with a utility knife before sanding. Make sure to smooth the entire perimeter of each hole, not just the front edge. This creates a slightly rounded lip that reduces the risk of pecking injuries to your chickens’ combs, wattles, and eyes. Sharp edges can also wear down beaks over time. You want an edge that feels smooth and doesn’t snag a fingernail. After handling the bucket, recheck each opening to ensure the edges remain flush and smooth. For additional protection, inspect hidden rough spots as you would when securing a fence with T post clips to avoid hidden snags. Before adding feed, confirm every opening is safe and smooth; your chickens depend on it for their safety and well-being. For additional chicken safety guidance, review best vent options for coops to ensure proper airflow without sharp edges. Providing a balanced layer feed ensures your chickens receive the essential nutrients needed for strong eggshells and overall health.
Secure the Feeder to the Pan to Prevent Tipping
Securing the feeder to the pan is essential to prevent tipping and wobbling. Begin by drilling aligned holes through the base of the bucket and the pan. Use corrosion-resistant bolts, washers, and nuts to assemble the connection, tightening them firmly to eliminate any shifting. For added stability, install a mounting bracket inside the bucket, which helps distribute the load and minimizes rocking. Drive screws with washers through the pan into this bracket to further lock the parts together. To reinforce the setup, wrap a reinforcing strap around the bucket’s base and secure it to the edge of the pan; this stops side-to-side twisting. Always set the feeder on level ground and opt for a wide pan to increase stability. Clamp the parts together before drilling to ensure perfect alignment. After filling the feeder, test its stability and tighten any hardware if movement is detected. Following these steps guarantees a secure connection, keeping your feeder upright and your chickens well-fed.
Seal Gaps to Keep Out Moisture and Pests
To seal gaps around your feed bucket and prevent moisture and pests from getting in, start by applying silicone sealant where the handle meets the bucket wall. This small gap can serve as an entry point for insects, so sealing it ensures pests can’t sneak inside. Next, focus on the lid area; use a tight-fitting lid with foam weatherstripping or a gasket on the rim to block out moisture and rodents. Check the rim for warping or cracks—replacing any damaged lids keeps the seal intact. Reinforce all openings at the feed ports with hardware cloth, and smooth any rough edges so no gaps remain. Use watertight lids and apply caulk over fastener heads to prevent humidity from entering. For exposed openings, upgrading to 19 gauge hardware cloth provides a durable barrier against gnawing rodents. Elevating the feeder slightly off the ground also helps stop ground moisture from wicking upward into the feed. These steps keep your feed dry and pest-free. For the best results, choose a high-quality cracked corn that is screened for uniform size to minimize dust and spoilage.
Fill, Cap, and Test Your First Batch of Feed
Fill only until the feed level reaches the port height, matching your flock’s daily needs. Avoid overfilling the bucket, as excess feed can lead to spillage and wastage. A small test fill allows you to confirm proper flow without overcommitting. Use fillers like a baffle or reduce the fill volume to control how the feed dispenses and prevent overpacking the tray. Consider that a top chicken coop design often includes integrated feeders for similar efficiency. Ensure the bucket is placed on a stable concrete base to prevent tipping during refills. Choosing affordable materials like plywood and reclaimed wood can also help keep overall project costs down.
Snap the lid on securely to keep the reservoir sealed and stable. A tight cap prevents contamination, pests, and moisture from entering between refills. Once sealed, observe the first batch of feed as it settles into the tray. Pellets or crumbles should flow smoothly and dispense without clogging or jamming. If feed stalls, check for issues like high humidity or fine feed consistency, which might cause misfiring.
Test with your actual feed to ensure the tray fills just enough to meet your flock’s access needs. Size the initial batch so it covers several refilling intervals without leaving excess feed sitting too long. For easier refilling, consider using a PVC knockout test cap as a quick-fill plug instead of removing the lid each time. This careful calibration helps maintain fresh feed availability and minimizes waste over time.
Fix Clogging, Spillage, and Tipping Fast
To fix clogs, spills, and tipping, you need to address key issues systematically. Keep feed dry because moisture is the primary cause of blockages. During refills, clear blocked ports with a wire and tap the bucket sides to break up compacted dust. Proper port placement is essential; position the openings low enough to let gravity assist flow rather than hinder it. To prevent spills, avoid overfilling and keep the feed level below the port line. Adding a raised rim or comfort rail captures stray feed before it hits the ground. To stop tipping, set your feeder on flat, stable ground. Secure it with a brick at the base or hang it from a fixed point using a short chain. Using a kit like the Zenzihawk DIY chicken feeder with four feeding ports ensures even spacing and clean openings. These adjustments only take minutes but effectively prevent waste and improve performance.

[NO-WASTE DESIGN]: The feeder inlet extends downwards by 0.8 inches, which helps prevent uneaten feed from spilling out, effectively reducing feed waste and mess, keeping the chicken house clean, and thus saving you cleaning time and feed costs.

No-waste design: Chicken feeder features a no-waste design with the feed opening extending downward, solving the problem of spilled feed, avoiding feed waste and providing a cleaner coop for your chickens. With the chicken feeder you can feed your chickens efficiently, avoiding mess and waste, saving you money and time. We recommend a distance of 3 inches between the feeder hole and the bottom of the bucket

It takes only a few minutes to build your chicken coop feeder, no matter 3 gal or 5 gallon, any size and shape containers, transform a bucket, box, barrel, or bin into a large chicken feeder
Adjust Hole Size for Pellets, Crumbles, or Chicks
Adjusting the hole size on your DIY 5-gallon bucket feeder depends on the feed type. For adult birds eating 3 to 5 millimeter pellets, use holes measuring about 1 to 2 inches in diameter to prevent bridging and ensure consistent flow. Crumbles, which are finer at around 1 to 3 millimeters, require smaller openings—around 0.5 to 1 inch—to avoid excessive dumping and waste. Chicks need the smallest holes, about 0.25 to 0.5 inches, since their starter crumbles are 1 to 1.5 millimeters and flow easily through tiny openings. Maintaining proper airflow and temperature in forced air incubators is equally critical for hatch success. For scratch grains, which are a mix of whole grains like corn and oats, larger holes of 2 to 3 inches are often needed to prevent grain bridging and ensure smooth flow. Similarly, ensuring adequate ventilation in your coop is vital for flock health, especially when using automated feeders.
Avoid relying on a single hole size for all feed stages. Instead, cut different-sized holes tailored to each feed type and stage of development. Test the flow with your specific feed and make adjustments as needed. Oversized holes may cause crumbles to spill and waste, while undersized holes can restrict pellet movement and reduce intake. Matching the hole size with the feed form ensures efficient feeding and minimizes waste.

Keep it clean & No Waste: You just place DIY chicken feeders anywhere on your farm or coop, fill it with feed and poultry feeders will be driven by gravity. Feed your chickens in an easy way, prevents spilling of feed and no waste. Chicken feeders can save you 15-32% of feed and make your coop cleaner and more comfortable

THE COMPLETE COOP SOLUTION: Upgrade your backyard farm in one go. This all-in-one bundle includes everything you need to create both a zero-waste gravity feeder and an automatic poultry watering system using your own plastic buckets.
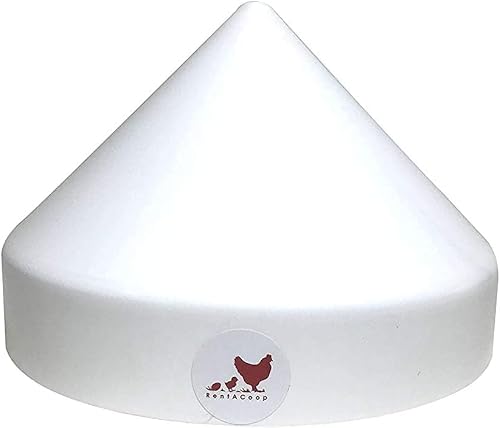
Anti-Roost Cone for Round Buckets: Helps keep your homemade set ups clean and standing! No more toppled over or dirty feeders or waterers due to your birds jumping off them