

Worried about keeping your newborn chicks warm and healthy? A chick brooder is a small, heated enclosure that provides the perfect controlled environment for them during their first crucial weeks.
With the right setup, you’ll ensure they stay cozy and grow strong. Keep reading to learn how to create the ideal brooder and set your flock up for success.
Why a Chick Brooder Is Essential for Your Flock’s First Weeks
A brooder is essential because newly hatched chicks cannot regulate their own body temperature. To keep them healthy, you need to provide external heat at chick level, starting with a temperature of 90 to 95 degrees Fahrenheit during the first week. Gradually decrease the temperature by about 5 degrees each week as they develop their feathers. Maintaining consistent warmth prevents chilling, which is a primary cause of early chick mortality, and reduces stress that can lead to illness. For example, the same principles of efficiency and the right tool apply when using a pry bar to remove stubborn fence staples quickly. Similarly, choosing the right mulch for chicken run flooring helps maintain a clean and dry environment that supports chick health.
A well-designed brooder also simplifies feeding management by keeping food and water accessible in one protected area. To further reduce expenses, you can construct your own feeding station using cost-saving materials like plywood and hardware cloth instead of buying a commercial bin. Including simple decorations like perches or small obstacles encourages natural behaviors such as exploring and exercise, supporting healthy development. Additionally, the controlled environment allows you to easily monitor individual behavior and overall chick health, helping you catch early signs of trouble and ensure your flock is thriving from the start.
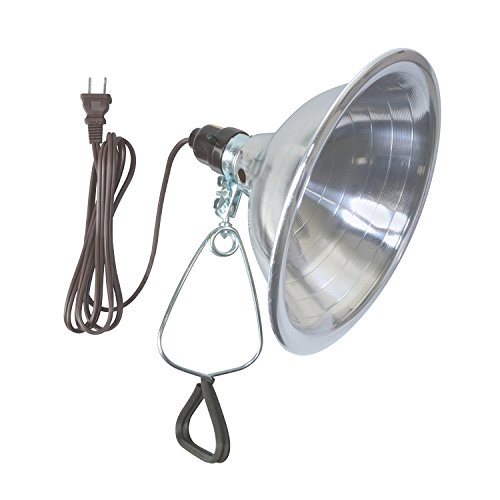
VERSATILE LIGHT WITH CLAMP: Suitable for use in the home; office or work studio; studio lamp for artists; photographer and also for indoor gardens it can provide consistent light and warmth
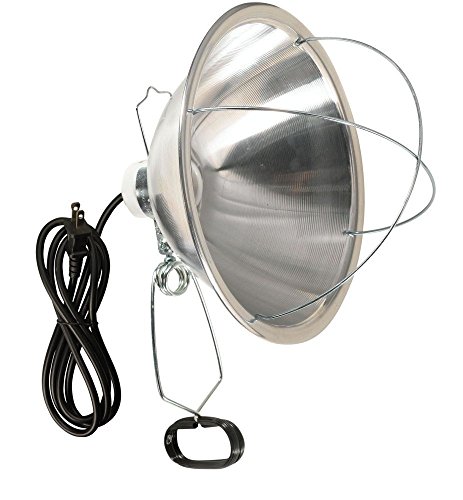
VERSATILE LAMP CLAMP with strong spring clam grips; double ball universal joint and adjustable reflector lets you direct light where you need it

【Dual-Sided Heating】 Front and rear heating areas provide flexible warmth for chicks and ducklings. Use the plate upright, tilted, or hanging to fit different brooder and coop setups.
How to Set Up a Chick Brooder for Heat, Safety, and Easy Cleaning
To set up a chick brooder for optimal heat, safety, and easy cleaning, start by placing the heat source in the center of the brooder. This allows chicks to move away from the heat if they get too warm or stay close if they need warmth, ensuring comfort. Secure a heat lamp firmly at least 20 inches above the bedding to prevent accidents and keep heat evenly distributed. Alternatively, consider a safer heating plate that provides consistent warmth without the risk of fire. When using a heat lamp, also place a heated waterer in the brooder to prevent the chicks’ water from freezing and keep them hydrated. For very small brooder setups, a brighter reflector lamp can help focus heat more effectively in a confined space.
Ensure the brooder is draft-free but well-ventilated. Proper airflow prevents moisture buildup, which can lead to respiratory issues. Use absorbent pine flakes, applied 2 to 3 inches deep, for natural insulation and odor control. Change wet bedding daily to maintain a clean environment and reduce disease risks. For an even safer and cleaner chick-raising system, some keepers later transition chicks to quality chicken pens that include runs for outdoor access.
Choose a container that can be fully disinfected before use. This makes cleaning more effective and safe for your chicks. Make feeders and waterers removable for quick, thorough cleaning—a practice that helps prevent mold, bacteria, and disease. Setting up everything at least 48 hours before bringing chicks home ensures all equipment is dry, stable, and ready for their arrival.

Energy-Efficient Heating Solution: Unlike traditional heat lamps that consume high wattage, ZenxyHoC 10" x 10" chick brooder plate operates at a lower wattage, significantly reducing energy costs. It provides gentle, consistent warmth while saving you money on electricity—perfect for extended use during the brooding period.

Precise & Adjustable Warmth for Delicate Chicks: Sindarhor adjustable chick heater has three-Temperature Settings (131 F/149 F/167 F) adapt to varying climates and chick ages. The heated top panel (8.67x10.63 inches) delivers gentle, consistent heat while dual side panels minimize heat loss. NOTE: Actual ambient temperature depends on coop setup-always pair with a brooder box for newborns (Days 1-2)

Multifunctional Clamp Lamp: With non-marring spring clamp on grips, this clamp light can be used for common lighting in rooms, garages, art studios, or by photographic light; It is also ideal for amphibious and reptile pet terrarium heating lamps and even indoor plant growth lamps; The clamp is a bit hard to open but that just guarantees the lamp will stay in place
Brooder Temperature: Week-by-Week Guide
You should start week one at 93–95°F for optimal chick health. Place the heat source at chick level to ensure accurate temperature control. If you notice chicks clustering under the heat lamp, the brooder is too cool, and you need to increase the temperature slightly. Conversely, if they are spread out and active across the brooder, the temperature is just right or might be slightly warm. Reducing the temperature by about 5°F each week is a standard guideline for gradual weaning. Reduce the heat gradually only when chicks are actively exploring the space and evenly spread, indicating they are comfortable without relying on the heat source. This process is similar to how you might adjust a DIY chicken harness for a proper fit, ensuring the bird is neither restricted nor able to escape. For reliable and efficient heating, consider using best heat bulbs designed specifically for chicken coops and brooders.
Chick Brooder Size: How Much Space Do Chicks Need?
Just as you monitor the heat level for your chicks, planning the brooder size from the start is essential. For day-olds, provide at least ½ square foot per chick, so 10 chicks need a minimum of 5 square feet of space. However, you should continue expanding as they grow. By week four, increase to 1 square foot per chick, and by week eight, aim for 2 square feet each. To maintain consistent warmth, selecting the best heat lamp bulb is critical for regulating the brooder temperature effectively. Be sure to include the space needed for feeders and waterers within the brooder. Crowding often occurs around these areas, so account for their footprint in your total space. A brooder designed only for hatchlings becomes cramped by week four, which can stress the chicks and hinder their development. Supplementing their diet with cracked corn can provide additional energy, though it should never replace a balanced starter feed. Including oyster shell grit in their diet helps ensure strong bone development and proper eggshell formation in future layers. Planning for the largest size needed at move-out ensures your chicks have enough room to flourish, reducing jostling and stress during their growth stages.

[2 Pack 250W Heat Lamp Bulbs] Power: 250W, Style:spiral, Voltage: 110V-130V, Lifetime: >8000h, Socket: medium E26 standard base, Length: 4.85 inch / 12.3 cm, Diameter: 4.92 inches / 12.5 cm

Heat Lamp for Chickens: This chicken heat lamp emits a pleasant red light, keeping chickens warm during freezing temperatures and allowing them to sleep undisturbed. It's ideal for those looking to keep their chicks cozy
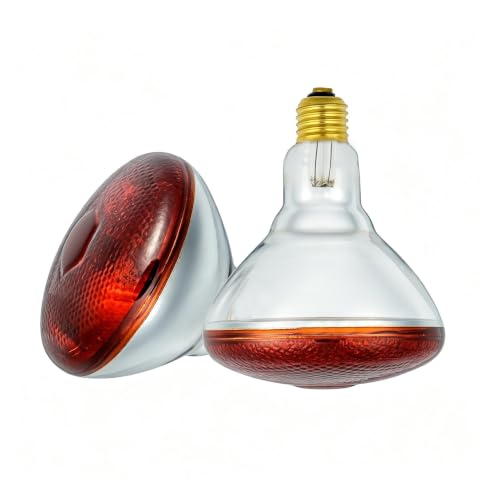
1.This 250W red infrared heat lamp use standard E26 socket.It is suitable for most standard size lamp holders.The voltage is 120v, easy to install.
Box, Lamp, or Radiant? Which Brooder Is Best?
A radiant brooder is the safest and most energy-efficient option. It uses significantly fewer watts than heat lamps and eliminates the fire risk posed by hot bulbs. Chickens naturally move under the warming plate to regulate their body temperature, reducing the need for constant supervision. While layer feed is designed for egg production, all flock feed provides a balanced diet suitable for both chicks and adult chickens, simplifying feeding in a mixed-age backyard flock. The materials used, such as plastic or metal, are often easy to clean, which simplifies maintenance. If you plan to keep chicks for an extended period, a radiant brooder is generally the best choice due to its safety and efficiency advantages. For those seeking a more interactive option, comparing top swings for chicken can help you understand how supplemental enrichment fits into a broader brooder setup. You can further reduce costs by using repurposed materials for the brooder frame or base, similar to how DIY flock blocks are constructed.

Designed for your flock | The 12" x 12" heating plate warms up to 20 chicks and can also be used for ducklings, turkey poults, quail, and other young poultry. A great brooder heat source for growing flocks without using a traditional heat lamp
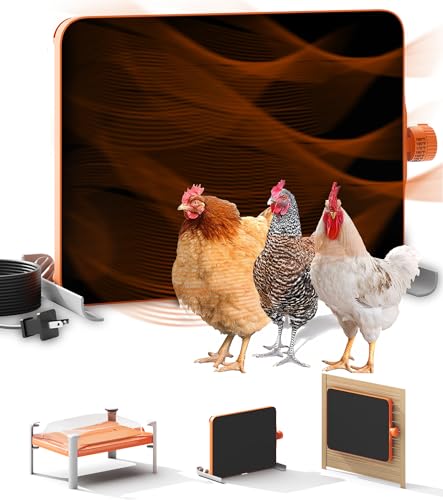
🤖SMART SENSOR, SAFE COMFORT - Effortlessly adapts to any weather! With a built-in smart temperature sensor, this chicken heater adjusts power in real-time according to the surrounding temperature to maintain your preset temperature, keeping your flock cozy without the risk of overheating or frostbite. Whether it's a winter chill or a cold snap, your chickens stay comfortable and safe all season long.

2-IN-1 CHICK BROODER PLATE & CHICKEN COOP HEATER – The Shaledig 150W adjustable chick brooder heat plate is designed for all growth stages, from baby chicks to fully grown chickens. Delivers soft radiant heat with no harsh light, helping reduce stress and support natural sleep cycles. Ideal as a chick brooder heater in spring and a reliable chicken coop heater during cold weather
5 Critical Brooder Features: Heat Zones, Ventilation, and Easy Cleanout
A brooder must provide a distinct hot zone and a cooler retreat area to allow chicks to self-regulate their body temperature. The ideal setup has the floor directly under the heat source reaching about 105°F, while the outer edges stay around 85–90°F. Placing feed, water, and resting space outside the hottest area helps chicks spread out comfortably without crowding the heat source. This temperature gradient encourages natural movement and prevents overheating or chilling. Use a thermometer to monitor temperatures regularly and adjust the heat source accordingly to maintain these zones as chicks grow. Similarly, a secure enclosure surrounding the brooder, such as chain link fencing, can protect chicks from predators while maintaining airflow. For those raising quail, choosing one of the best quail egg incubators ensures the eggs hatch into healthy chicks ready for a brooder with these critical temperature zones. When selecting a brooder, consider using the best roost for chicks to transition them smoothly into a full-sized coop later.
Energy-Efficient Heating Solution: Unlike traditional heat lamps that consume high wattage, The ZenxyHoC 12" x 12" chick brooder plate operates at a lower wattage, significantly reducing energy costs. It provides gentle, consistent warmth while saving you money on electricity—perfect for extended use during the brooding period.

Precise & Adjustable Warmth for Delicate Chicks: Sindarhor adjustable chick heater has three-Temperature Settings (131 F/149 F/167 F) adapt to varying climates and chick ages. The heated top panel (8.67x10.63 inches) delivers gentle, consistent heat while dual side panels minimize heat loss. NOTE: Actual ambient temperature depends on coop setup-always pair with a brooder box for newborns (Days 1-2)

Exactly Like a Mother Hen: The brooder heater plate provides a warm and comfortable place for newborn baby chick to get enough warmth and safety like from mother hens. 16”X22”plate can warm up to 50 chicks comfortably and freely