

If you’re tired of wasting feed and constantly cleaning up spilled chicken choline, a DIY no-waste feeder can help cut costs and mess.
With just a few simple materials, you can build one that controls access to feed and minimizes waste.
Keep reading to learn the straightforward steps to assemble your own efficient chicken feeder.
How a No-Waste Feeder Cuts Feed Loss by 30
Switching to a no-waste feeder can reduce feed loss by about 30 percent. Open-trough and open-pan feeders often leave 10 to 30 percent of purchased feed unused, mainly due to spillage, scratching, moisture, and pests. This waste significantly impacts your costs because feed accounts for 60 to 70 percent of your overall production expenses. By controlling access and using gravity-fed designs, a no-waste feeder delivers only what your birds eat, preventing overfilling and limiting feed flinging and scratching. Building your own feed bin from common materials like PVC pipe or galvanized steel can further cut upfront costs and simplify construction. For lasting savings, consider designs with a sealed lid to protect feed from pests and moisture. Pine shavings used as deep litter bedding can absorb moisture and help keep the feeder area dry, reducing waste from damp feed.
Regular maintenance is essential to sustain these savings. Check for blockages, keep the unit level, and ensure seals stay tight. Properly adjusted and clean feeders will consistently reduce wastage and turn this investment into ongoing savings, making the feed expense more predictable and manageable.

VISUAL FEED LEVEL MONITORING: The bucket allows you to check feed levels at a glance without opening the lid. This time-saving design helps your poultry stays fed and simplifies your daily coop management routine

[12 Feeding Ports - Faster Feeding] Improve coop efficiency and reduce competition. This automatic chicken feeder features 12 ports, allowing 10+ hens to eat at once without crowding. Designed as a chicken coop feeder and poultry feeder, it helps reduce pecking-order stress so even timid hens can feed comfortably. Ideal for growing flocks and backyard chicken keepers

Durable BPA-Free Plastic: Heavy-duty polyethylene construction is rust-proof, dent-resistant, and built to withstand rain, sunlight, and outdoor weather.
Choose Your No-Waste Feeder: Bucket or PVC?
A PVC feeder generally offers better material durability than a bucket feeder. Its rigid, weather-resistant construction keeps feed dry and clean, making it suitable for outdoor or humid environments. A bucket feeder relies on its shell, which can flex over time but still provides decent durability when kept covered. For those also raising quail, top quail incubator reviews can help ensure hatch success alongside your feeding setup. When choosing a waterer for your flock, you can also look at heated waterer reviews to ensure your birds have access to unfrozen water in cold weather.
Construction complexity differs notably: a bucket build is simpler and quicker to assemble, often needing just a reused pail and a few fittings. PVC feeders require more materials like pipe sections, elbows, and fasteners, resulting in a more involved construction process. However, PVC designs typically produce a compact vertical tube that offers better control over feed dispensing.
Your choice hinges on your priorities. If you prefer easy cleaning and a low-part build, the bucket option is ideal. If you want superior protection for your feed and a tidier feeding area, PVC is the better choice. Both options are budget-friendly, so consider what best fits your setup.

Easy install, come with a 3.15"/80mm hole saw, make an outdoor chicken feeder in a minute

CHICKEN FEEDERS NO WASTE: The hanging chicken feeder is installed on the wall, the chickens just stick their heads in and get constant food, instead of standing on the food and pulling the food everywhere with feet, minimizing food waste and feed costs
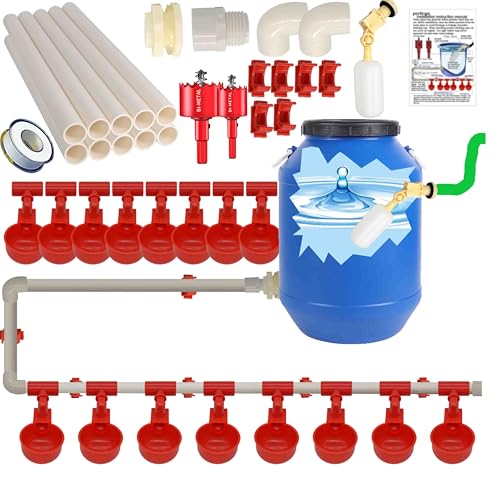
All DIY accessories are included, you just need some extra PVC glue.
How to Add No-Waste Feeder Ports to a Bucket
To add no-waste feeder ports to a bucket, you’ll need to create controlled access points that prevent chickens from scratching out and wasting feed. Begin by marking even port locations around the lower sidewall of the bucket, spacing them 90 degrees apart or every 2 to 3 inches. Position the ports about 4 inches from the closed end when the bucket is inverted—this makes feeding easily accessible. Use a 3-inch hole saw to cut the ports; start with a pilot hole to guide your cut and then proceed carefully. After cutting, smooth all burrs and sharp edges to ensure user safety, as rough spots can cut both the birds and your hands. For material durability, make sure each port fits snugly. Choose a heavy-duty plastic bucket to withstand outdoor weather and regular wear. Insert the feeding opening downward, with the body of the port inside the bucket and the lip outside. Secure each port using a gasket and nut or adhesive to prevent leaks and maintain stability. Before adding feed, keep the inside of the bucket clean and dry. Applying a lid afterward helps seal out moisture and keeps the feed fresh. This DIY project constructs a durable feeder using common household items like buckets and basic tools for long-term use. For an even more cost-effective approach, consider using salvaged PVC pipe as an alternative to purchased metal ports. Additionally, using a pilot hole ensures a cleaner cut when starting with the hole saw.

No-waste design: Chicken feeder features a no-waste design with the feed opening extending downward, solving the problem of spilled feed, avoiding feed waste and providing a cleaner coop for your chickens. With the chicken feeder you can feed your chickens efficiently, avoiding mess and waste, saving you money and time. We recommend a distance of 3 inches between the feeder hole and the bottom of the bucket

NO MORE FEED SCATTERED ON THE GROUND: This chicken feeder uses a gravity-fed port design to deliver chicken feed directly to your flock, keeping it inside the feeder, off the ground, and away from pests. The enclosed port design reduces spillage and wasted feed, making it an ideal chicken feeder option for backyard chickens.

【Top Quality】Made from high quality TCT Carbide( Tungsten Carbide Tipped Cutters), High-grade Titanium-plated cemented carbide Tooth, ensuring its high hardness, rust proof, sturdy and durable;
Build a Wall-Mounted No-Waste PVC Feeder
Mounting a PVC feeder on a wall or fence keeps the feed off the ground, preventing chickens from scratching it out or tossing it away. Use thin-wall PVC pipe and fittings like elbows, wyes, and caps to shape the feed path. The gravity-fed design stores feed in a vertical pipe, guiding it to a “heads-in” access port that limits spillage. PVC is durable and resists rot, making it suitable for harsh coop conditions and ensuring a long-lasting feeder. This same design can also work for turkeys if you scale it up and monitor their cracked corn intake to avoid overfeeding risks. Opting for a clear or visible pipe allows you to easily monitor feed levels, enhancing the overall look if a cleaner aesthetic is preferred. Secure the feeder with pipe straps or brackets against the wall to keep it stable as chickens peck and bump into it. Adding a top cap makes refilling straightforward and protects the feed from weather, completing a no-waste, efficient feeding setup. This feeder is made from high-quality PVC material that is waterproof, anti-aging, and easy to clean. For a more budget-friendly build, you can substitute scrap lumber or repurposed containers for some of the PVC parts to lower material costs.

Minimize Waste: The feeding opening is not big which can minimize the spilled and wasted feed; this pvc chicken feeder kit also keeps the feed clean; with 3 lids, this chicken gravity feeder is easy to refill and easy to clean

【Premium & Durable PVC Material】This pvc chicken feeder is constructed from high-quality PVC with a wall thickness of approximately 0.2 inches, ensuring excellent sturdiness and wear resistance. Easy to wipe clean, and effectively keeps the feed dry and fresh.

Chicken Feeders No Waste: This feeders are mounted on the wall of chicken coop, allowing chickens to feed without creating a mess. By inserting their heads, they access a continuous supply of food, reducing waste and cutting down on feed costs
No-Waste Feeder Height and Placement for Best Results
The optimal height for your PVC feeder is roughly 6 to 18 inches above the ground, aligning with the birds’ back or neck level. For standard breeds, this range typically works well, reducing spillage and encouraging natural pecking. If you notice birds scratching or spilling feed, raise the feeder slightly. Conversely, if smaller birds are having trouble reaching, lower it. For mixed flocks, set the height to accommodate the smallest birds, such as chicks or bantams, which need a lower position than larger adult chickens. Adjusting the height ensures easy access and minimizes waste. A consistent temperature in the coop also helps reduce feed waste, and infrared heat bulbs are a popular choice for maintaining that warmth efficiently. For a reliable and durable design, consider top reviewed PVC feeders that offer both quality and value.

[NO-WASTE DESIGN]: The feeder inlet extends downwards by 0.8 inches, which helps prevent uneaten feed from spilling out, effectively reducing feed waste and mess, keeping the chicken house clean, and thus saving you cleaning time and feed costs.

Space-Saving Design: Mount this KHEARPSL PVC gravity chicken feeder on the wall to save coop space and keep it tidy. The compact design maximizes efficiency while reducing clutter

No Waste Design:The Chicken Feeder is meticulously designed to prevent waste, offering efficient feeding solution for your poultry.