

Building a chicken coop that’s secure and functional doesn’t have to be complicated. With a clear plan, you can create a space starting at just 4 square feet indoors and providing 10 square feet per bird in the outdoor run.
The key is knowing the right materials and layout to keep your hens safe and comfortable year-round. Keep reading to see how you can put it all together step by step.
Calculate the Right Coop Kit Size for Your Flock
To select the correct coop kit size, start by calculating the indoor and outdoor space your flock needs. For standard chickens, allocate 4 square feet inside the coop per bird and 10 square feet in the run. Multiply these figures by your flock size to determine the minimum floor area. For example, six standard birds require a minimum of 24 square feet indoors and 60 square feet in the run.
Heavy breeds need more space, so adjust the numbers upward accordingly. Bantams, being smaller, require less space—plan for fewer square feet per bird. Keep in mind that coop insulation can influence usable space, especially in temperature extremes, and a well-designed lighting setup supports winter egg production. If your birds will stay confined for longer periods, add extra space to prevent overcrowding. A common recommendation is that a 4 by 6-foot coop is suitable for about five to six chickens, making it easier to match kit sizes with flock needs and avoid issues later on. Supplementing their diet with top vitamins for healthy poultry can also help maintain strong egg production and immunity during confinement. For quail keepers, a similar approach applies, though these birds thrive with stackable cage systems to maximize vertical space. For chicken keepers, using a well-reviewed brooder box ensures chicks grow strong before transitioning to the main coop.

Multi-Directional and Stable: 360-degree swivel casters provide exceptional stability for chicken tractor. The four-corner design of the chicken coop accessories can support a maximum load capacity of 700 lb, ensuring safe transport for chicken house

【Effortless Mobility】 This Chicken Tractor Wheels features an innovative wheeled ginger system that easily transforms your chicken coop into a mobile one, reducing the heavy labor of moving your coop. It's the perfect choice for backyard farming or DIY chicken coop building.

Wheel Kit for Easily Movable Coop - Use our chicken coop wheel kit can effectively solve the problem of moving chicken coops, and ensure a stable movement and move the coop to the most comfortable place.
Choose a Coop Kit With Solid Materials and Safe Fencing
For fencing security, use 1/2-inch, 19-gauge hardware cloth. This thickness and gauge provide a strong barrier that predators can’t tear or squeeze through. Cover all openings, vents, and run sides with this mesh to prevent any gaps. An outward-buried apron of about 12 inches helps stop diggers from tunneling under. Overhead netting or wire prevents hawks and other flying predators from gaining access. Secure the mesh with screws and washers rather than staples, as staples are easier for predators to dislodge. Opt for predator-proof latches and flush-fitting doors to avoid warping or manipulation. These careful choices will ensure your flock’s safety without requiring frequent repairs or replacements. Adding cracked corn to your feeding routine can provide a healthy, energy-rich treat that supports their growth and egg production. Scratch grains, which often include cracked corn, should be offered in moderation to avoid nutritional imbalances that can occur if quail overconsume scratch grains instead of a balanced feed. Over time, the hardware cloth can develop surface rust, which does not compromise its structural integrity but using a galvanized coating will significantly delay this process.

High-Quality Anti-Rust Process This hardware cloth is made from high-strength low-carbon steel wire, combining excellent strength with flexibility. After precision welding, the entire product undergoes a premium anti-rust treatment—hot-dip galvanization—with special reinforcement at all seams and corrosion-prone areas to ensure uniform, dense coating and outstanding rust resistance. This process grants the product superior weather resistance, making it an ideal choice for wire mesh fencing and long-term outdoor applications.

Galvanized After Welding: Hot-dip galvanized after welding coats every welded joint, so the heavy duty mesh resists rust and breakage far longer than pre-galvanized wire in rain, soil, and sun.Thicker wire builds a sturdier fence that resists bending and animal push-through

Material and size: The size of the hardware cloth is 16 inch×50 ft and 1/2 inch×1/2 inch thickness, adopt 19 guage hot-dipped galvanized material
Prioritize Good Ventilation in Your Coop Kit
Prioritizing good ventilation in your coop kit is essential to maintain your flock’s respiratory health and comfort. Use passive stack ventilation by placing high vents above roost level to allow warm, moist air to escape without creating drafts for your sleeping birds. Complement these with low, baffled intakes to ensure proper airflow management. Keep humidity levels between 50% and 70% to control moisture and ammonia buildup, both of which contribute to respiratory issues. For sizing vents, follow the rule of one square foot of vent space for every 10 square feet of coop floor area or per bird in cooler climates. During different seasons, keep upper vents open year-round while adjusting lower vents—reducing their size in winter—to prevent drafts and moisture buildup. Avoid sealing the coop completely; instead, install adjustable openings that allow you to modify airflow with changing temperatures. This dynamic approach helps prevent condensation and damp litter without relying on mechanical fans. A common mistake is sealing the coop too tightly, so always incorporate baffled intakes to redirect air away from your birds while still allowing fresh exchange. If you build your own feed bin, you can also reuse scrap plywood and lumber from that project to construct these adjustable vent openings, further reducing material costs. To further enhance durability, select a quality and value design that balances strong materials with reasonable cost.
Predator-Proof Your Coop Kit Before Assembly
Predator-proofing your coop kit before assembly is essential. Use 1/2-inch galvanized hardware cloth to cover every opening, including vents and roofline gaps. Unlike chicken wire, this stronger material prevents raccoons and other predators from squeezing through. Secure all seams with screws and washers instead of staples, which predators can pry open. Dig a 12-inch apron of hardware cloth around the base to block digging predators like foxes and dogs. Install heavy-duty, two-step latches on all doors, mounting them high and securing with padlock-compatible hardware. Mounting these latches high makes manipulation difficult for raccoons. Also, mesh the floor before assembly for an extra barrier. In vulnerable spots, use 1/4-inch mesh to exclude smaller pests such as weasels and snakes. For roosters sharing the coop, remember that layer feed is formulated with extra calcium for egg production, which can cause kidney damage in roosters over time. A similar approach applies to duck nesting boxes, where covering vents and roofline gaps with hardware cloth prevents raccoons from reaching the interior. If you provide supplemental treats, note that wild rabbits should not be fed cracked corn because it lacks nutritional value and can cause digestive issues. Taking these steps ensures predators cannot exploit weak points during and after assembly.

High-Quality Anti-Rust Process This hardware cloth is made from high-strength low-carbon steel wire, combining excellent strength with flexibility. After precision welding, the entire product undergoes a premium anti-rust treatment—hot-dip galvanization—with special reinforcement at all seams and corrosion-prone areas to ensure uniform, dense coating and outstanding rust resistance. This process grants the product superior weather resistance, making it an ideal choice for wire mesh fencing and long-term outdoor applications.

Heavy-Duty 19 Gauge Hardware Cloth Construction: This hardware cloth is made from thick 19 gauge welded steel wire, creating a rigid and stable structure that holds its shape during installation. It is designed for outdoor and DIY applications where strength and durability are important.
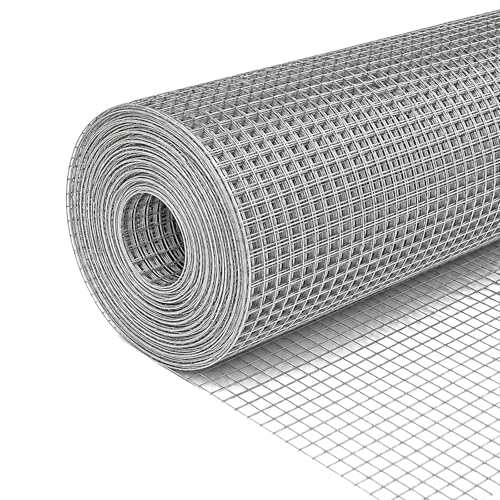
Hardware Cloth 1/2inch for Chicken Coop – 16 inch x 50 ft welded wire mesh made from 23-gauge galvanized steel hardware cloth. Provides reliable strength and flexibility for chicken wire fencing, garden protection, and general outdoor use
Set Up Nesting Boxes and Roosts Inside Your Coop Kit
Once predator-proofing your coop kit, the next step is setting up nesting boxes and roosts. Nesting boxes should be mounted 18 to 24 inches off the floor, in the darkest and quietest area of the coop. Always position them lower than your lowest roost to prevent hens from sleeping inside the boxes. Use one 12 x 12 x 12-inch box for every four standard chickens to provide enough space and prevent overcrowding. Chicken saddles can protect the hens’ backs from feather loss during roosting. Providing a dust bath in the coop or run helps keep chickens clean and free of mites by allowing them to coat their feathers with fine dirt. Selecting the perfect fit for your flock’s needs ensures maximum comfort and engagement from these essentials.
Set roosts 18 to 36 inches above the floor to encourage hens to sleep there instead of in nests. Use 2×4 lumber, allowing each bird 8 to 10 inches of space to roost comfortably. Install the roosts above the nesting boxes, with 12 to 18 inches of vertical space between them. Keep the highest roost below the ceiling to avoid injury and ensure ease of access for hens. Proper placement of nesting boxes and roosts keeps your coop organized, clean, and functional.
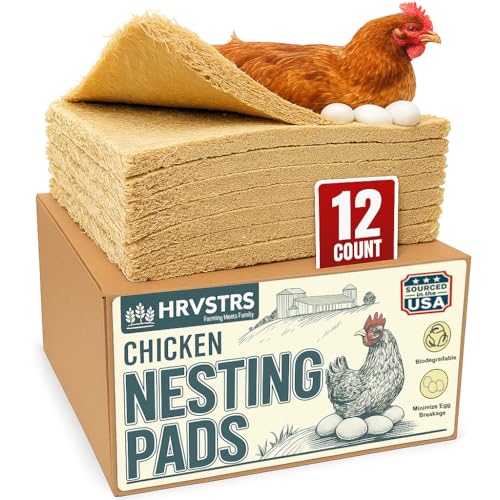
STOP SCRUBBING, START GATHERING – Stop wasting your mornings washing manure and mud off your eggs. Our moisture-wicking aspen fibers allow droppings to fall through while keeping your eggs clean, dry, and ready for the carton. These fit in a 12 x 12 nesting box perfectly!

2-Hole Design Prevents Egg Falls: With 2 spacious holes, our nesting box minimizes the risk of eggs rolling out and breaking. This thoughtful design ensures that your hens can lay their eggs in peace, knowing they are secure.

Effortless Roll Away Egg Collection: Our nesting box for chickens features a slight tilt design that allows eggs to roll forward under a secure lid, keeping eggs clean, intact, and preventing pecking or breakage, collect your eggs easily without disturbing your poultry
Assemble the Base and Roof of Your Coop Kit
Cut rafters for a simple front-to-back slope, spacing them 24 inches on center. Attach roof sheathing, leaving a small overhang of about 2 inches on all sides to promote water runoff. Install a drip edge along the edges of the roof to direct water away from the structure. Lay down tar paper underlayment over the sheathing to provide first-line moisture protection. For added durability and weather resistance, consider applying a weather-proof paint or stain to the exterior wood before installing the roofing panels. To help maintain healthy feather condition and parasite control, you can also provide a separate area filled with coarse builder’s sand for dust bathing. Secure the metal roofing panels with appropriate screws, making sure to fasten them along the ridges and edges to prevent leaks and ensure stability. For chicks kept in the coop, using high-quality chick feeders ensures they receive consistent access to fresh feed without spillage. To provide additional weatherproofing, top the roof with flashing cut and bent to fit and painted to prevent rust.
Install Doors, Hatches, and Hardware Cloth Correctly
Install all doors, hatches, and vents with a predator-proof approach. Make sure the pop-door closes squarely with no gaps that predators could exploit. Attach a raccoon-resistant two-step latch to each access panel for added security. For reliable locking, avoid flimsy hook-and-eye closures; instead, opt for spring-loaded bolts or keyed latches. When installing hardware, stretch ¼-inch galvanized hardware cloth tightly over every opening. Fasten it with screws and large washers placed closely along the edges—never rely solely on staples. Use furring strips to press the mesh flat against the frame, which prevents lifting points. Remember, every hatch should have a secure closure for night lockup, essential for effective predator control. To further reduce costs, consider using common scrap lumber for these furring strips instead of buying new material. For optimal results when fastening hardware cloth with staples, angle the staple gun slightly to achieve a tighter fit. Additionally, consider building a roll away nesting box to keep eggs cleaner and reduce the risk of breakage. For best results, always choose staples long enough to penetrate the wood fully, as properly sized fasteners are crucial for mastering fence staple installation.

【Durable Material & Size】Our hardware cloth measures 16in x 100ft with a 1/2 inch square opening, made of 19 gauge hot-dipped galvanized steel. This hardware cloth 1/2 inch is strong, rust-resistant, and designed for long-lasting outdoor use

High quality raw materials: Our hardware cloth chooses the strength, toughness and ductility of low carbon steel wire as the inner core. This determines the basis of the high quality of our products

ATTENTION: Please Read: Our hardware cloth is 20 feet long, 4 inches wide, wire 23 gauge thick and holes 1/4 inch. Please confirm the size before placing the order
Finish Your Coop Kit: Inspect Seams, Vents, and Weak Spots
After installing the doors and hardware, walk the entire coop to inspect seams, vents, and weak spots from a predator’s perspective. Check seam sealing at roof-to-wall junctions and panel corners for gaps, daylight, loose fasteners, or cracked sealant. Replace damaged materials instead of patching to ensure durability. For vents, confirm every opening is covered with sturdy hardware cloth, not flimsy wire. Inspect covers for tears, rust, or loose attachments. Remove cobwebs, dust, and debris that could block airflow.
At night, shine a light through the coop and mark any pinpricks of light that appear. Gaps wider than a quarter inch are potential vulnerabilities. Press on screens and mesh to test their tension and integrity. Tighten or replace loose or corroded fasteners. Make sure vents are positioned above roost level to prevent drafts and recheck after significant weather changes, as swelling or contraction can create new gaps.