

Wondering how to ferment chicken feed at home? It’s a simple process that can boost your chickens’ health while reducing waste.
By mixing dry feed with water and letting it sit for a few days, you create a tangy, nutritious treat your flock will love. Keep reading for easy step-by-step instructions to get started.
Why Fermented Chicken Feed Is Worth the Extra Step
Fermented chicken feed is worth the extra step because it significantly enhances digestibility and nutrient availability. Fermentation breaks down complex nutrients like carbohydrates, vitamins, minerals, and amino acids, making them easier for your hens to absorb. As a result, your flock benefits from improved health, stronger eggshells, and better growth rates.
The process also reduces feed waste and boosts overall feed efficiency, which translates into cost savings over time. Fermented feed is more appealing to chickens because it develops beneficial lactic acid bacteria, making it more flavorful and enticing. This increased palatability encourages your birds to eat more enthusiastically, reducing scratch-out waste. Additionally, the fermentation process neutralizes anti-nutritional factors naturally present in grains, further improving nutrient absorption.
A healthier gut microbiome from fermentation leads to a stronger immune system and better nutrient uptake. Your chickens will produce more robust eggs with shells that are less prone to cracks. For those seeking a setup that supports this feeding method, choosing from the best chicken coops with runs ensures ample space for feeding and foraging. If you also hatch quail, selecting from the top-rated quail egg incubators can provide the precise temperature and humidity control needed for successful incubation. In short, investing in fermentation not only improves your flock’s health and productivity but also lowers your feed costs—making it a worthwhile practice.
What You’ll Need to Start Fermenting Feed Safely
You only need a few clean, food-grade supplies to ferment feed safely. Choose a plastic bucket or glass jar with a tight-fitting lid—avoid metal because acids can react with it and cause contamination. Use non-chlorinated water, as chlorine can inhibit fermentation microbes. Grab a wooden or plastic spoon for stirring; metal utensils are best avoided. A colander or slotted spoon makes draining and portioning feed easier later on. Selecting a top layer feed as your base ensures the nutritional balance needed for healthy egg production.
Adding a starter culture isn’t necessary because microbes naturally exist on grains. Focus on preserving nutrients by fermenting fresh, unmedicated feed at temperatures between 60 and 75°F. Higher or lower temperatures can slow fermentation or promote spoilage. To ensure safety, use pH test strips to confirm your batch reaches a pH of 4.5—this level inhibits harmful bacteria. Always discard any feed that develops mold or smells foul. Keep the feed submerged during fermentation to prevent spoilage and maintain an environment that favors good microbes. With these supplies and tips, fermentation stays simple and safe. For additional calcium supplementation, some chicken keepers also offer crushed oyster shell on the side. Unlike chickens, ducks do not typically need oyster shell supplements because they obtain calcium from other dietary sources.
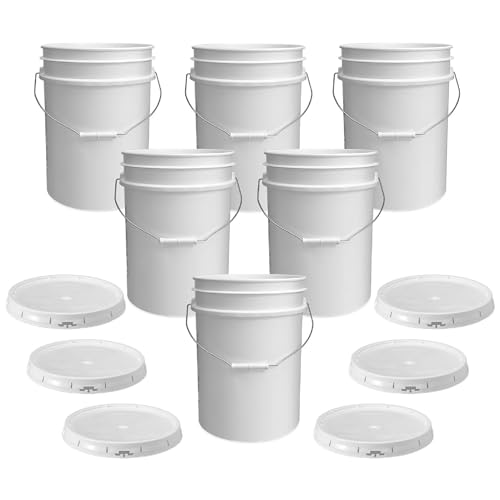
Made To Handle More: Tackle bulk storage with a plastic bucket and airtight gasketed tear strip lid made from sturdy 90 mil HDPE plastic. It’s a dependable pick for pantry staples, utility use, and everyday organization when lightweight containers won’t cut it.

MULTI-USE: Make storage a breeze with these multi-purpose 5-gallon buckets. Perfect for storing liquids, powders, oils, paints, fire chips, charcoal, as well as for fermenting and brining.

Durable and Sturdy Material: This food grade buckets with lids is made of high-quality PP plastic, this BPA-free buckets with handles is built to last. It is perfect for storing a variety of foods, including soups, kitchen essentials, prepared meals, flour, deli meats, and rice.
Step 1: Mix Your Feed and Water in the Right Container
To combine your feed and water properly, start by choosing a container made of glass, ceramic, or BPA-free plastic to avoid reactive metals. Select a container that can hold enough feed and water for one to two days, and leave extra headspace for stirring and expansion. Use a ratio of one part feed to two parts water, or fill the container one-third with feed and two-thirds with water. Ensure the water fully submerges the feed by one to three inches.
Add the dry feed first, then pour water over it, and stir thoroughly to wet all particles and release trapped air. A loose-fitting lid is best to let gases escape while preventing debris from entering. Do not fill the container to the brim, as fermented feed swells and bubbles during fermentation. Adjust the amount of water as grains absorb liquid to keep the feed submerged throughout the process. Using a bin with a tight-sealing lid helps prevent contamination, similar to the cost-saving design principles used for building a feed bin. For a similar approach to durable container design, consider using BPA-free plastic materials recommended for building a chicken tractor. Choosing the perfect roost can also benefit from the same careful material selection.

Food Storage for All Pets: Keep dog kibble, cat dry food, bird seed, pellets, and treats fresh and organized in one versatile 33 Quart container that holds approximately 22–26 lbs of most dry kibble, depending on kibble size—not all 30 lb bags will fit

Keeps Food Fresh and Flavorful: our patented GAMMA SEAL TECHNOLOGY, featuring a threaded locking system and double gaskets, create a controlled moisture balance making it the ideal airtight dog food storage container (suitable for cat food, too)

BPA-Free bowls nest nicely for easy stacking and storage
The Ideal Conditions for Fermentation Success
Maintaining the correct environment is essential for successful fermentation. Temperature should be kept between 60 and 75°F (15.5 to 24°C) to promote acid production. Warmer temperatures around 32 to 37°C accelerate lactobacillus activity, leading to a quicker pH drop. Cooler conditions slow down the process, so consistent temperature control is crucial.
Ensure microbial dominance by lowering the pH from around 6.5 to 4.2–4.5. This acidity prevents harmful bacteria from thriving and helps establish lactic acid bacteria. Use non-chlorinated water to avoid inhibiting microbial growth, keep the feed fully submerged to maintain anaerobic conditions, and work in a low-oxygen environment. Clean equipment regularly to prevent mold formation. A rapid initial pH decline indicates a healthy fermentation, and stabilization near 4.5 signals completion. The fermentation usually takes 2 to 3 days at room temperature, but warmer weather speeds up this process while cooler temperatures extend it.

【Easy to use】 Supports °C/°F display.

Different quantity to choose: we provide you with 2 different quantity set to choose from, namely, 12 pieces or 24 pieces of temperature strips, enough quantity to use, each thermometer sticker is approx. 5.2 x 0.7 inch
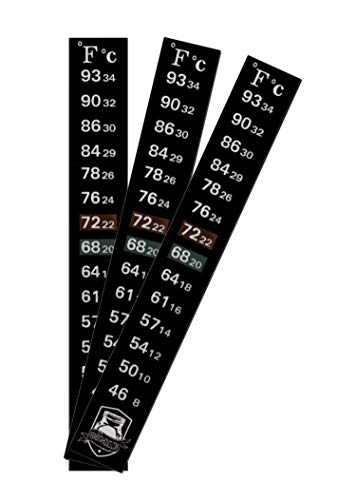
Wide range stick on temperature strip – 46° to 93° fahrenheit
How to Tell When Your Fermented Feed Is Ready
Your fermented feed is ready when it develops a tangy, sour smell and a moist, softened texture. A tangy aroma indicates proper flavor development, similar to sourdough bread, not rotten eggs. You’ll also notice a cloudy liquid and small gas pockets in the slurry. The fermentation process usually takes about 24 hours in warm conditions, but in cooler rooms, it can extend up to 48 hours. Rely on your senses rather than strict timing—if the feed smells yeasty or slightly sweet, it’s likely ready. Conversely, if you detect a putrid, sulfur, or alcohol-like odor, discard it immediately. Watch for mold, a dry appearance, or a milky-white film, as these signs indicate spoilage. Trust the tangy, moist result for safe, ready-to-serve feed.
Step 2: Strain, Serve, and Store Leftovers Correctly
After fermentation finishes, you should strain the feed to separate it from the excess liquid. Use a fine-mesh strainer or a slotted spoon to drain only what you need for the day, minimizing waste. This step helps preserve nutrients by reducing oxidation caused by prolonged exposure to air. Serve the drained feed promptly, matching portions to your feeding schedule so the flock can finish it in one meal. Remove any uneaten wet feed rather than leaving it out to prevent spoilage.
Store leftovers in a cool, covered container, such as the original fermenting vessel, with an airtight lid to limit oxygen. Room temperature storage is suitable for 24 to 48 hours, but refrigeration extends freshness to 1 to 2 days. Always inspect leftovers before reuse for mold or off odors, and discard any feed that appears spoiled to ensure your flock’s safety.

Three Graduated Sizes: This colander set includes three strainers in multiple sizes, a 3.15 inch mini strainer fine mesh, a 5.5 inch small strainer and a 7.87 inch large strainer with a deep bowl

White Plastic Mesh Strainer: This nylon white plastic mesh strainer is essential for a wide range of uses around the home and kitchen. It is 3” wide and 6.75” long.

Food Grade Stainless Steel 18/8 Construction: Our kitchen strainer is made of first class Stainless Steel 18/8 304 that is BPA free, Lead and Cadmium free. It is rust free and will never affect the taste of your food!
What to Do If Your Fermented Feed Goes Wrong
If your fermented feed shows signs of spoilage, it is crucial to stop feeding immediately. Mold, a foul or putrid smell, and slimy textures indicate it’s unsafe for your flock. Scraping off the affected areas won’t eliminate the toxins; discard the entire batch and compost it away from your feeding area. Spoiled feed not only loses its nutritional value but can also introduce harmful toxins that pose health risks to your birds. Before restarting your fermentation process, thoroughly clean all containers and utensils. Store feed in a cool, dark, dry place, ensuring grains are fully submerged to prevent air pockets that foster spoilage. If your batches become too sour or fuzzy, assess and adjust your temperature and fermentation duration. To prevent future failures, make smaller quantities daily checking for changes in color, smell, or surface growth. A healthy ferment remains clean, bubbly, and mildly sour. When uncertainties arise, it’s safer to discard questionable feed rather than risk your flock’s health. For additional support against spoilage risks, consider adding food-grade diatomaceous earth to your feed to help control pests and maintain dryness. Providing your chickens with enriching coop toys can also reduce stress and minimize pecking at spoiled feed. Using a pallet-based chicken coop design can improve ventilation and reduce moisture buildup that encourages spoilage.
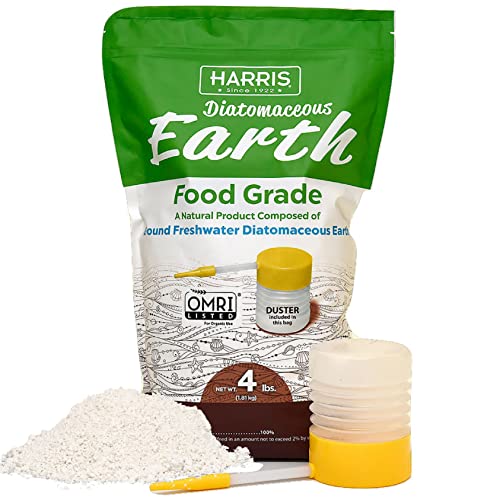
Natural Product - Composed of 4lbs of 100% ground freshwater diatomaceous earth with absolutely no additives or fillers.

100% Chemical-Free: Made from 8oz of food-grade freshwater diatomaceous earth with no additives or fillers. Safe for use around children, pets and farm animals when used as directed.

✅ OMRI Listed for Organic Use – Certified by the Organic Materials Review Institute, ensuring compliance with strict organic standards for safe gardening and farming.