

Struggling to keep your chicken water from freezing during the coldest months? You’re not alone.
A simple DIY heated waterer can solve this problem without the need for costly or complicated equipment.
By the end of this guide, you’ll learn how to build an affordable, effective system that keeps water flowing—even in subzero temperatures.
Why a Heated Waterer Saves You Time Every Morning
Heated waterers save you time every morning by preventing ice from forming overnight, eliminating the need to chip or thaw frozen water. With a built-in thermostat, these devices automatically turn on only when temperatures drop below a set point, ensuring water remains just above freezing. This reliable setup means you spend less time testing water each dawn and more time tending to your flock—all while conserving electricity. Larger models can hold enough water to skip refilling multiple times, reducing those early cold trips. Stable water temperatures also decrease waste from slushy or frozen water, and fewer manual interventions simplify your routine during the coldest mornings. Just remember to maintain proper coop ventilation to balance humidity, but a heated waterer turns winter mornings into a more predictable, less exhausting task. For those who prefer building structures themselves, comparing kit options vs. building from scratch can help decide the most efficient approach for custom poultry equipment. Additionally, selecting durable roofing materials for your coop setup can further protect the waterer from excess moisture and extend its lifespan. Using pine shavings as bedding near the waterer can be beneficial, as pine shavings decompose slowly and help absorb moisture without creating mold issues when kept dry.
Gather Materials for Your DIY Heated Waterer
To assemble your DIY heated waterer, you’ll need several key materials. Start with a food-grade 5-gallon bucket, which provides a safe, chemical-free container for water. Include a matching lid to minimize heat loss and prevent debris from contaminating the water. Opt for non-corrosive, poultry-safe materials—avoid rusty or questionable containers that could leach harmful substances. For water delivery, install poultry nipples and rubber grommets to prevent leaks and ensure a clean flow. Use plumber’s tape on threaded connections for airtight sealing. Following cost-saving tips such as repurposing a sturdy bucket or using scrap concrete blocks can significantly reduce your total expense. For added durability and value, choose materials that match the quality and performance found in top reviewed coops. The bucket’s capacity should be similar to the right fit for incubating quail eggs to avoid excessive weight.
Add a Thermo Cube or a wired temperature switch to automatically control your heat source, whether that’s heat tape or a submersible heater, to conserve energy. A simple water strainer will keep particles out of the nipple system, reducing clogs. For stability, position everything on concrete blocks that will prevent tipping over and distribute weight evenly. Before starting assembly, gather a drill with appropriately sized bits for drilling through the bucket and grommets, along with electrical tape to secure wiring safely. Position all components near your coop for ease of setup and maintenance, and plan to spend a weekend putting everything together.

Safe Assured Material: food grade, BPA free, non-toxic, and environmentally friendly.
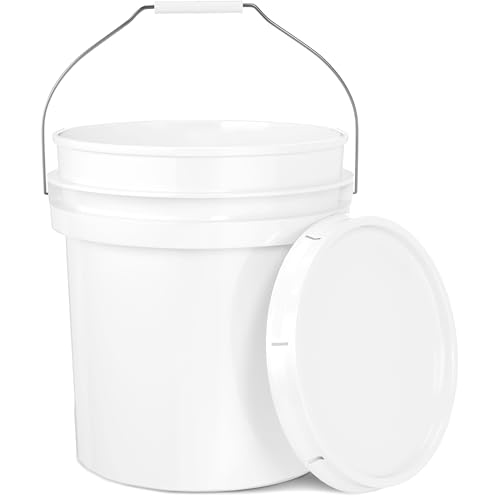
MULTI-USE: Make storage a breeze with these multi-purpose 5-gallon buckets. Perfect for storing liquids, powders, oils, paints, fire chips, charcoal, as well as for fermenting and brining.
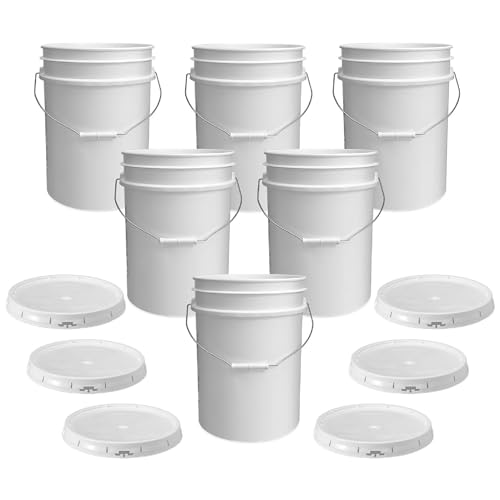
Made To Handle More: Tackle bulk storage with a plastic bucket and airtight gasketed tear strip lid made from sturdy 90 mil HDPE plastic. It’s a dependable pick for pantry staples, utility use, and everyday organization when lightweight containers won’t cut it.
Bucket-and-Nipple, Heat Cable, or Bulb Base: Pick Your Build
To match your flock’s setup and winter conditions, you have three main options for heated waterers: bucket-and-nipple, heat cable, or bulb base. For a bucket-and-nipple system, drill precise holes, seal them with silicone to prevent leaks, and pair it with an insulating outer bucket. This setup minimizes spillage and works well when combined with insulation techniques like a double-shell wrap. A common mistake is to leave the silicone uncured before use, but waiting for proper curing time prevents seal failures. Alternatively, use heat cable by wrapping it flat around the lower portion of your bucket, making sure not to cross the cable. Secure it inside a second bucket to protect the wiring, and ensure the thermostat sensor remains exposed to ambient air for accurate temperature control. The bulb-base option involves simply placing the waterer on a heated platform, which is easier to install but requires the container to sit level for even heat distribution. Always use GFCI protection for safety and route cords away from pecking areas to prevent damage. Adding diatomaceous earth around the base can help control pests that are attracted to the warmth and moisture.

WINTER MUST-HAVE FOR CHICKEN KEEPERS – Keeps water from freezing to -10°F with included wrap; Belt fits any 2-5 gallon bucket; Perfect for chickens, turkeys, and farm birds

【Winter-Ready Heated Waterer】250W heated chicken waterer designed to keep water liquid during freezing temperatures, helping your hens stay properly hydrated all winter. Works as a reliable deicer and winter waterer for chickens.
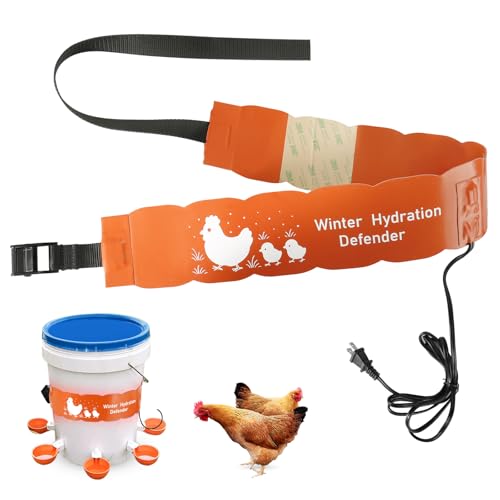
🔹Adjustable Heating Strap: Designed for 2-5 gallon buckets, the 3x30 inch heated strap wraps securely around containers to ensure even heat distribution; prevents water freezing in temperatures as low as 5°F (-15°C)
Step-by-Step: The Heat Cable and Cinder Block Method
The heat cable and cinder block method provides a secure, contained way to warm your waterer from below. Start by cutting a notch in the cinder block for the electrical cord and feeding the cable through. Coil the cable in the first chamber near the top of the block, keeping it organized and secure with tape to ensure reliable insulation. Route the cable through a notch in the center of the block into the second chamber, then coil it there as well. Place the cinder block on a dirt or concrete base to ensure electrical safety; never set it on straw or other insulating materials that could pose a fire hazard. Cover the top of the block with a flat stone or tile, making sure it completely covers the opening. This creates a heated, stable platform for your waterer. Before relying on this setup permanently, test it to confirm even warmth across the waterer’s surface. Access to shelter is critical to protect animals from harsh weather during winter. Using cost-effective materials like those in a mite spray guide can help reduce your overall expenses for this project. A similar approach to building a DIY duck egg incubator can also provide insights on regulating consistent temperatures. When selecting a heat cable, consider coop design features that improve safety and efficiency.

【EFFORTLESS PLUG & PLAY CONTROL】.This automatic thermostat extension cord turns heat cables and connected electrical devices ON at 37°F and OFF at 50°F by itself. Zero complex tool setups or manual adjustments required—just plug in and enjoy instant winter peace of mind.

Freeze Proof heated waterer cord: Keep your animal’s drinker/waterer from freezing in winter with the Flexible Drinker Heating Cable. Simply submerge the stainless-steel coated area of the cable within the waterer, with the connection piece of the heating cable inside as well. The cable maintains steady heat to the water supply preventing it from freezing. Perfect for chickens/poultry, rabbits, and pets.

【Prevents Water from Freezing】-- The poultry water heater base is made of a safety standard power cord that has passed multiple quality tests, which will not melt the plastic and scald the chickens when in use. Heating base of the chicken waterer is made of galvanised steel, making it resistant to rust and corrosion. There is no need for you to go outside every day in the cold weather to change the frozen water.
Route Cords Safely and Seal Out Moisture
Routing your power cords safely and sealing out moisture is essential. Plan your cord path to keep it away from standing water, mud, and areas with frequent traffic. Create a downward drip loop before any plug or splice; this allows water to shed off before reaching the connection point. Use only outdoor-rated cords and weather-resistant plugs to withstand the elements. Additionally, when feeding ducklings, dried mealworms can be a nutritious treat if offered in moderation and as part of a balanced diet.
For moisture sealing, apply adhesive-lined heat-shrink tubing on all splices. The inner adhesive flows into gaps, providing an effective moisture barrier. Combining soldered or crimped joints with heat-shrink tubing results in a stronger, more reliable seal than tape alone. Elevate connection points above ground level using a weatherproof box. Regularly inspect cord jackets for cuts or cracks to prevent water intrusion. All connections should be on a ground fault circuit interrupter (GFCI) protected circuit for safety. Never leave connectors exposed to the rain; cover them with weatherproof covers designed for outdoor use. For a heavy-duty solution, consider using fence post removal tools to help dislodge stubborn concrete anchors if your waterer’s base becomes embedded. Additionally, keeping your birds healthy with regular deworming protocols supports their overall resilience against moisture-related illnesses.
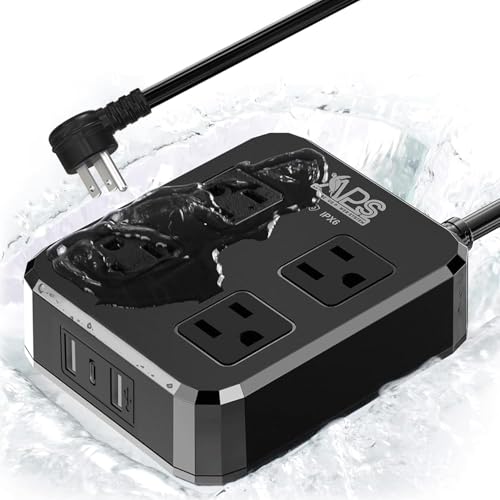
OUTDOOR POWER STRIP WEATHERPROOF: IPX6-rated shell with spring-loaded outlet covers shrugs off rain, splashes and snow for patio, deck, garden, garage, RV, yard, porch, balcony and holiday/Christmas lights - real all-season outdoor use, not just indoor.
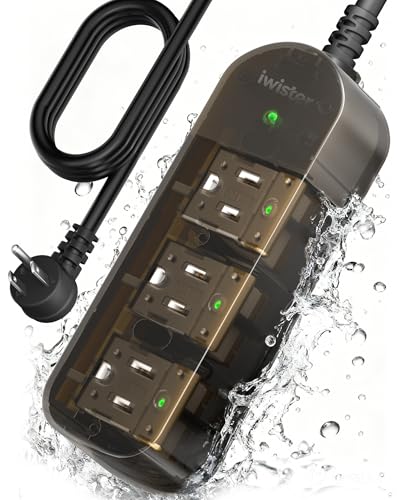
1625W High-Power: Iwister outdoor power strip weatherproof includes 3 outlets, ideal for powering high-power devices. Designed for a wide range of outdoor power needs, including electric lawn mowers, pressure washers, pool pumps, outdoor string lights, BBQ grills, and more. Helpful Tip: MEASURE BEFORE PURCHASE to choose the right cord length and AVOID CHOOSING THE WRONG SIZE.

OUTDOOR POWER STRIP WITH EXTENSION CORD: ForgeNest 3-outlet weatherproof power strip extends 3FT from any indoor/outdoor outlet — perfect for patio, garden, yard, balcony and garage where wall sockets fall short.
Insulate Your Heated Waterer for Subzero Temps
To keep your heated waterer functioning in subzero temperatures, insulate it thoroughly. Use closed-cell foam barriers such as pool noodles or pipe insulation and wrap them tightly around the reservoir. This creates a thermal buffer that traps air, reducing cold penetration and preventing cold bridges. For added insulation, add two to three layers of bubble wrap or fill any voids with dry straw or hay. Choosing the best insulation depends on balancing R-value with moisture resistance, as some materials degrade when wet. Building an insulated enclosure using rigid foam or straw bales around the waterer provides an R-value up to approximately R18, depending on materials and layering. For example, the livestock waterer achieves an impressive R-value of 7.14 per inch with its extra-thick polyurethane foam insulation. A well-placed chicken coop roost can help keep your flock dry and away from moisture near the waterer. Using ag lime for chicken coop bedding within the enclosure can also help absorb moisture and reduce odors. Leave the top open for access, but ensure the sides are well sealed. To prevent moisture from compromising insulation, ventilate the enclosure and protect foam from weather exposure with weatherproof paint. Keep everything dry to sustain reliable operation in frigid conditions.

What You Get: you will receive 1 roll of closed cell rubber with adhesive foam, and measure about 78 x 16 x 1/2 inches/ 200 x 40 x 1.3 cm, allowing for easy installation to fit various applications; With this proper size, you can achieve precise insulation and weatherproofing without wastage or need for extensive cutting

What You Get: you will receive 2 roll of closed cell rubber with adhesive foam, and measure about 78 x 16 x 1/2 Inches/ 200 x 40 x 1.3 cm, allowing for easy installation to fit various applications; With this proper size, you can achieve precise insulation and weatherproofing without wastage or need for extensive cutting

Packaging Content: 1x Pipe Insulation Foam Tube, Length: 6.2 ft; Thickness: 3/4", 1-1/5"; Inside Diameter: 3/4", 1", 1-1/4", 1-1/2", 2", 2-1/2", 3", 3-1/2", 4"
Maintain and Troubleshoot Your Waterer
To keep your waterer functioning properly through winter, focus on daily and weekly maintenance tasks. Start with water quality by dumping, scrubbing, and refilling the trough every day. This prevents sludge and algae from building up. Once a week, use a dilute white vinegar wash to remove biofilm, and perform a deep disinfect with a bleach solution once a month. Adding 1 teaspoon of raw apple cider vinegar per quart of water several times a week can also help inhibit buildup. For frost prevention, ensure the heating element is properly centered and making good contact. Confirm that the power cord is firmly seated and receiving 120 volts. Clear mud and debris from the trough regularly, as buildup insulates the water from heat and reduces efficiency. Inspect cords for signs of fraying or damage and replace them immediately if needed. If freezing persists, check the heater for mineral or algae buildup. Test the system to ensure it provides a steady drinking level, not a drained reservoir. If the heater is not receiving power but still won’t heat, consider replacing it. Similarly, when building a structure for your flock, using reclaimed or inexpensive materials can significantly reduce costs. For those interested in broader poultry care, hatching duck eggs at home requires attention to temperature and humidity, much like maintaining a heater’s environment. For chicks and ducklings, feeding cracked corn in moderation can be a healthy treat if introduced properly.